Analytics Tools
For all users
Updated Sep 2025
Understanding how visitors interact with your website is key to improving performance and making smarter decisions. Oniva.io makes this easy by letting you connect your site to analytics tools. You can choose from Google Tag Manager, Google Analytics and Meta Pixel, or even use them together for deeper insights.
Finding Analytics Settings
You can access Analytics in Oniva.io in two ways:
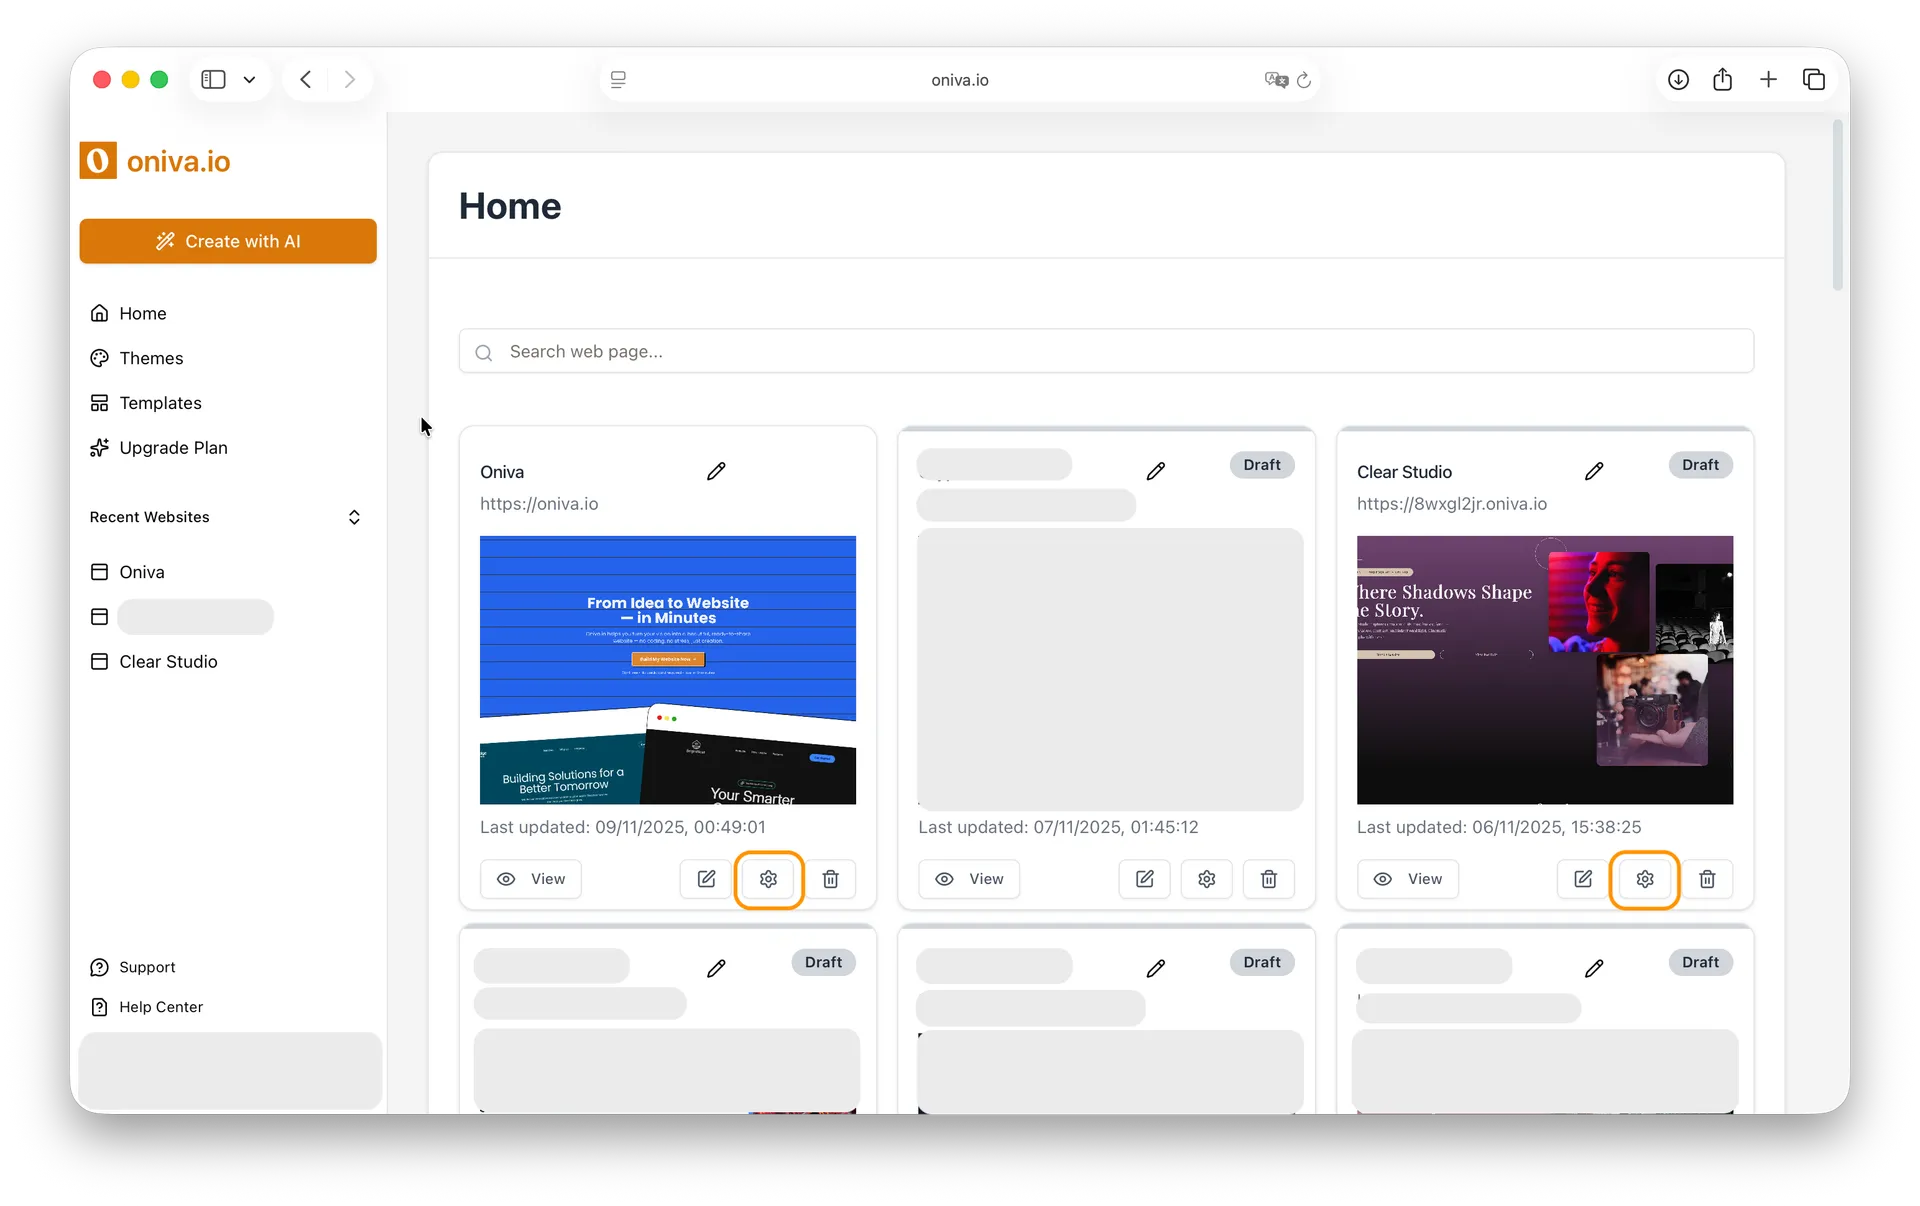
1 - From the editor left sidebar: While editing a page, click the Website Settings icon in the left sidebar.

2- From your home page - place where all your projects are listed: Find the website you want to edit its Analytics tags and click the Website Settings button.
What is Consent Mode Banner?
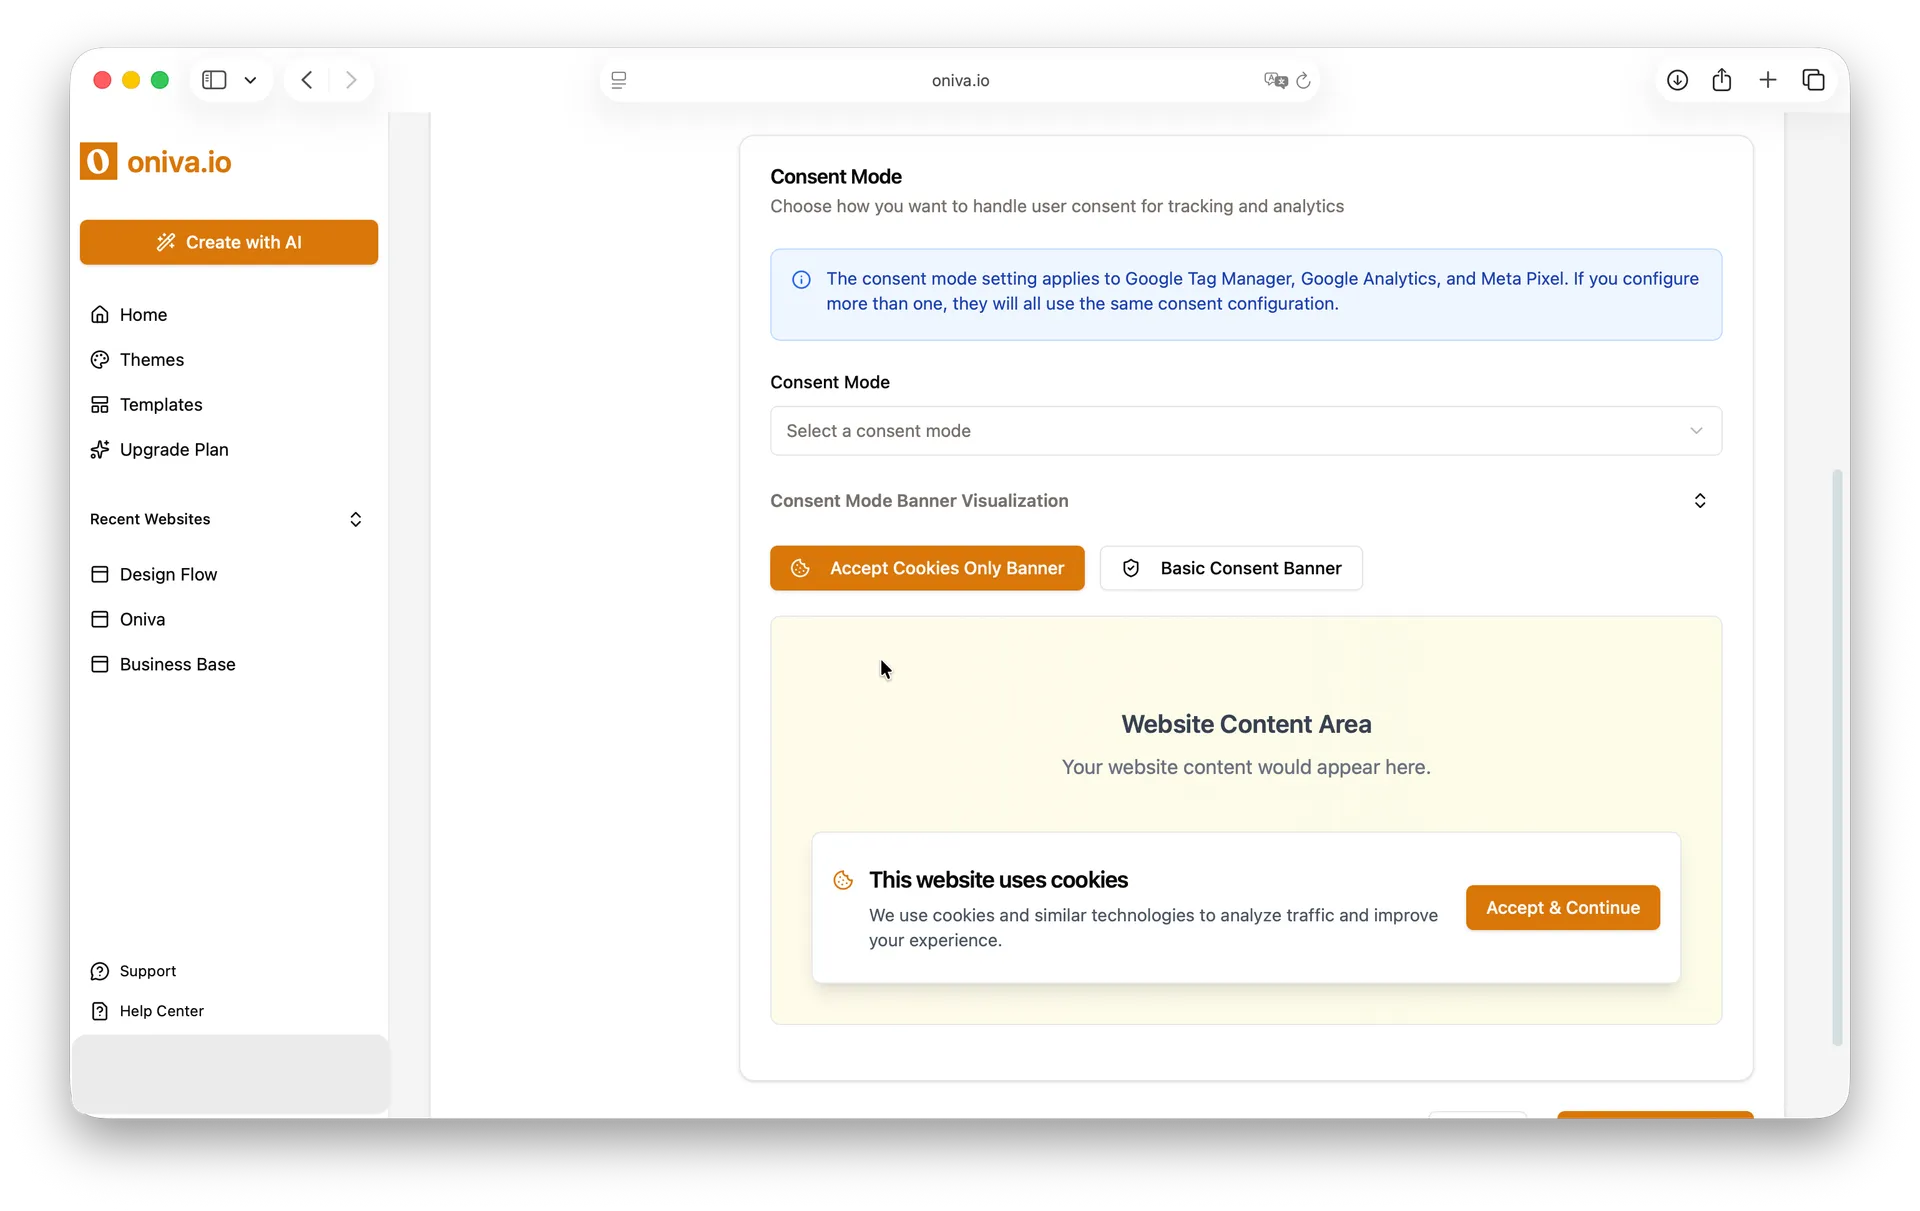
Before enabling any analytics tools, it’s important to inform your visitors that your website uses cookies. Oniva.io lets you configure a Consent Mode Banner that appears to users when they visit your site. This banner informs visitors that your website uses cookies and lets them choose whether to accept or deny all tracking.
1 - Do not display any consent banner:
The banner will not be shown. Analytics tracking runs automatically.
2 - Accept Cookies Only Banner:
Visitors must accept cookies to continue navigating the site.
3 - Basic Consent Banner:
Visitors can choose to allow or deny cookies. If denied, all tracking tags will be disabled for that visitor.
Important: If you configure multiple tracking tags (Google Analytics, Google Tag Manager, Meta Pixel), they will all use the same consent mode.
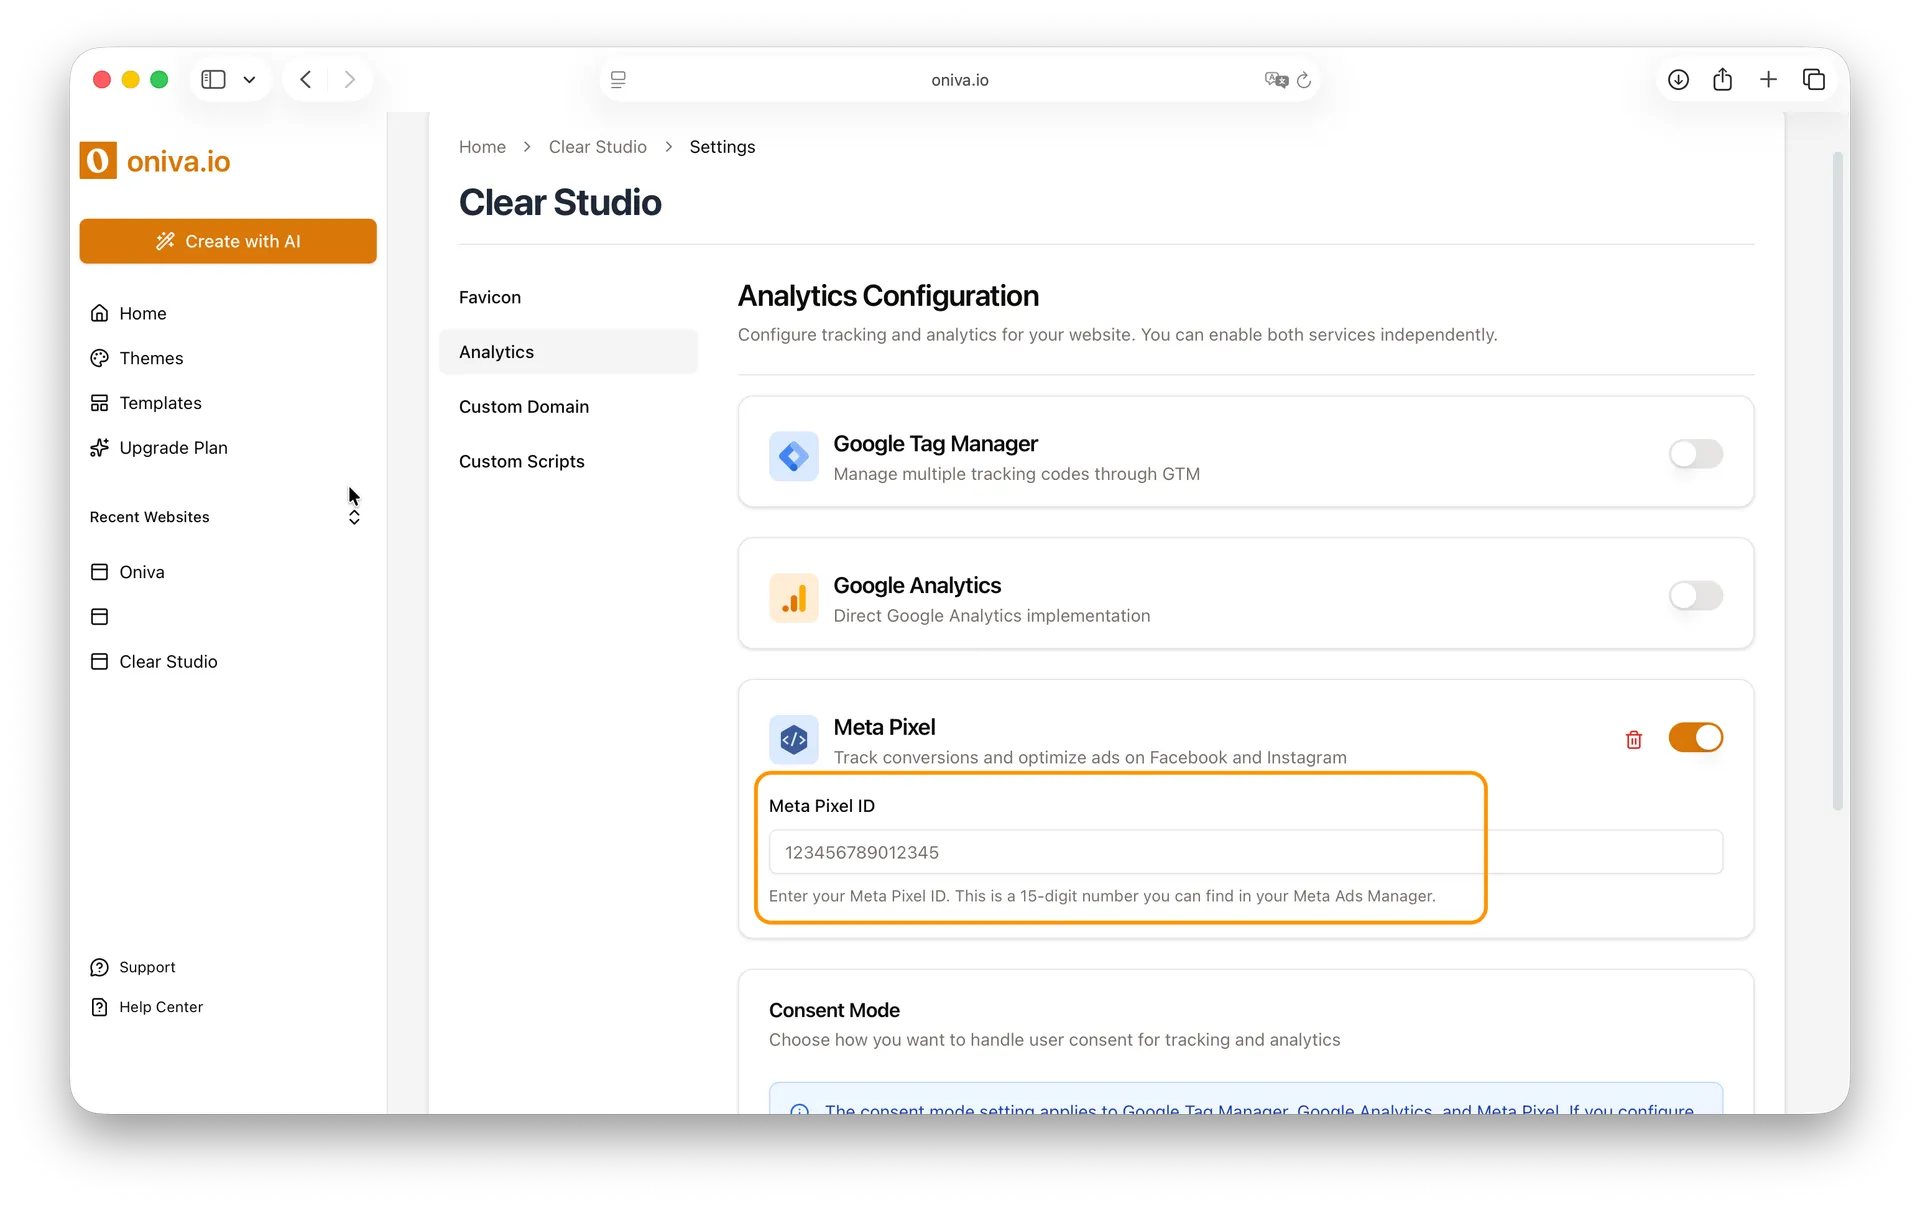
Configuring Your Analytics Tag
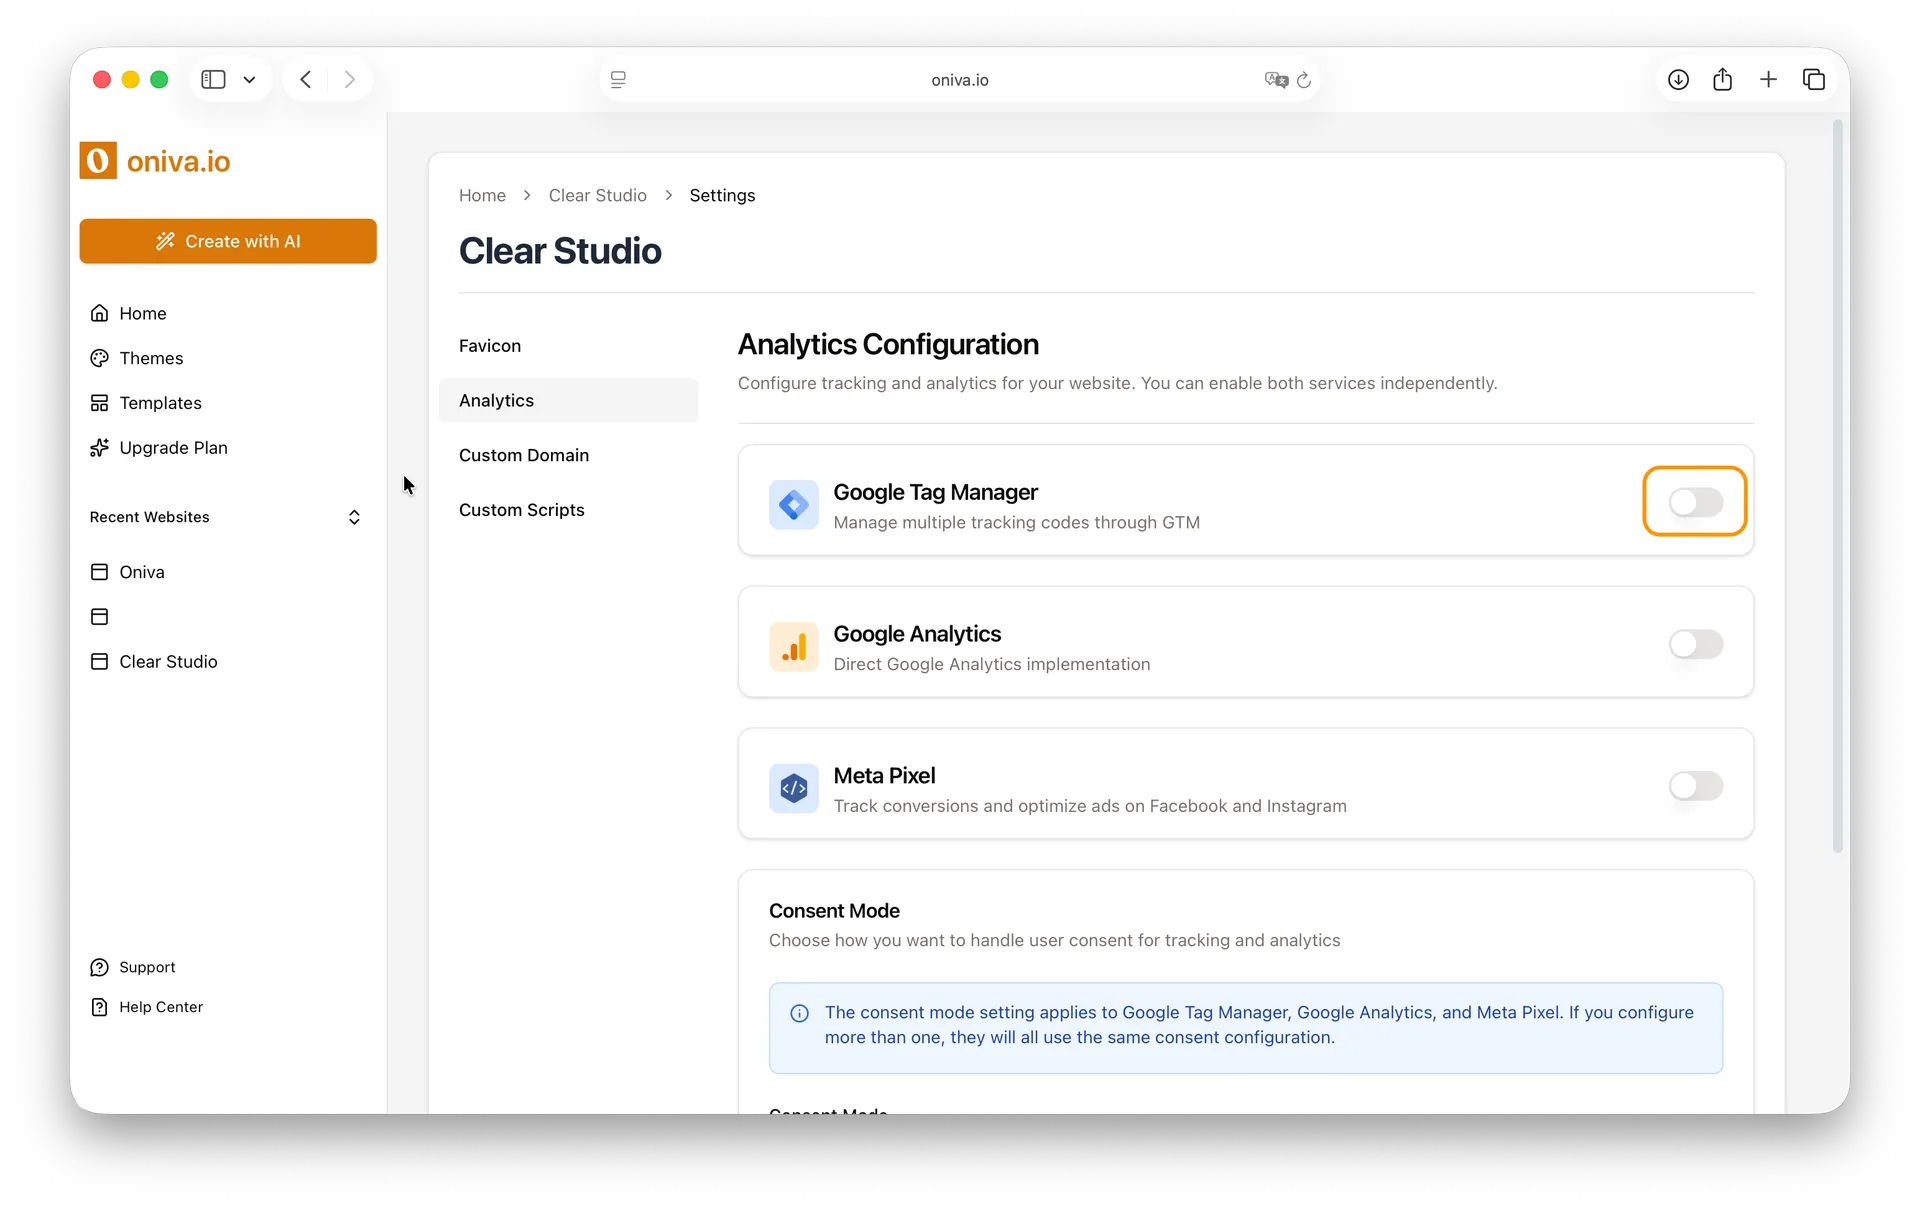
1 - Select which analytics platform you want to configure:
Inside the Analytics Configuration pannel, find the analytics tracking tool you want to configure - Google Tag Manager, Google Analytics or Meta Pixel. Then, enable the tag you want to configure
2 - Configure the tag:
Follow the step-by-step instructions for the chosen platform.
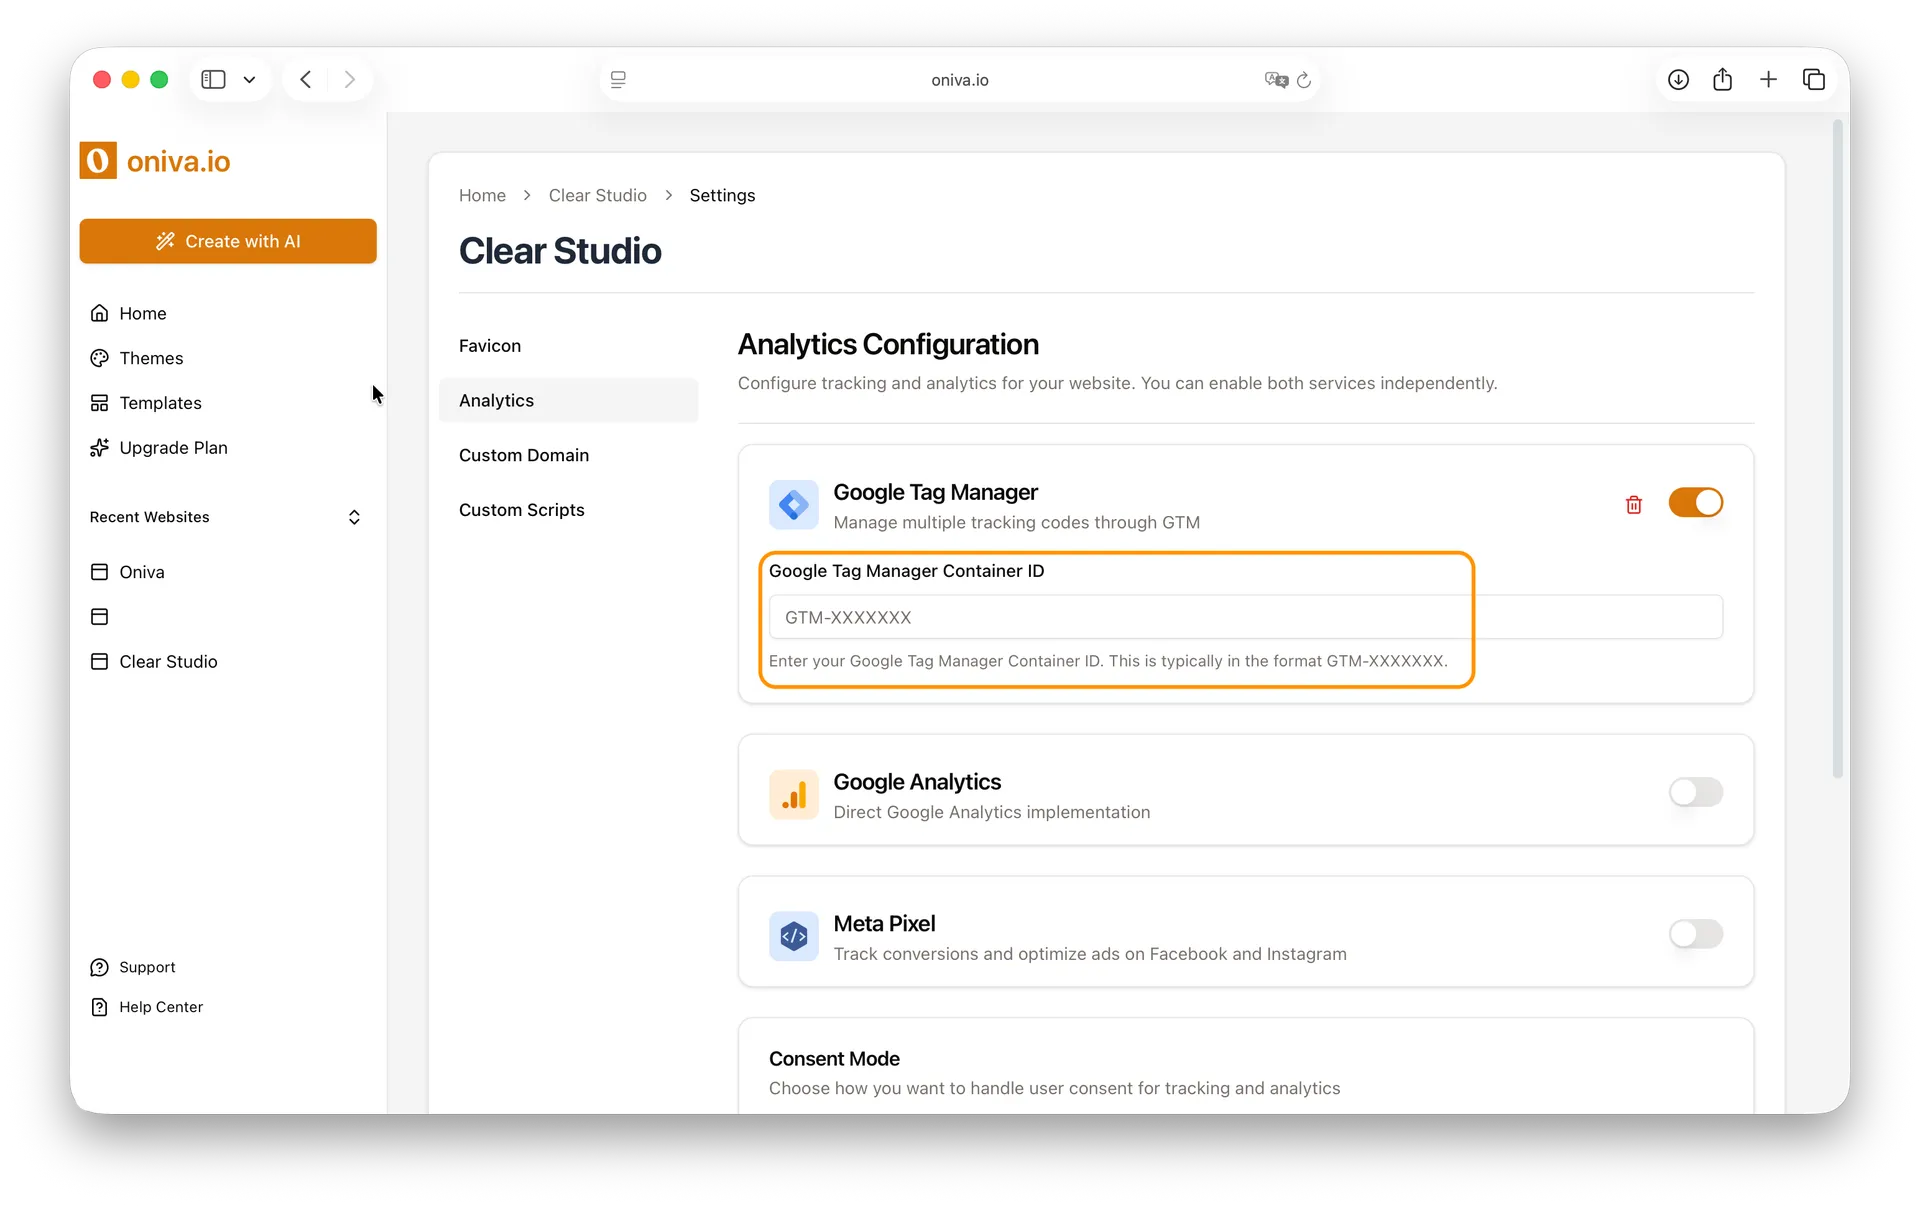
Google Tag Manager
To connect Google Tag Manager, you’ll need your Container ID.
- Log into your Google Analytics account.
- You’ll see a list of all your accounts. Find the one associated with the website you're configuring.
- You’ll see your Container ID (it looks like GTM-XXXXXX) on the card showing the Google Tag Manager account associated with the website you're configuring.
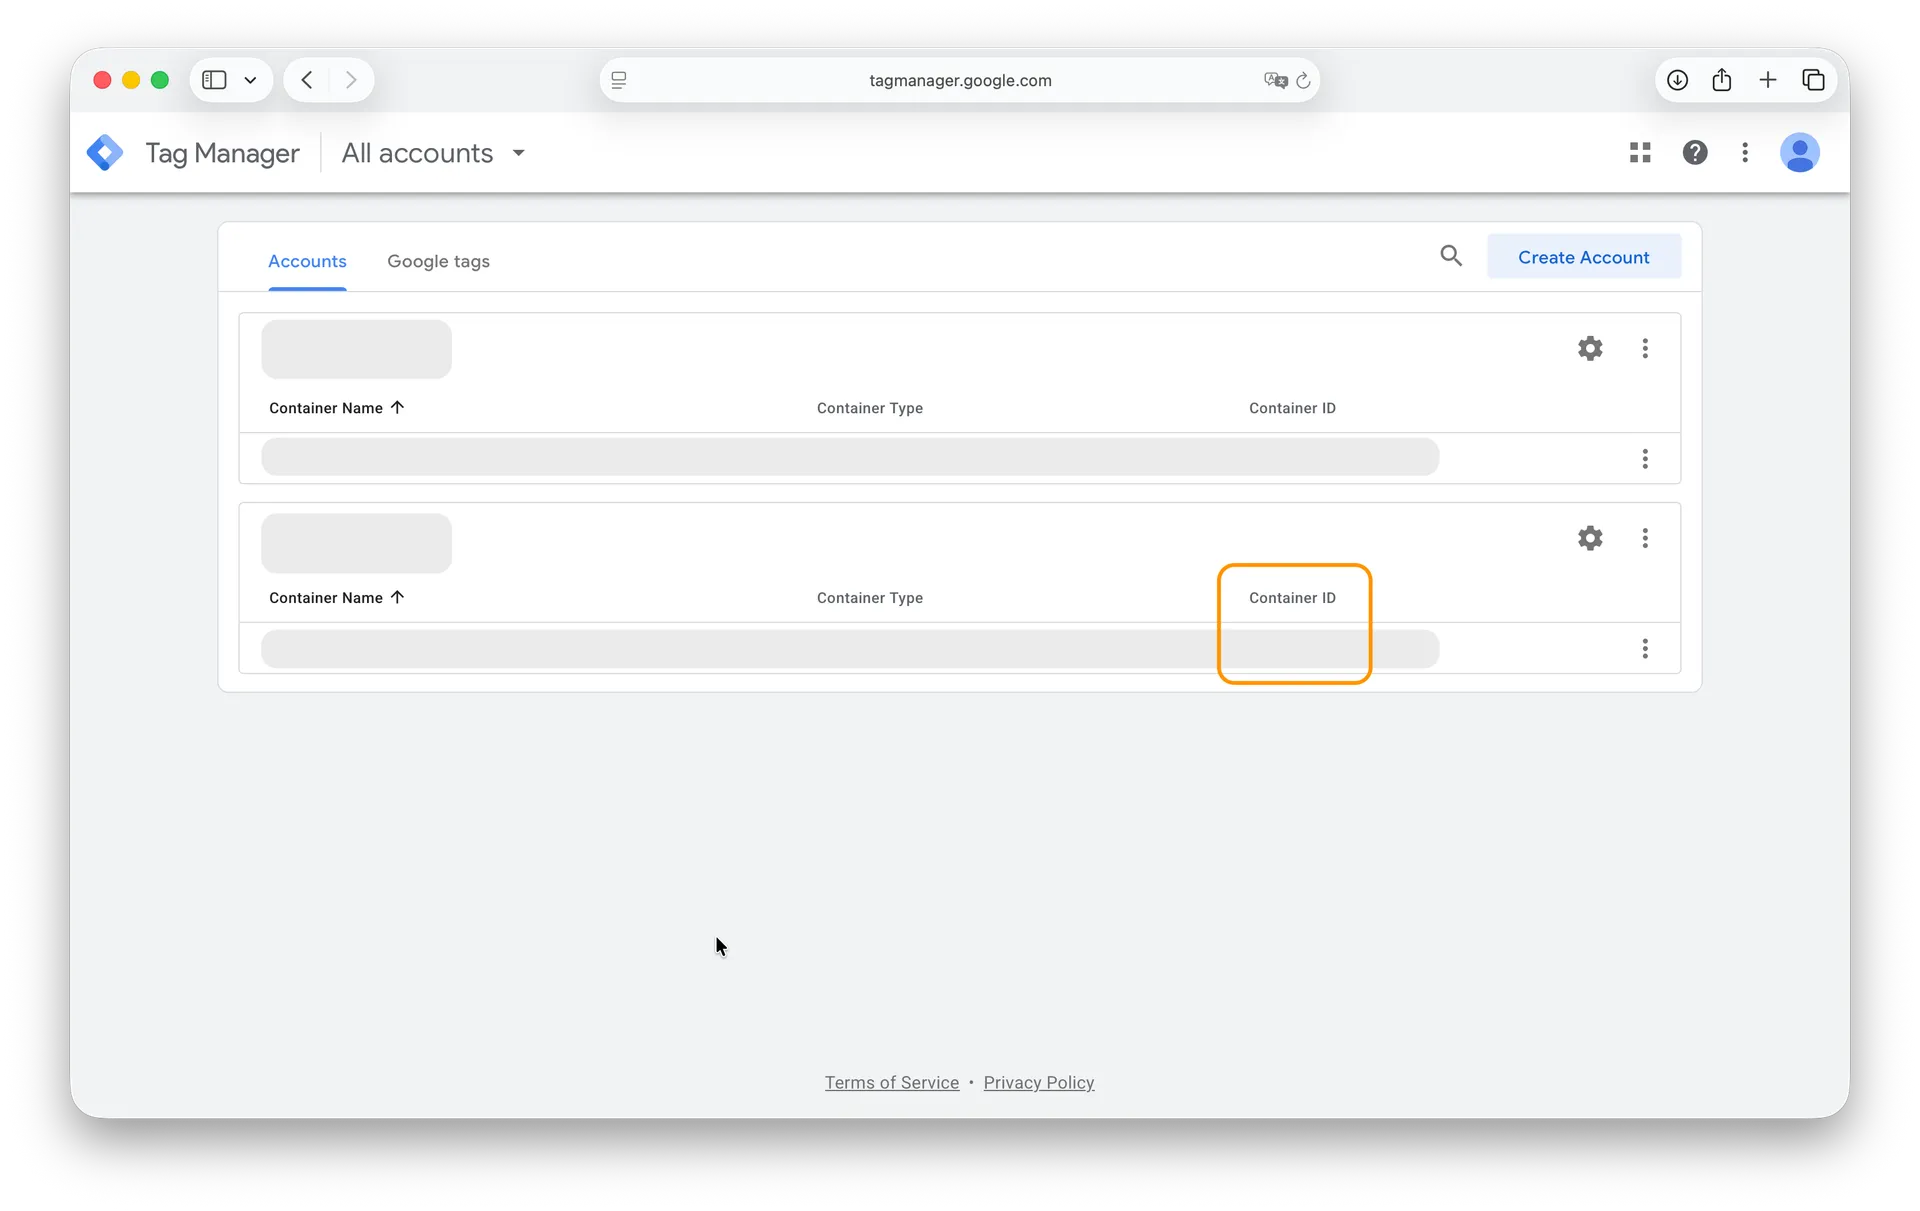
- Copy this ID and paste it into the Tag Manager field in Oniva.io.
Google Analytics:
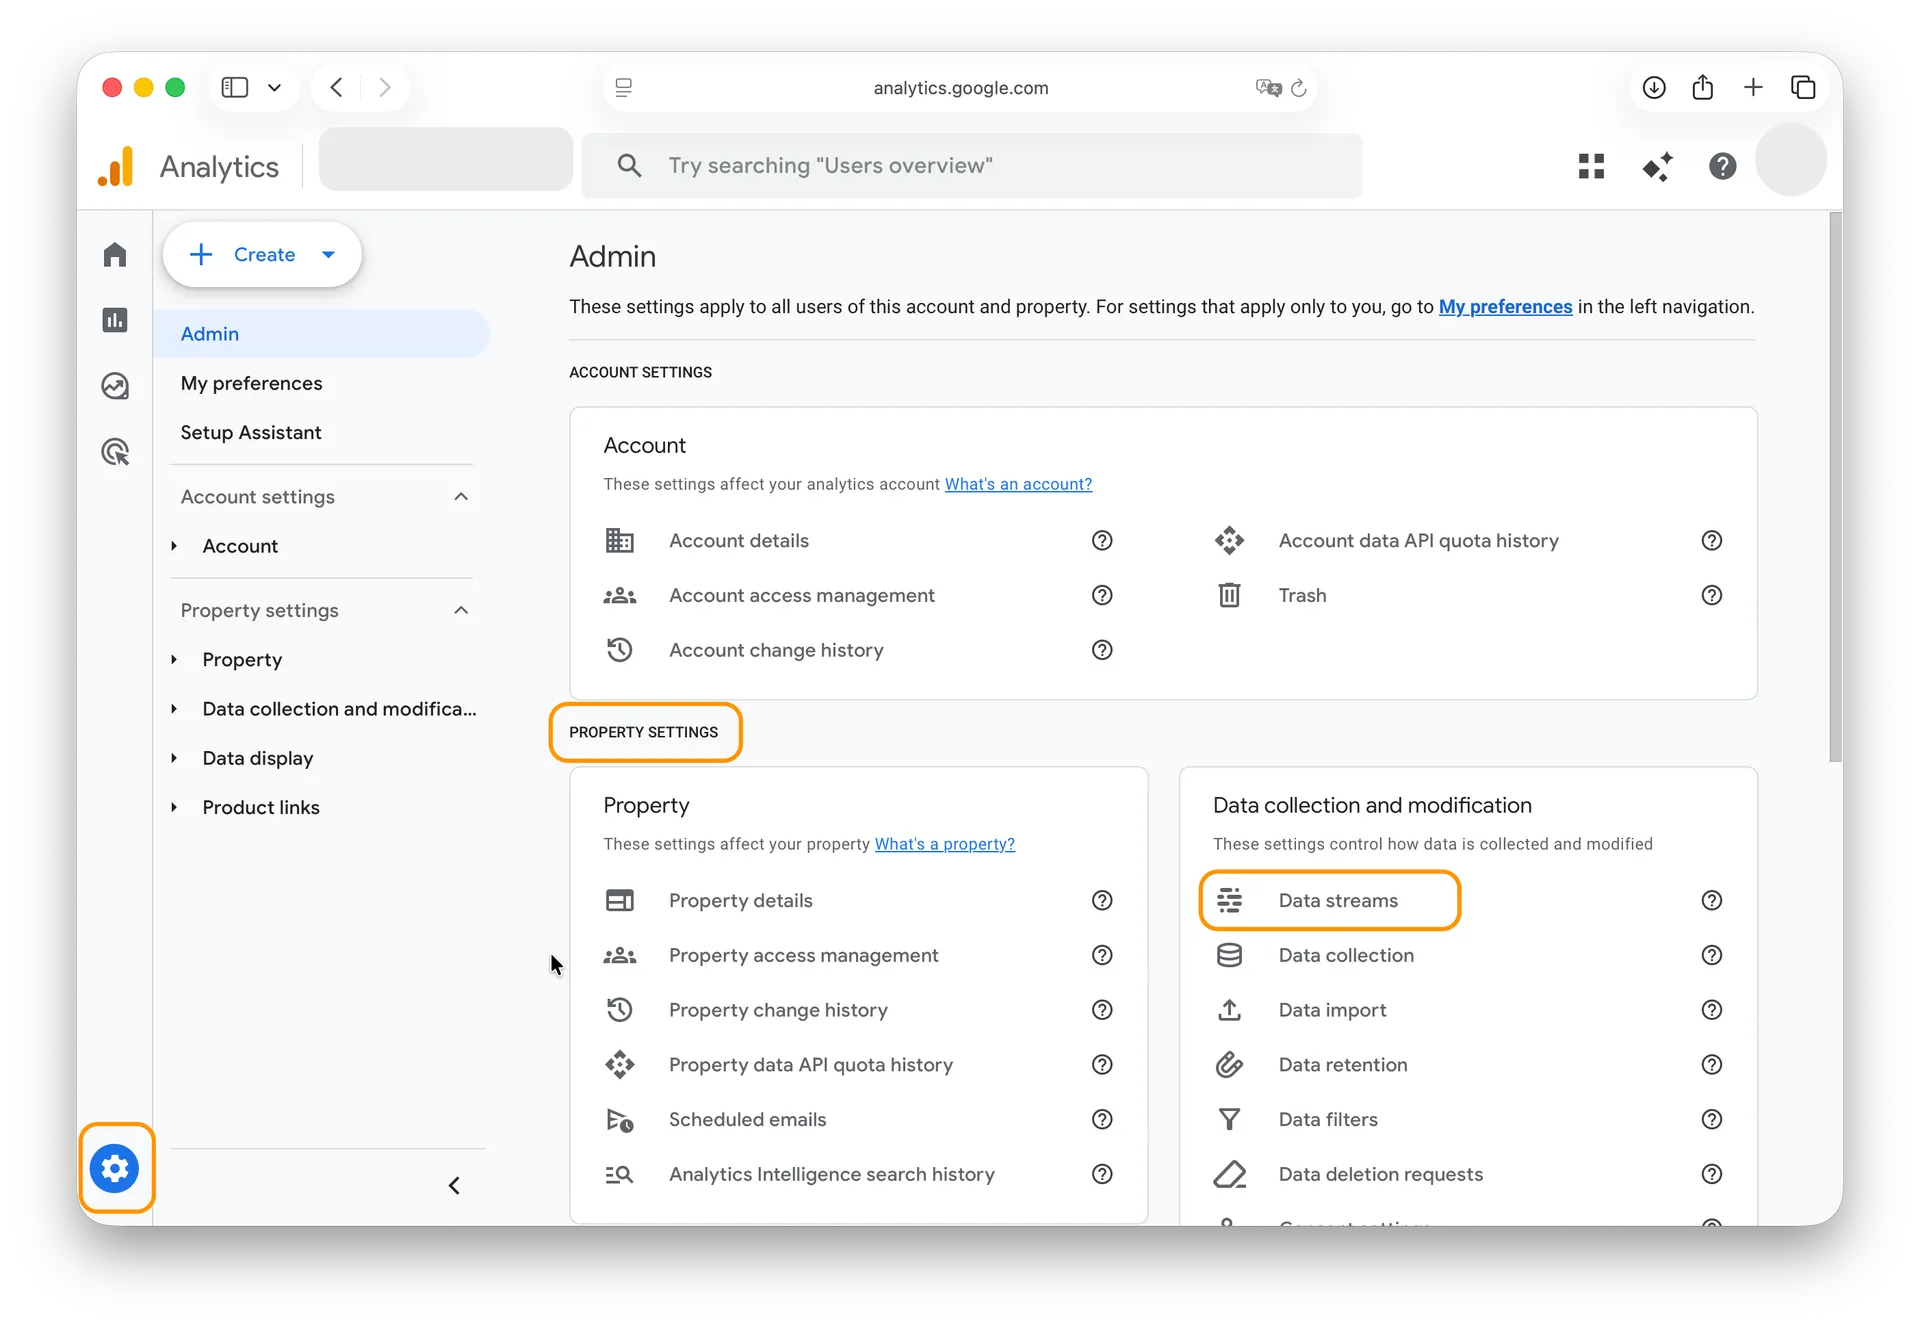
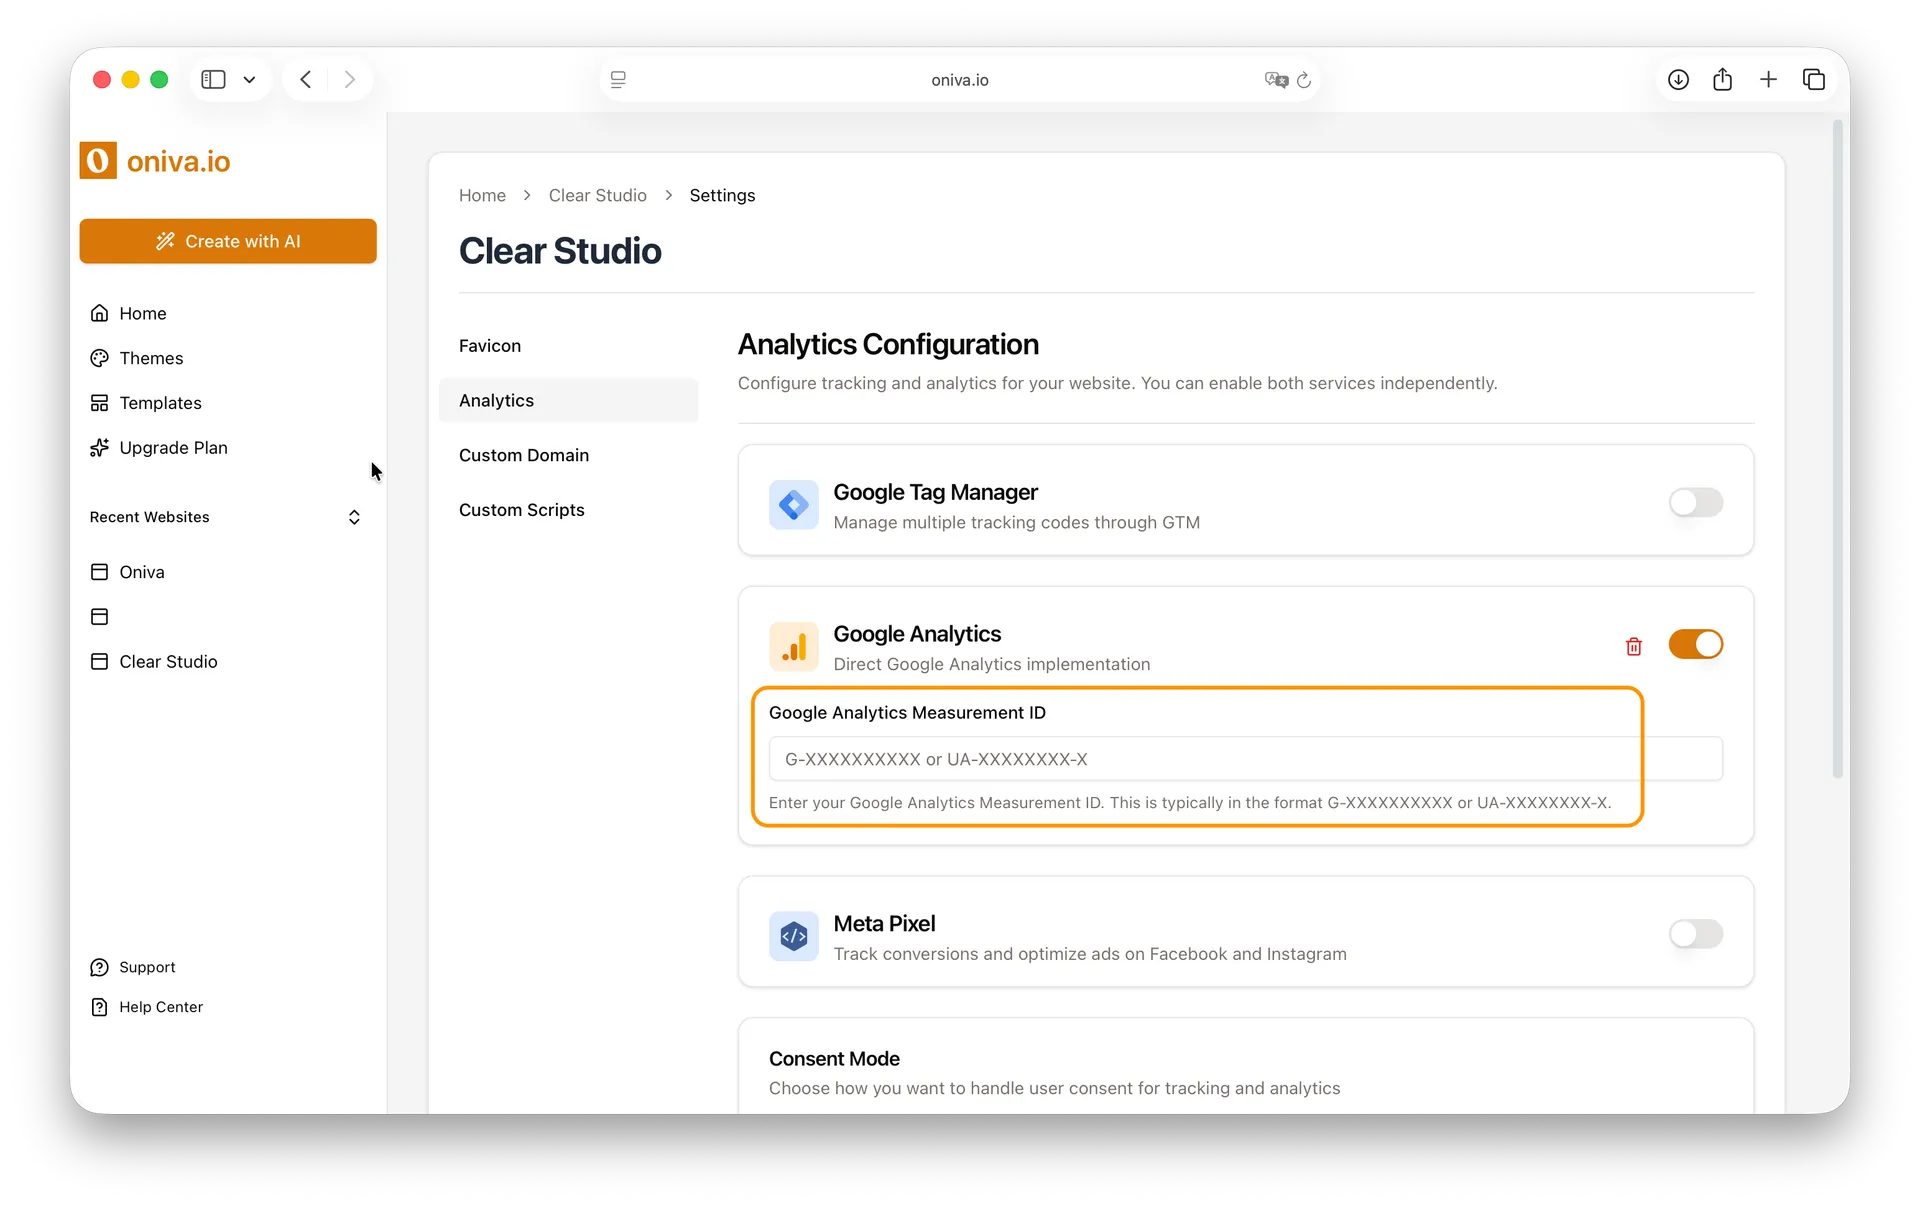
To connect Google Analytics, you’ll need your Measurement ID.
- Log into your Google Analytics account.
- From the left sidebar, go to Admin.
- Under Property, select Data Streams.
- Choose your website’s stream, and you’ll see your Measurement ID at the top right (it starts with G-XXXXXX).
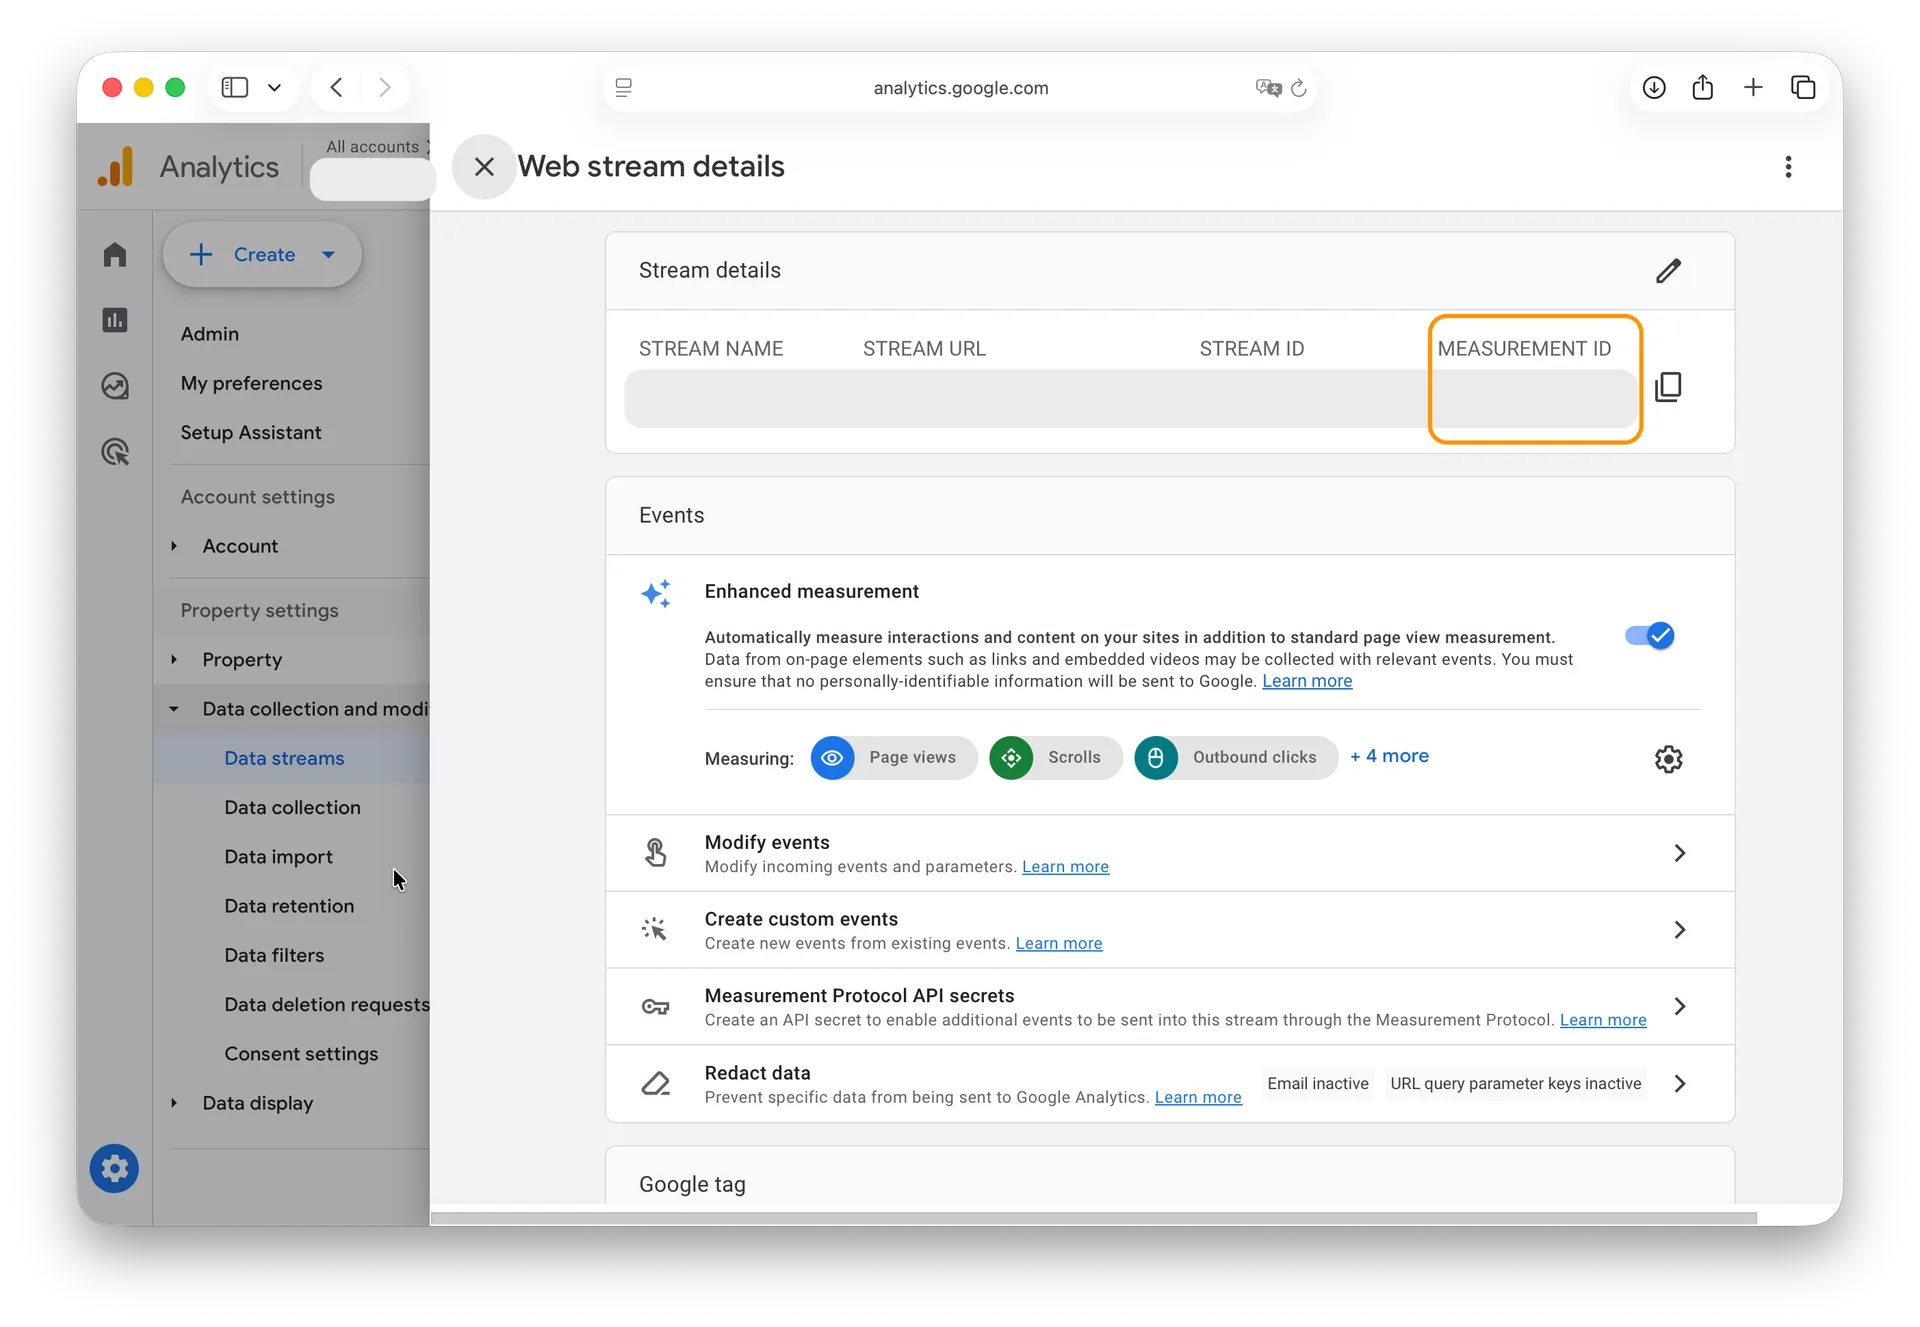
- Copy this ID and paste it into the Google Analytics field in Oniva.io.
Meta Pixel:
To connect Meta Pixel, you’ll need your Pixel ID.
- Log into your Meta Business Suite.
- Go to Events Manager from the sidebar.
- Select your Pixel from the list.
- Your Pixel ID appears under the Pixel name (a long number).
- Copy this number and paste it into the Meta Pixel field in Oniva.io
3- Configure Consent Mode Banner and save:
After adding your tracking tags, select the Consent Mode Banner you want to use. Once you’ve selected the banner, scroll to the bottom of the page and click Save to apply your changes.
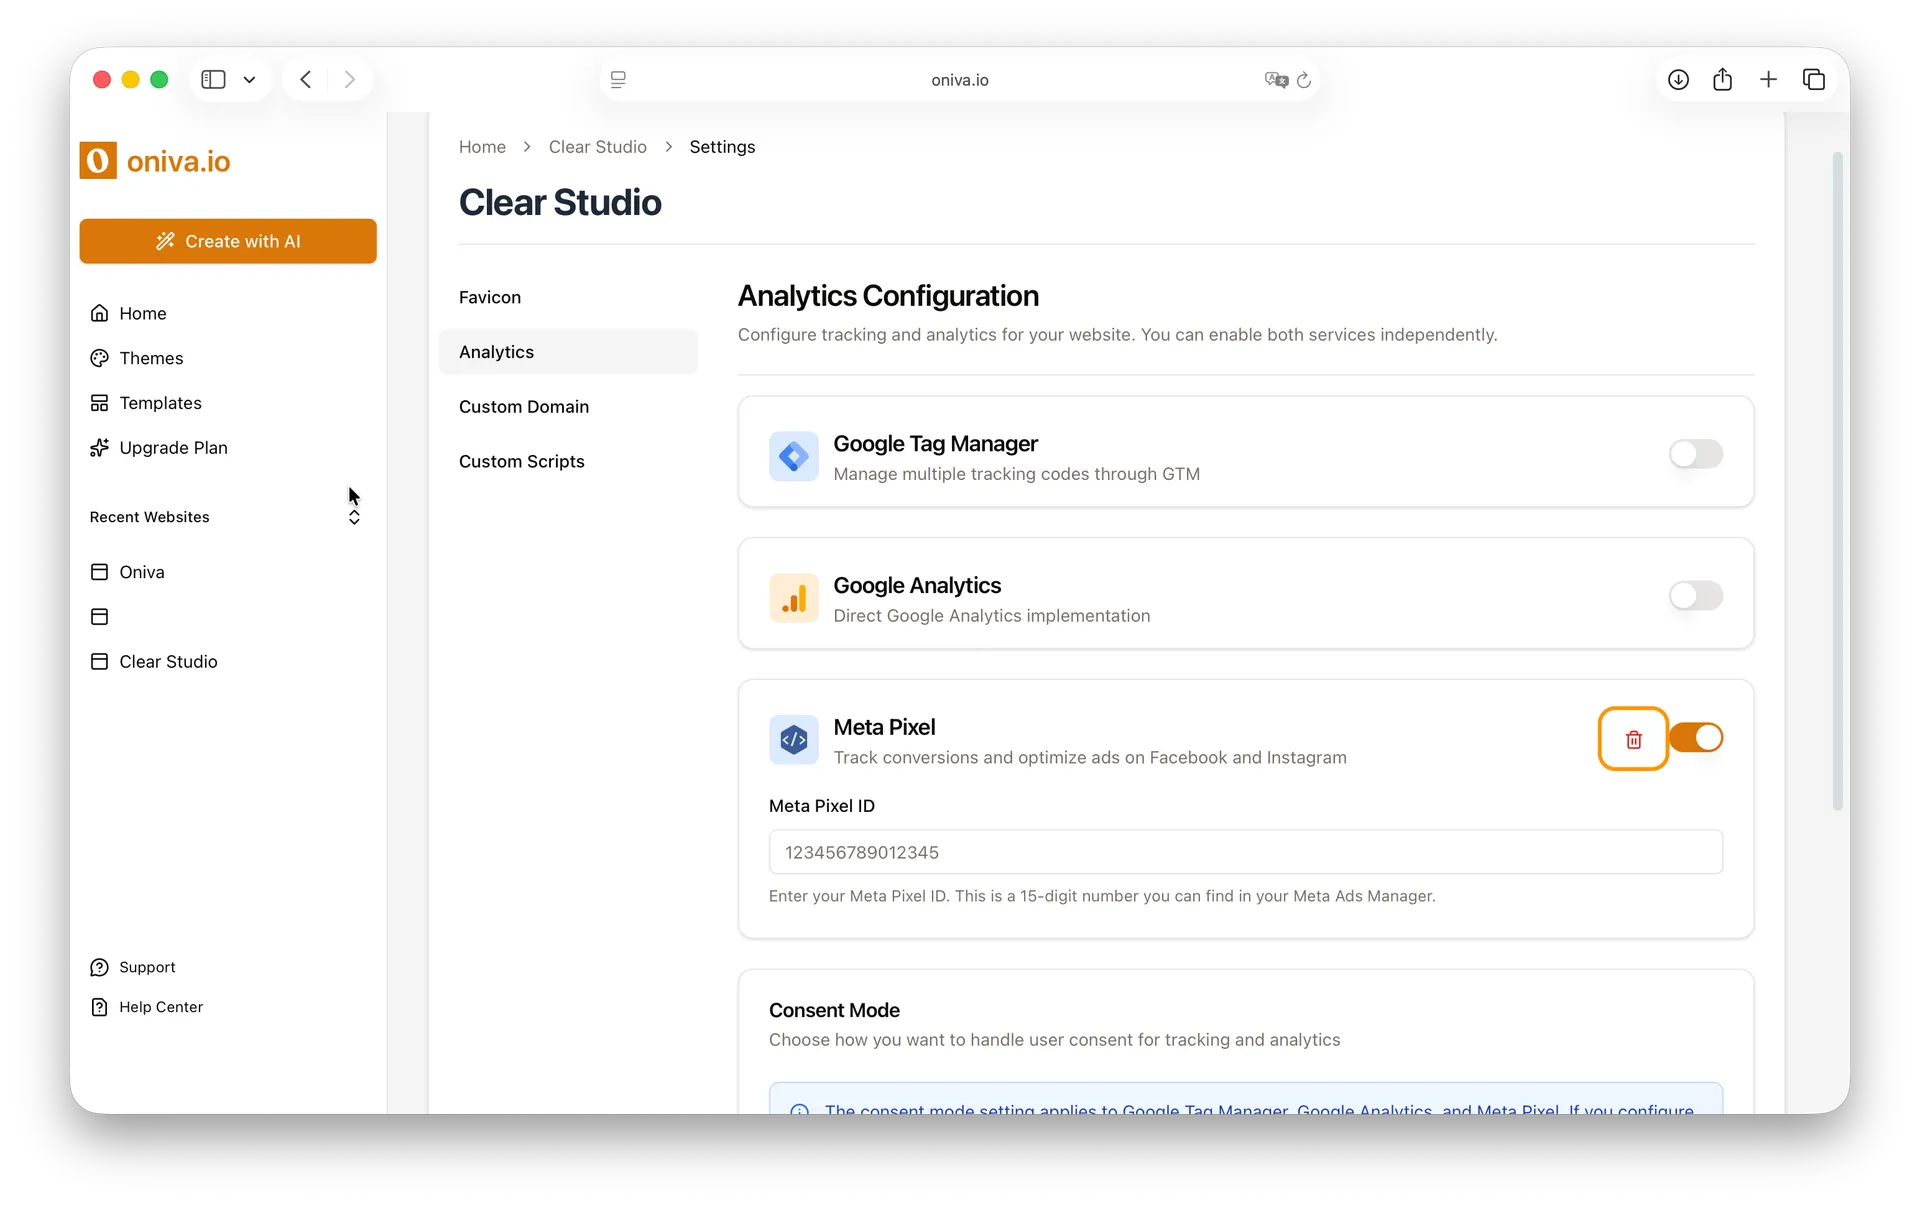
Deleting a Analytics Tracking Tag
Tip: If you only want to temporarily disable a tracking tag without losing its configuration, simply switch it off and click Save.
If you don’t want a tracking tag on your website anymore:
1 - Select which analytics platform you want to delete:
Inside the Analytics Configuration pannel, find the analytics tracking tool you want to delete - Google Tag Manager, Google Analytics or Meta Pixel.
2 - Delete the tag:
Click the trash icon on the card of the tool you want to remove.
3 - Save changes:
Scroll to the bottom of the page and click Save to apply the changes.
Note: You don’t need to worry about the Consent Mode Banner. If at least one tracking tool remains active, the banner will continue working. If you delete/disable all tracking tools, the consent banner will also be removed, and your website will no longer display a consent banner.