Custom Domain
All users
Updated Sep 2025
Using a custom domain gives your website a more professional look and strengthens your brand identity. Oniva.io, you can easily connect your own domain instead of using our default subdomain.
Custom Domain
The Custom Domain feature is only available to Oniva.io paid users.
What is a custom domain?
A custom domain is your unique web address, like www.website.com or www.blog.website.com, that makes your site easier to remember, strengthens your brand, and gives it a professional look.
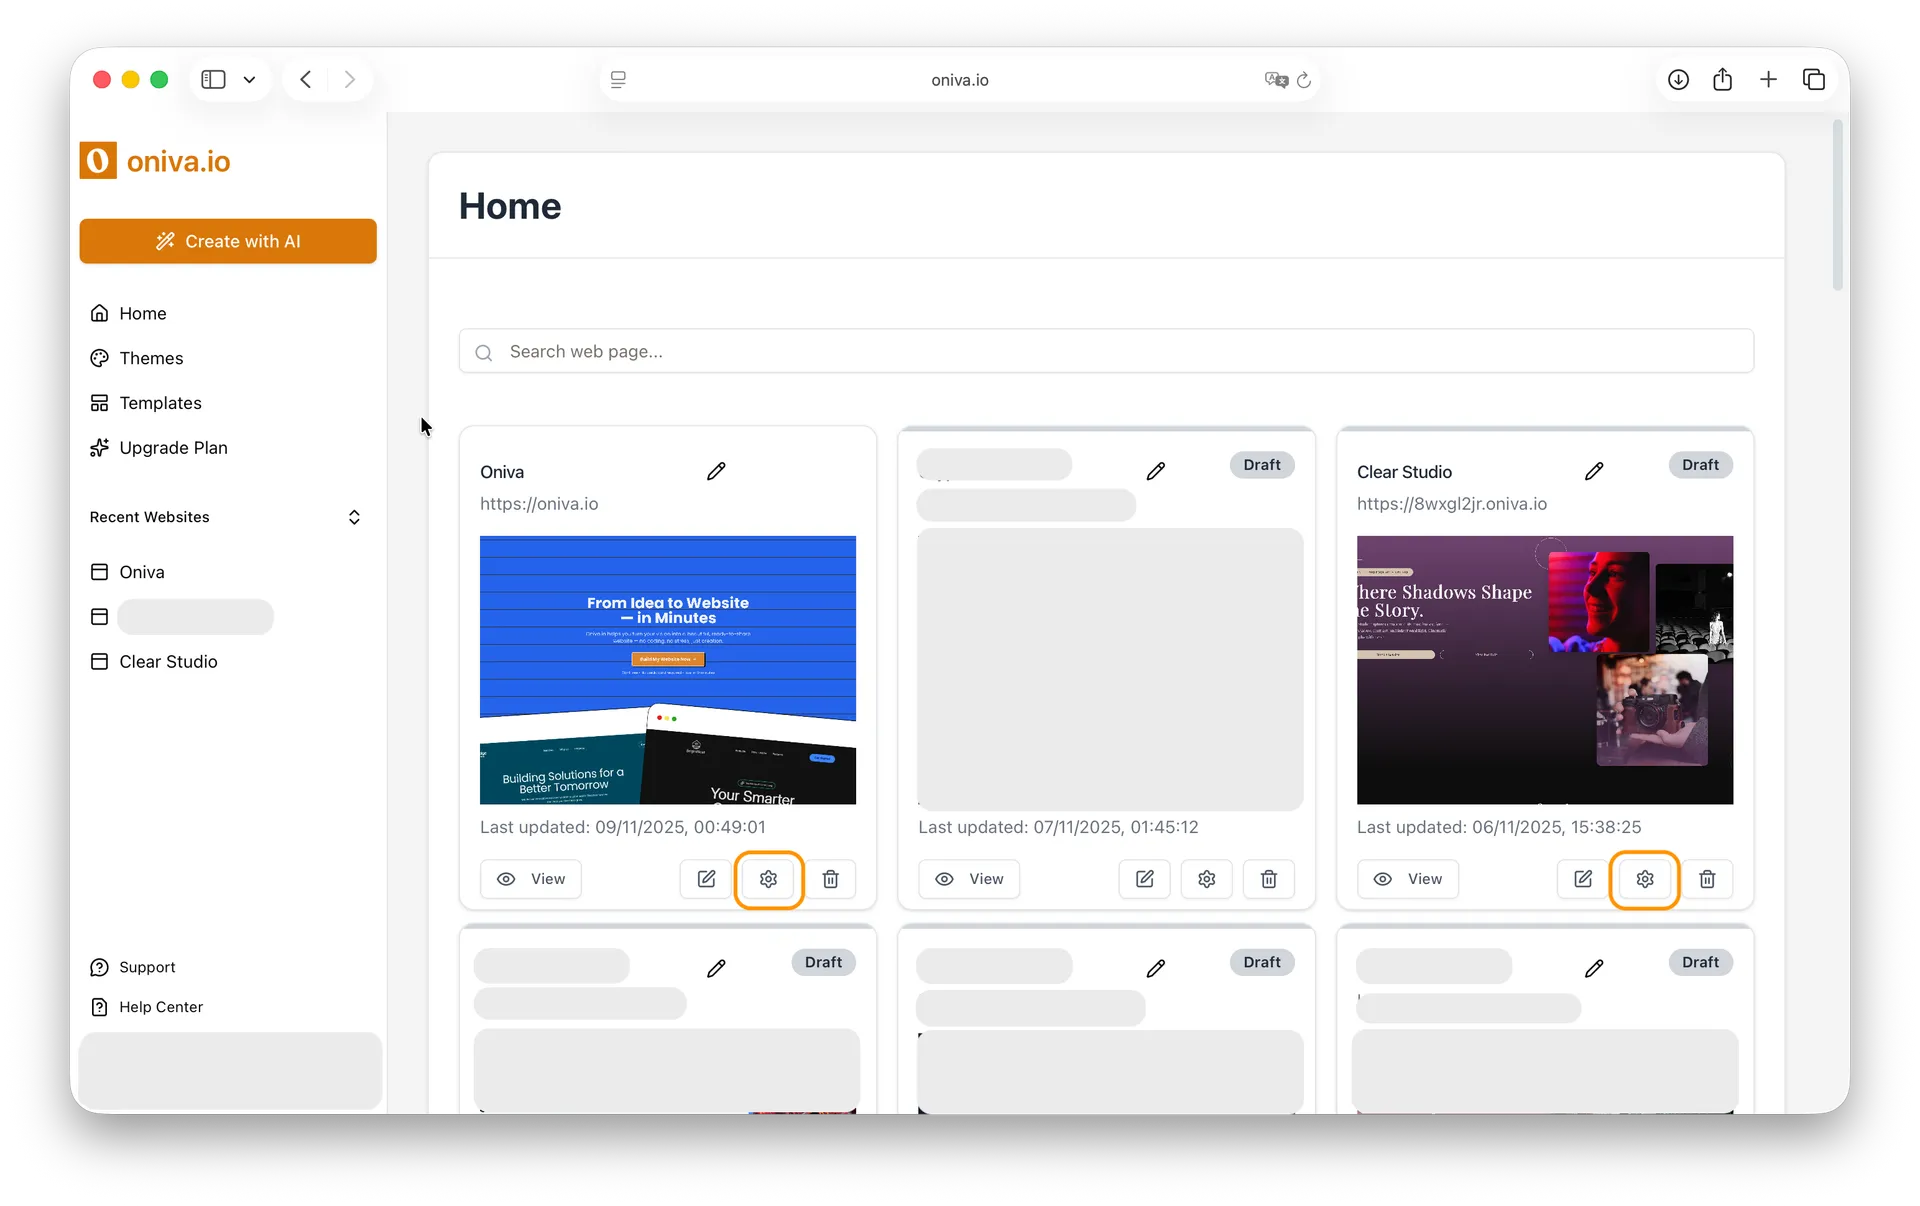
How to find Custom Domain
You can access Custom Domain in Oniva.io in two ways:
1 - From the editor left sidebar: While editing a page, click the Website Settings icon in the left sidebar.

2- From your home page - place where all your projects are listed: Find the website you want to edit its Custom Domain tags and click the Website Settings button.
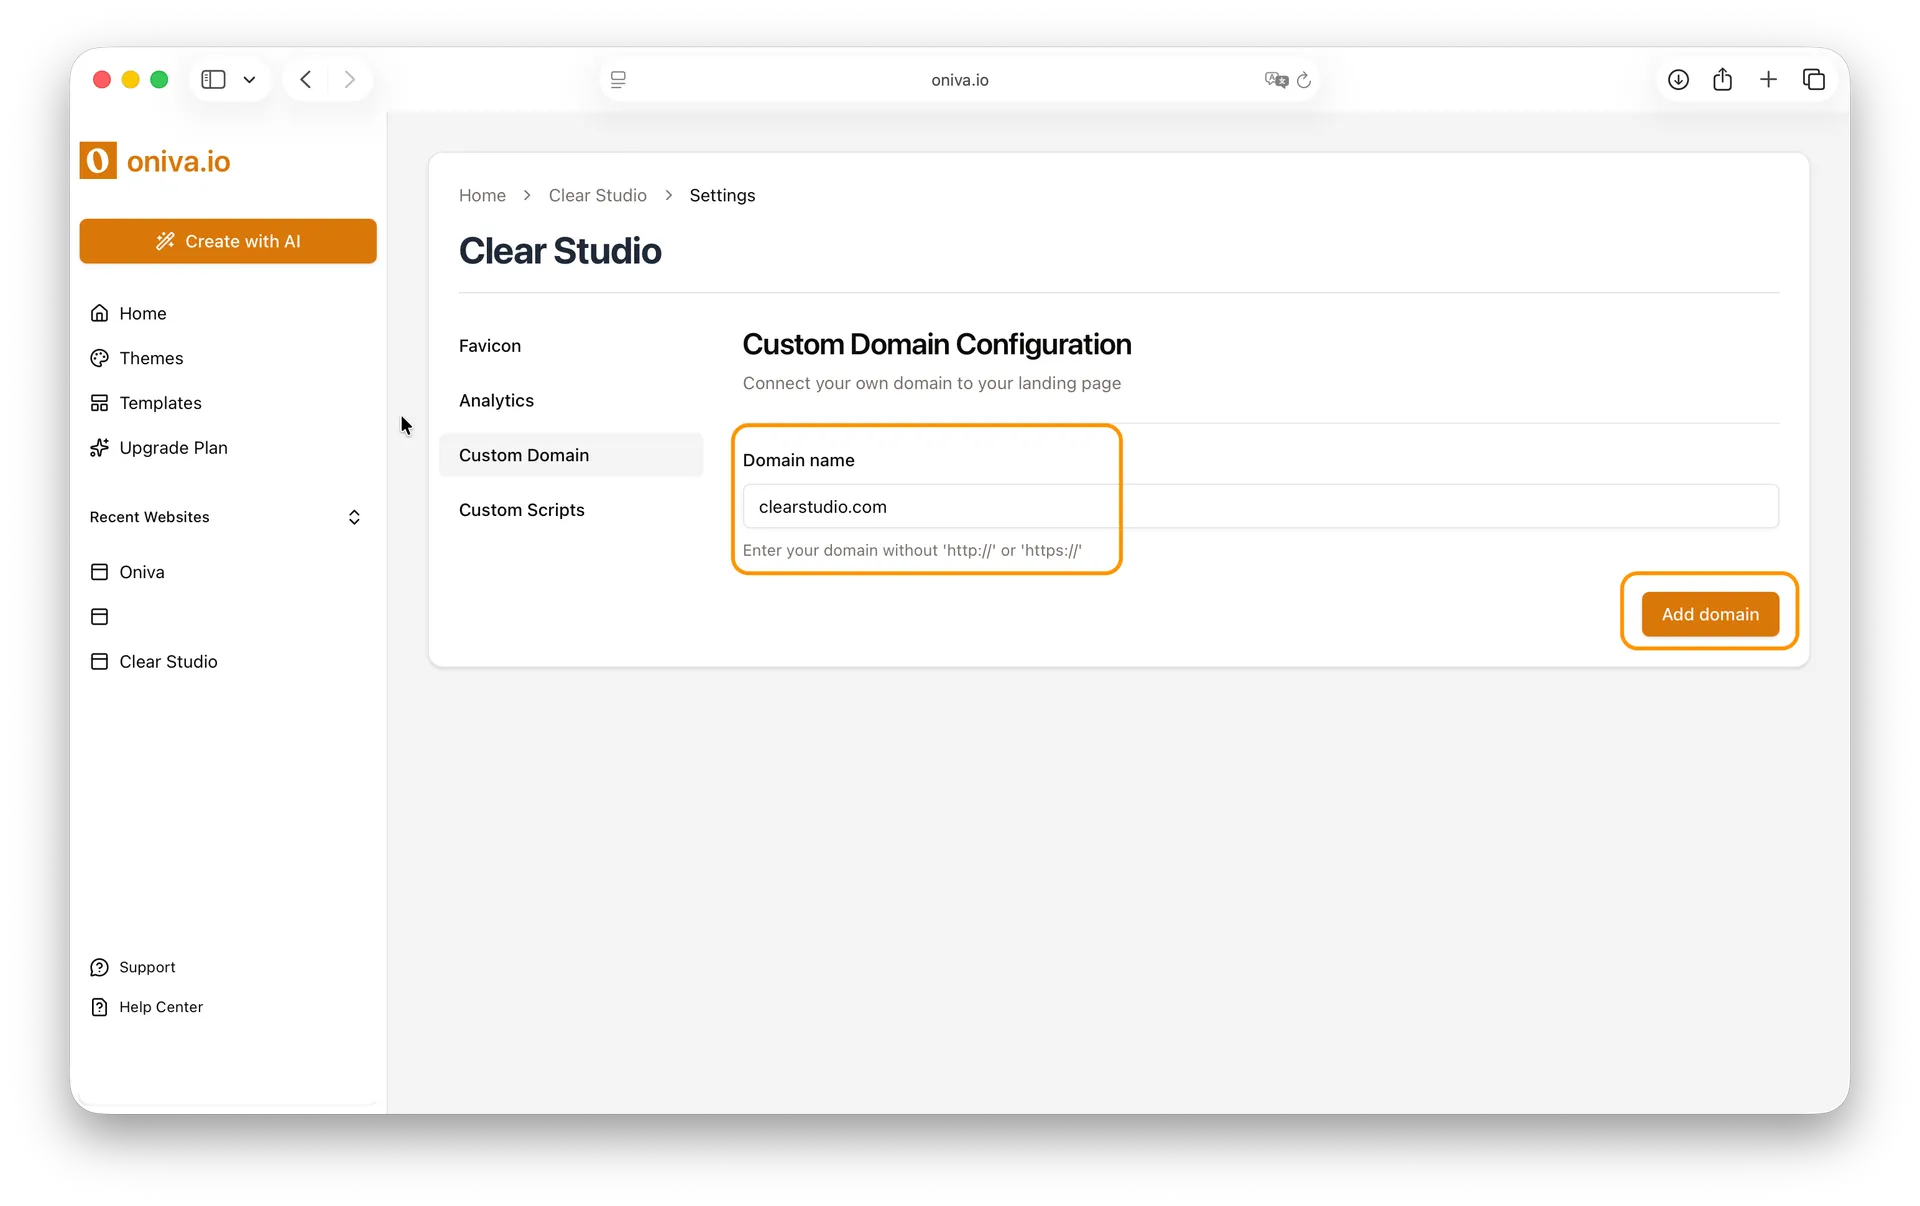
Connecting your domain
Before setting up your custom domain, check that you already own the domain and have access to manage its DNS settings. This will make the configuration process much smoother and faster.
1 - Add your domain:
Enter the domain you want to connect. You can use a root domain like website.com or a subdomain like blog.website.com, depending on how you want your site to appear. Then, click Add domain.
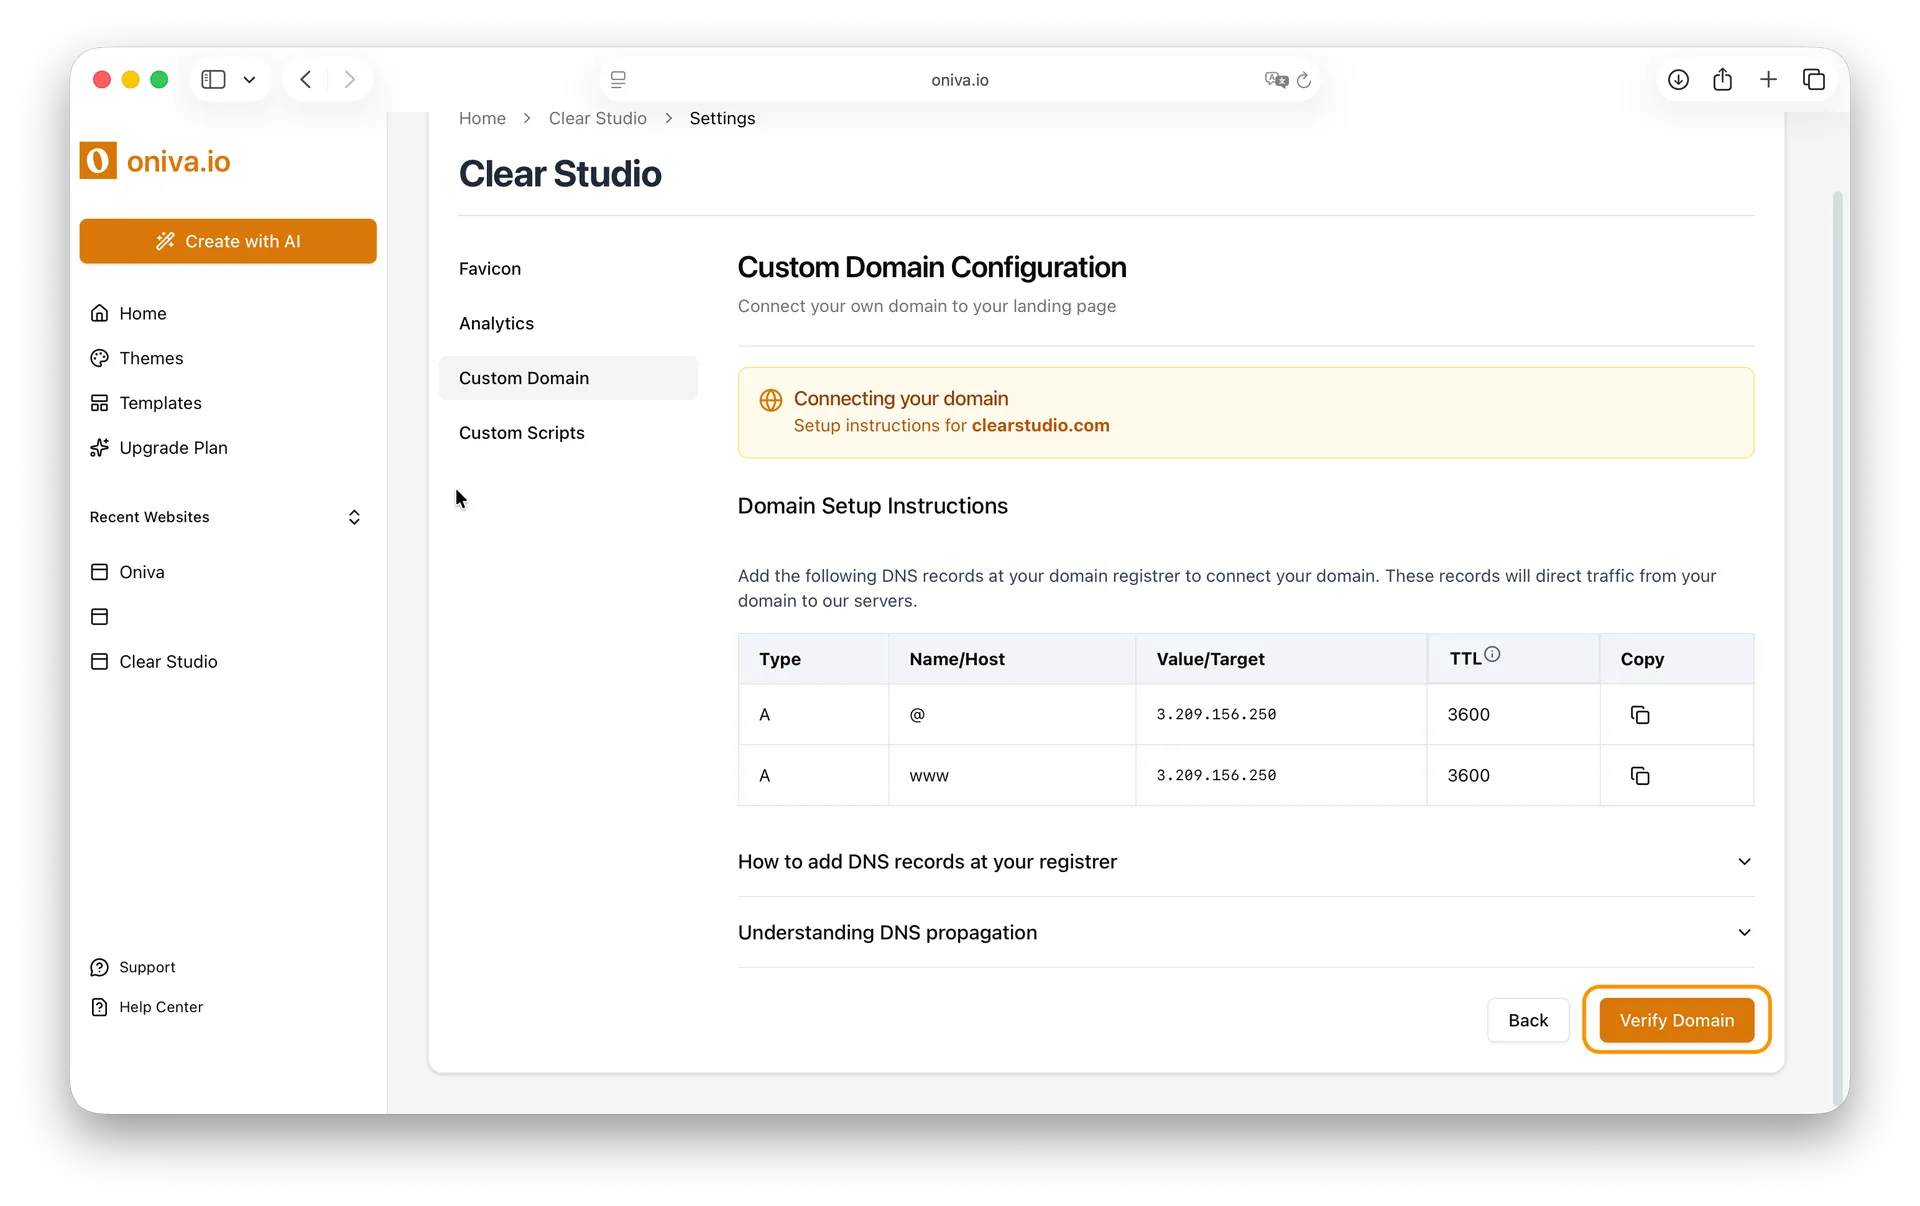
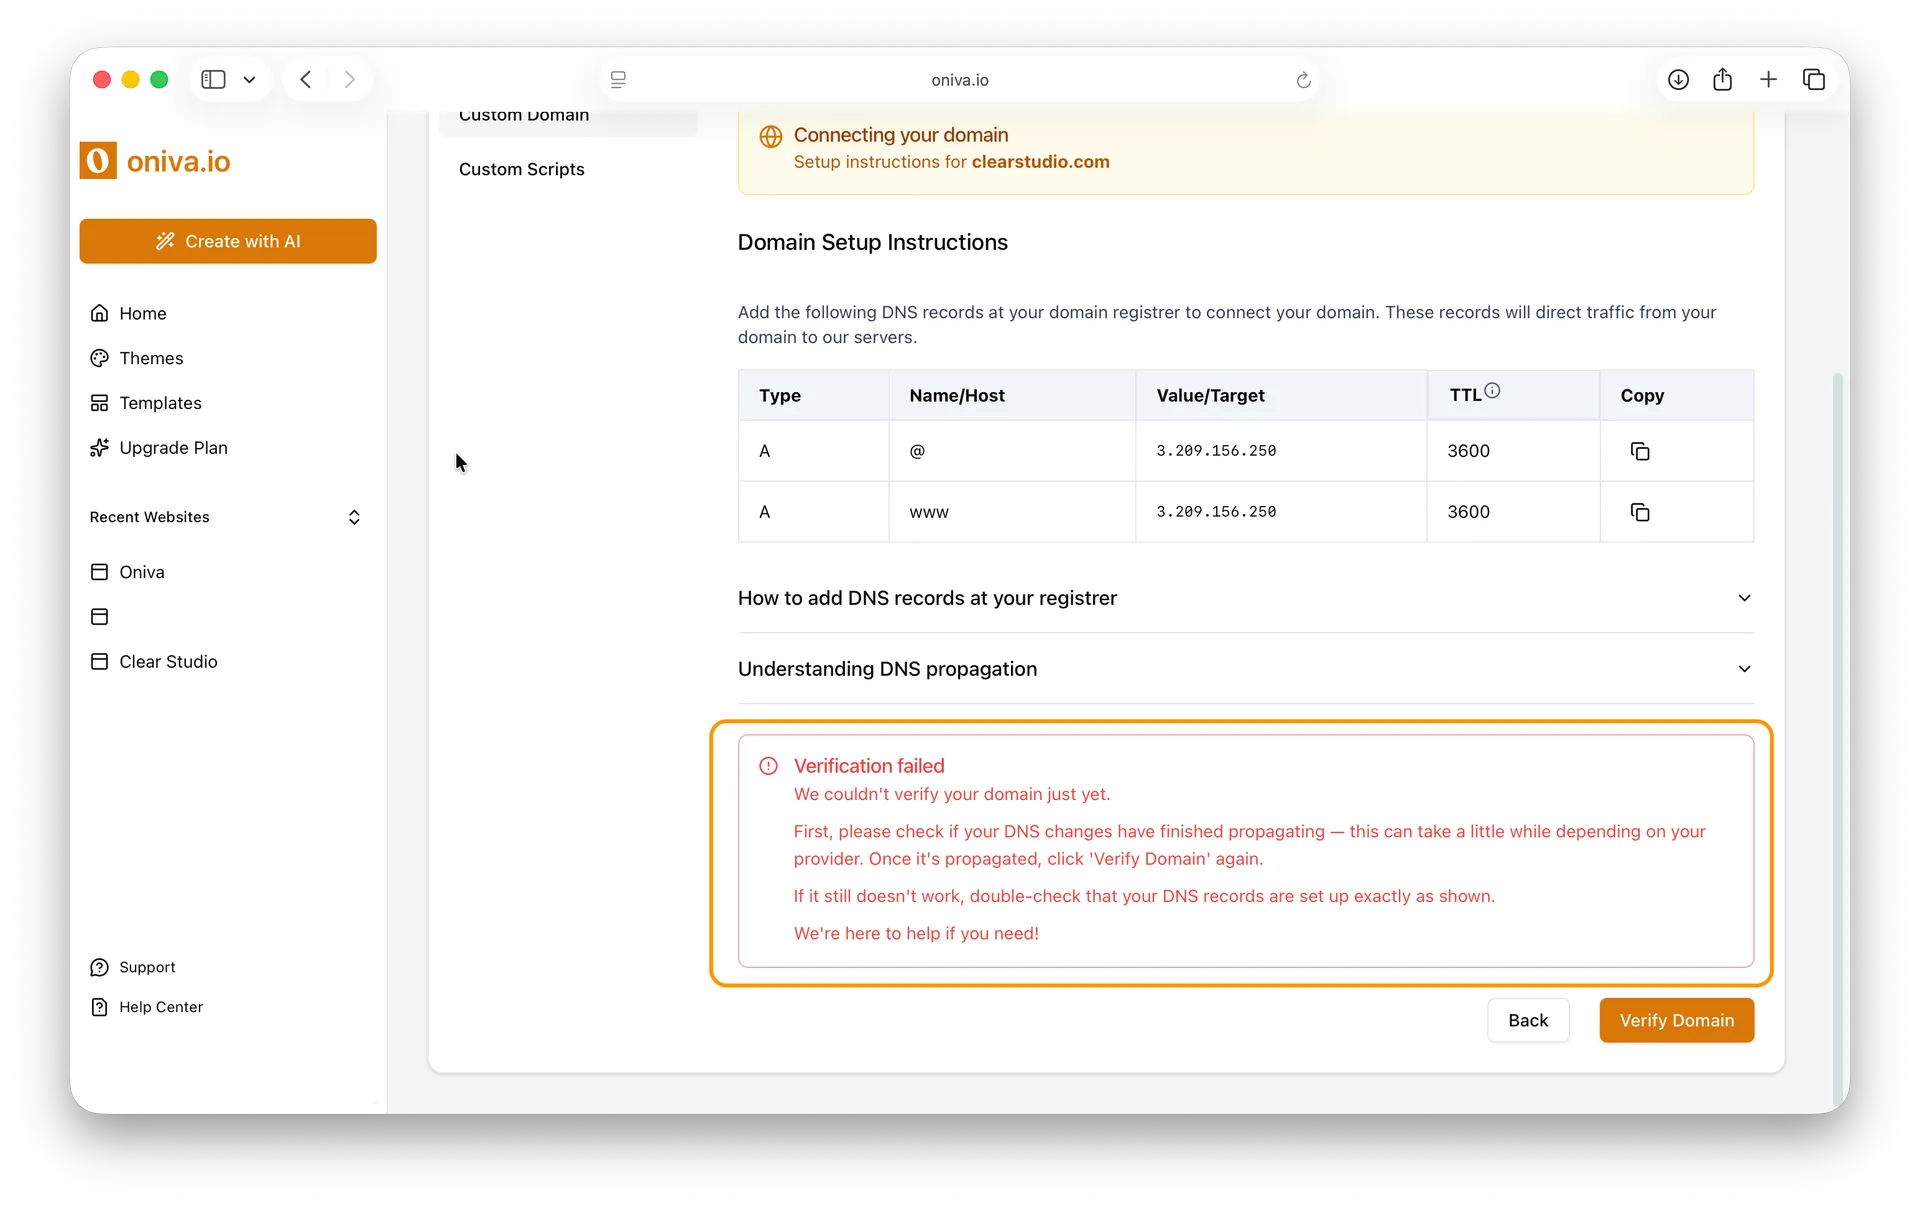
2 - Update DNS Records:
To link your domain with Oniva.io , you’ll need to update the DNS settings with your domain provider (such as GoDaddy, Namecheap, or Google Domains).
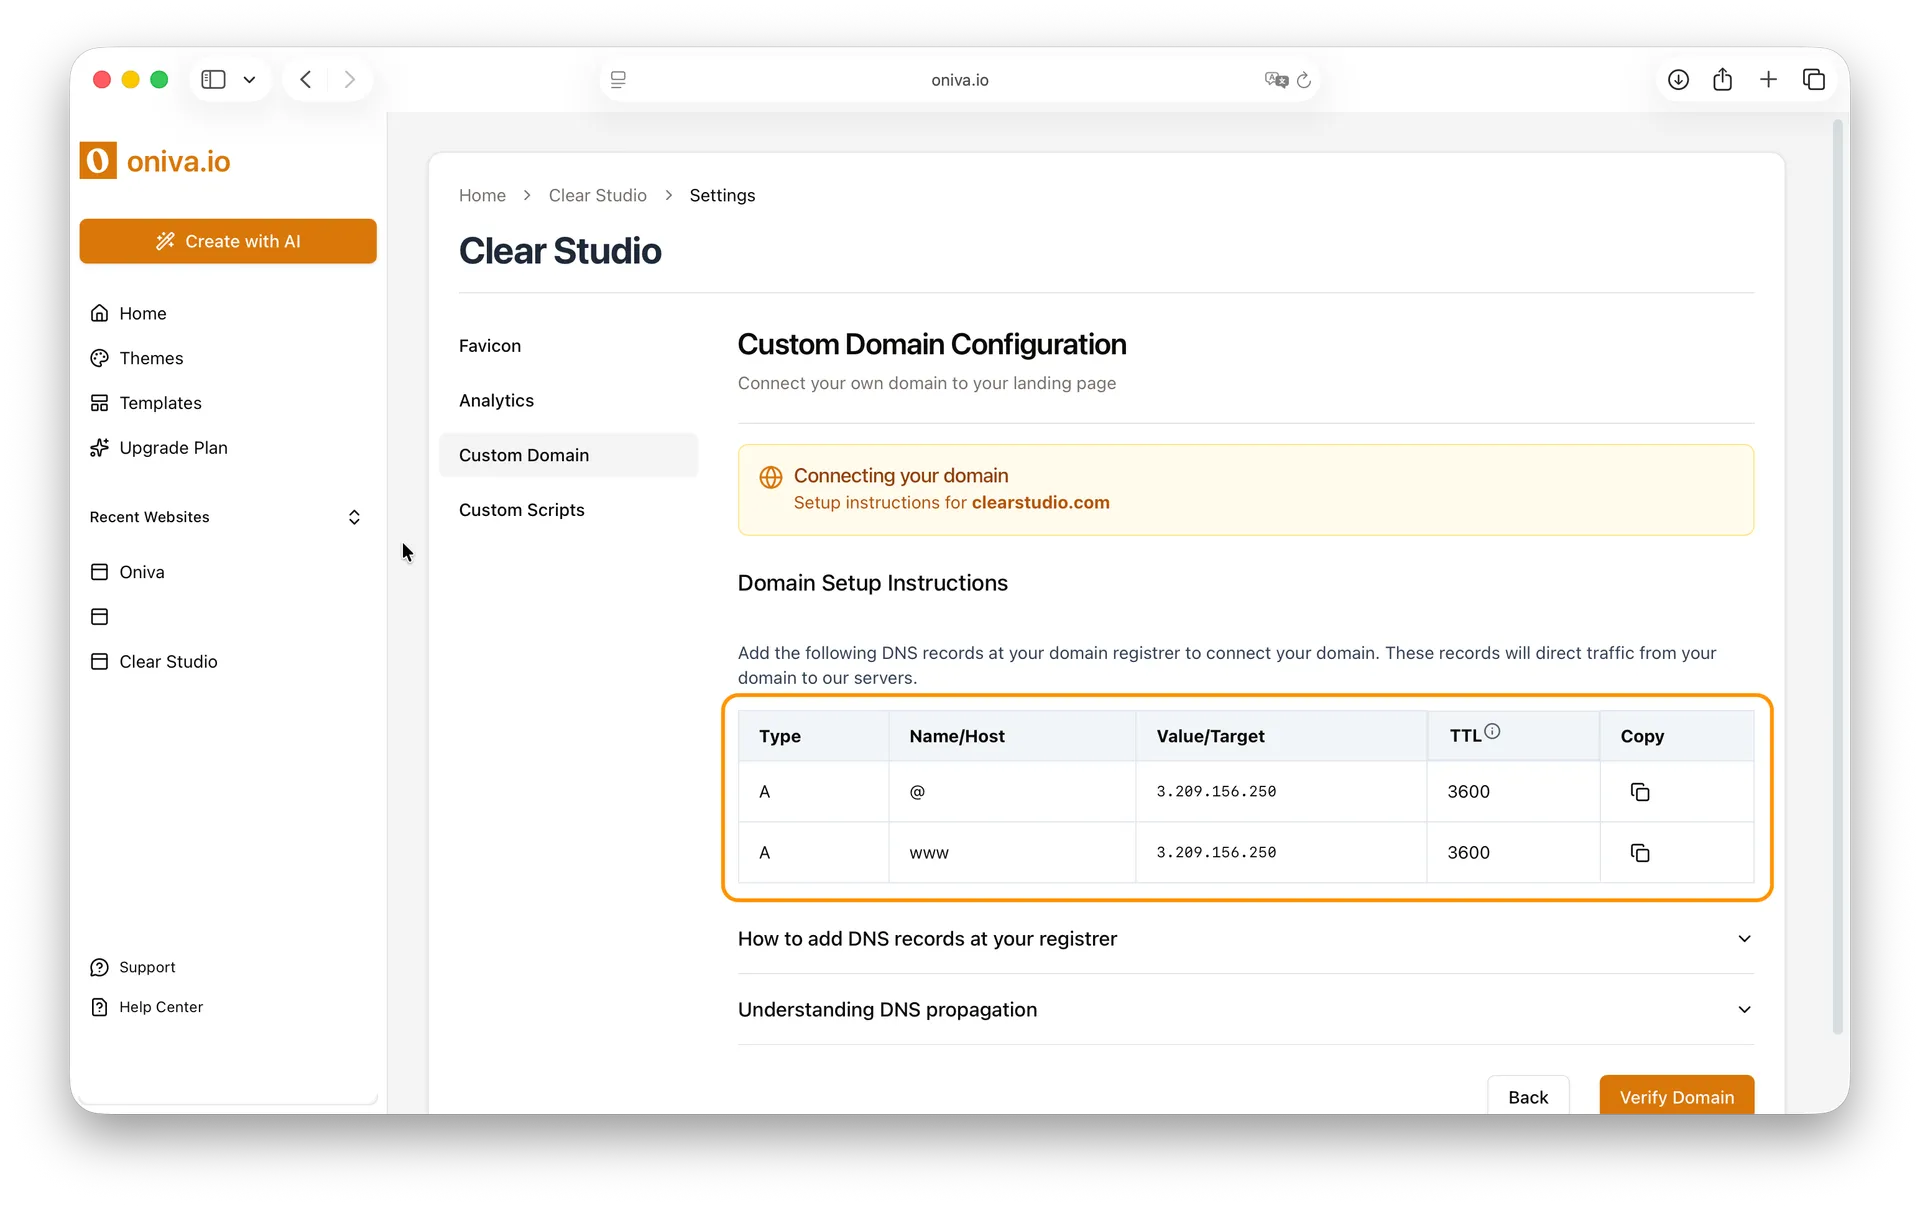
Here, we’ve selected some DNS settings documentation from popular domain providers to help you configure your custom domain more easily.
Domain Provider
DNS Settings Documentation
GoDaddy
Namecheap
Google Domains
Cloudflare
Bluehost
HostGator
3 - Verify your domain
After updating the DNS records, return to Oniva.io and click Verify. Wait until the DNS records are verified — this can take from a few seconds to a few hours due to the time your DNS takes to propagate.
When your domain is successfully verified, Oniva.io will automatically issue an SSL certificate for your website, ensuring a secure connection.
If everything is set up correctly, the Custom Domain screen for your domain will show a successful verification status.

If there’s an issue, it will display an error status so you can troubleshoot.
Removing your domain
1 - Go to Custom Domain:
Open Website Settings and go to Custom Domain of the website you want to remove the custom domain.
2- Click Reset Domain Settings
Locate and click the Reset Domain Settings button.

3- Delete DNS Records
Log in to your domain provider’s DNS settings panel (e.g., GoDaddy, Namecheap, Cloudflare).
Note: Resetting your domain does not delete your website; it only clears the custom domain settings so you can reconfigure it.