Custom Scripts
Users with programming knowledge
Updated Sep 2025
With Custom Scripts, you can inject your own JavaScript to extend your website’s functionality. This is especially useful if you want to add tools or integrations that aren’t built into Oniva.io by default.
Custom Scripts
The Custom Scripts feature is available for all Oniva.io users for free.
Important
Custom scripts can affect site performance and security. Always make sure you understand what the code does before adding it to your website.
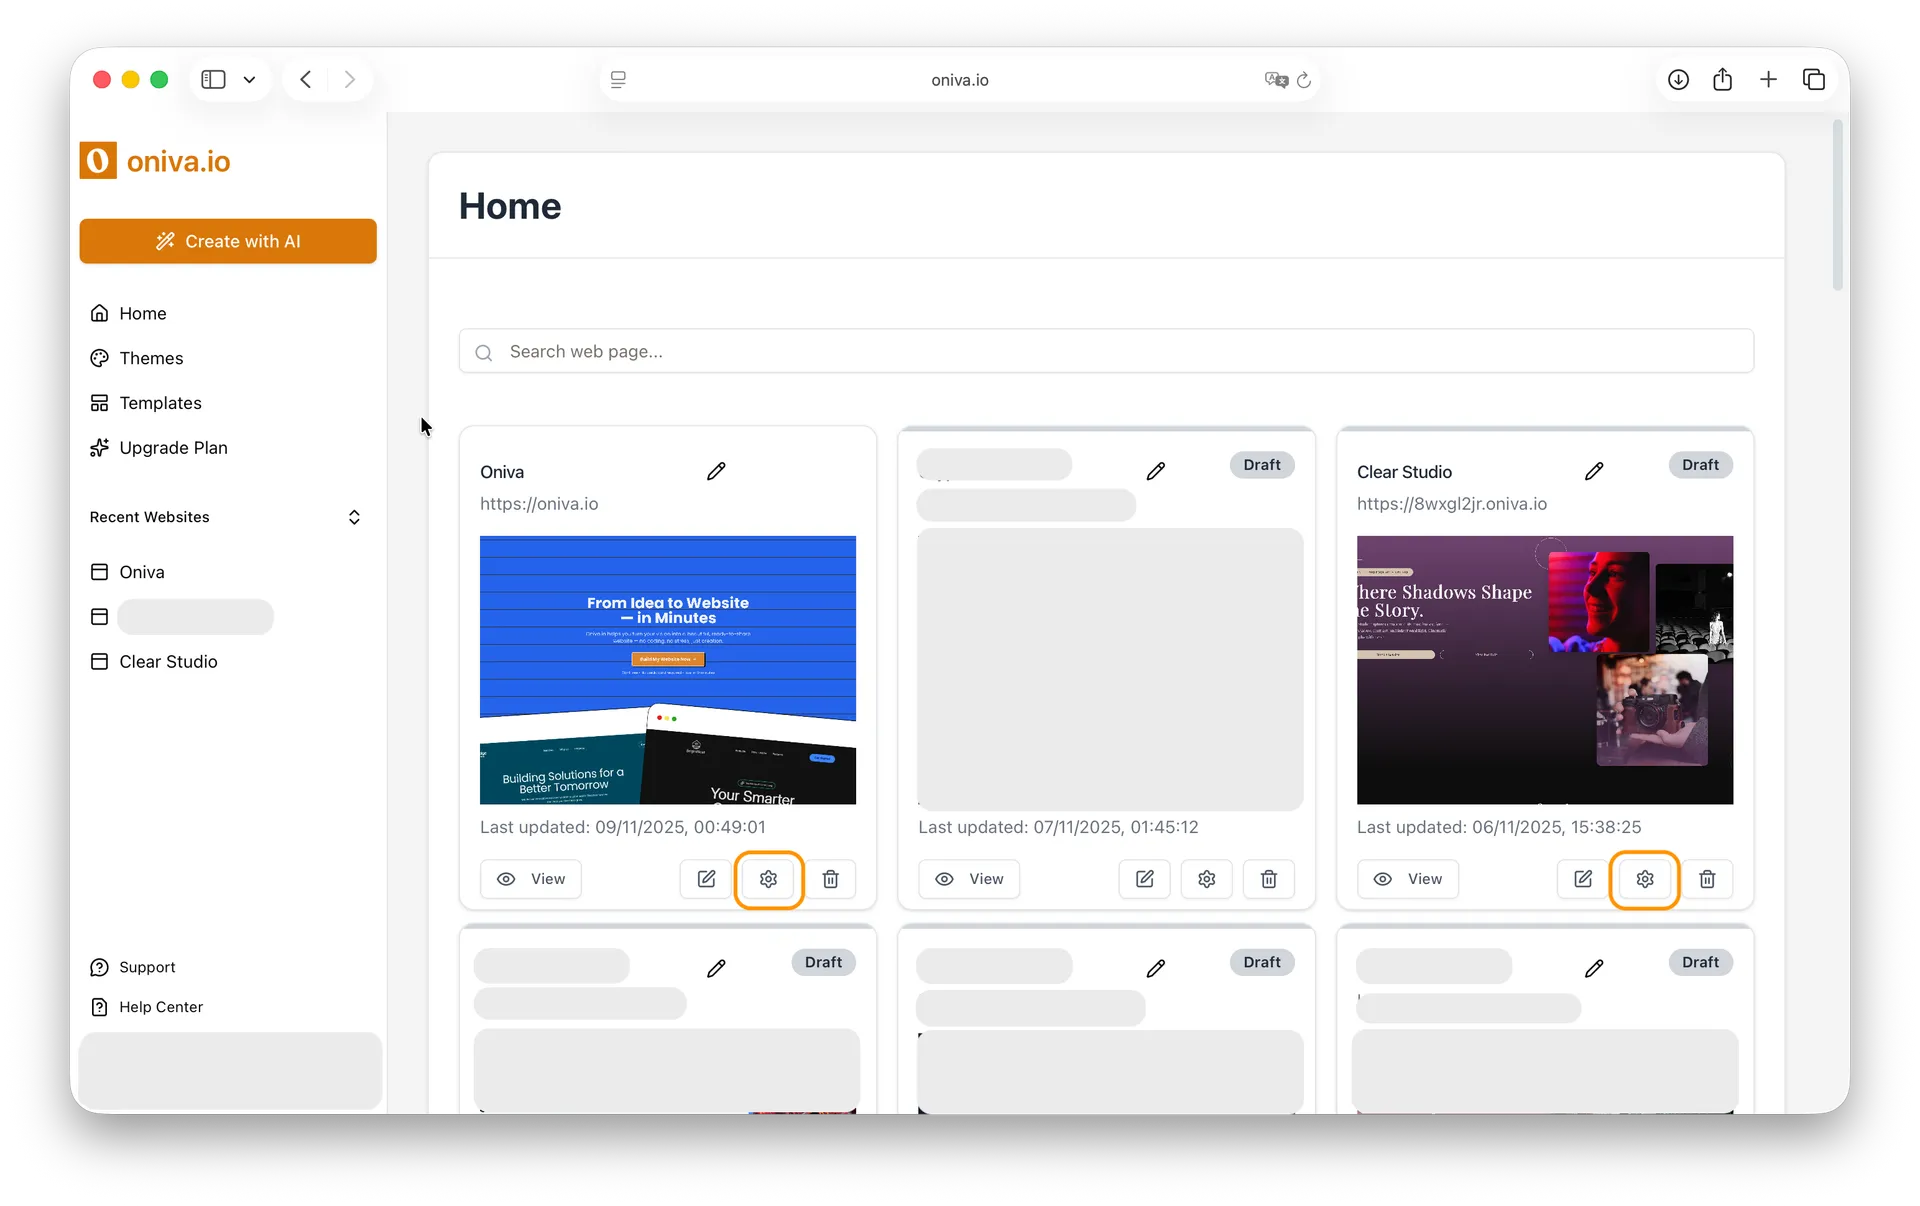
How to find Custom Scripts
You can access Custom Scripts in Oniva.io in two ways:
1 - From the editor left sidebar: While editing a page, click the Website Settings icon in the left sidebar.

2- From your home page - place where all your projects are listed: Find the website you want to edit its Custom Scripts and click the Website Settings button.
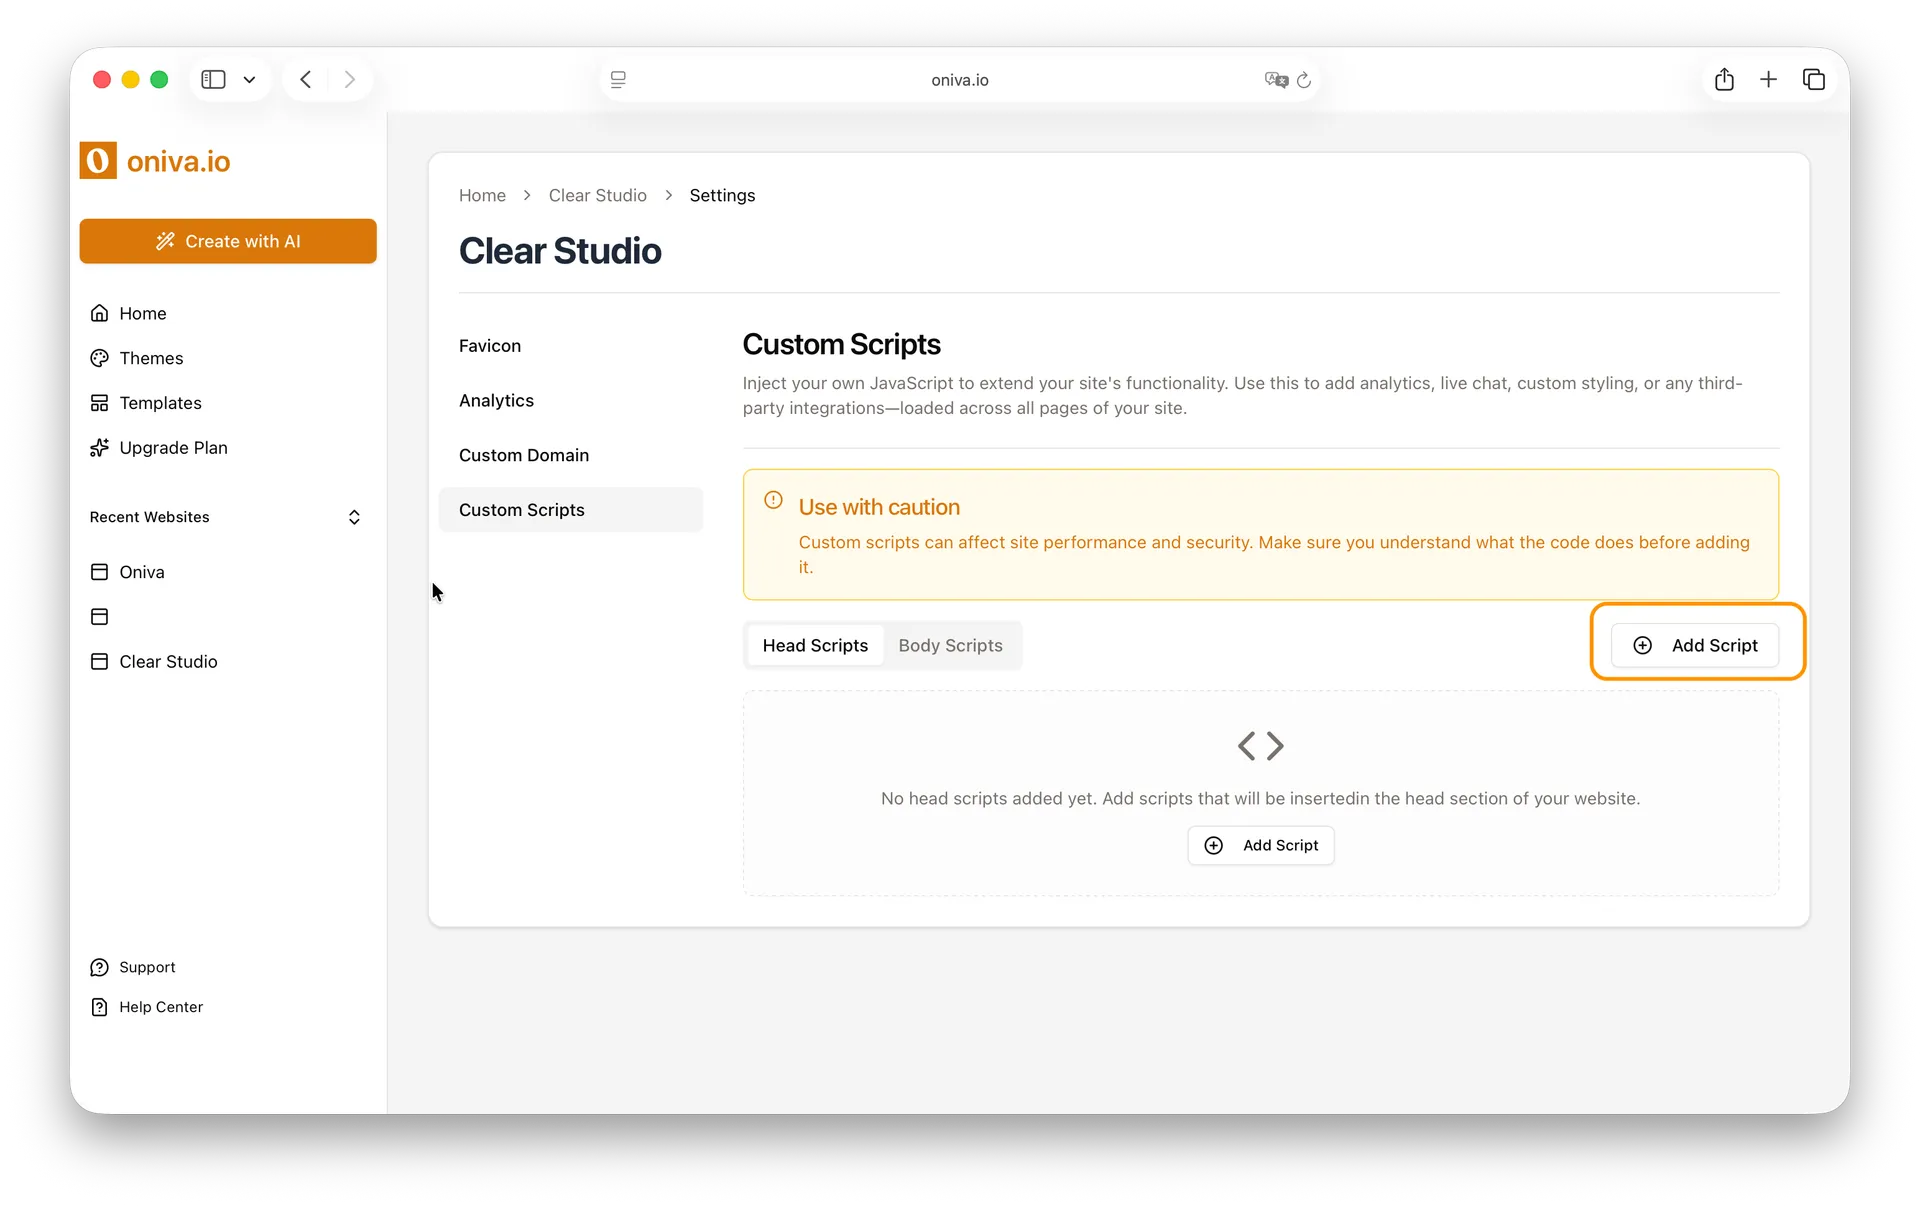
How to configure a Custom Script
1 - Click on Add Script:
In the Custom Scripts section, click the Add Script button to begin.
2 - Give your script a name:
Enter a clear, descriptive name so you can easily identify this script later.
3 - Choose where to load It
Select whether you want the script to load in the Head or the Body of your website.
4 - Paste your script
Insert your JavaScript code into the input field. This can be a tracking code, widget snippet, or any third-party integration.
Important: Make sure your code is placed between <script> and </script> tags so it runs correctly.
5 - Save your changes
Click on Add Script to save it.

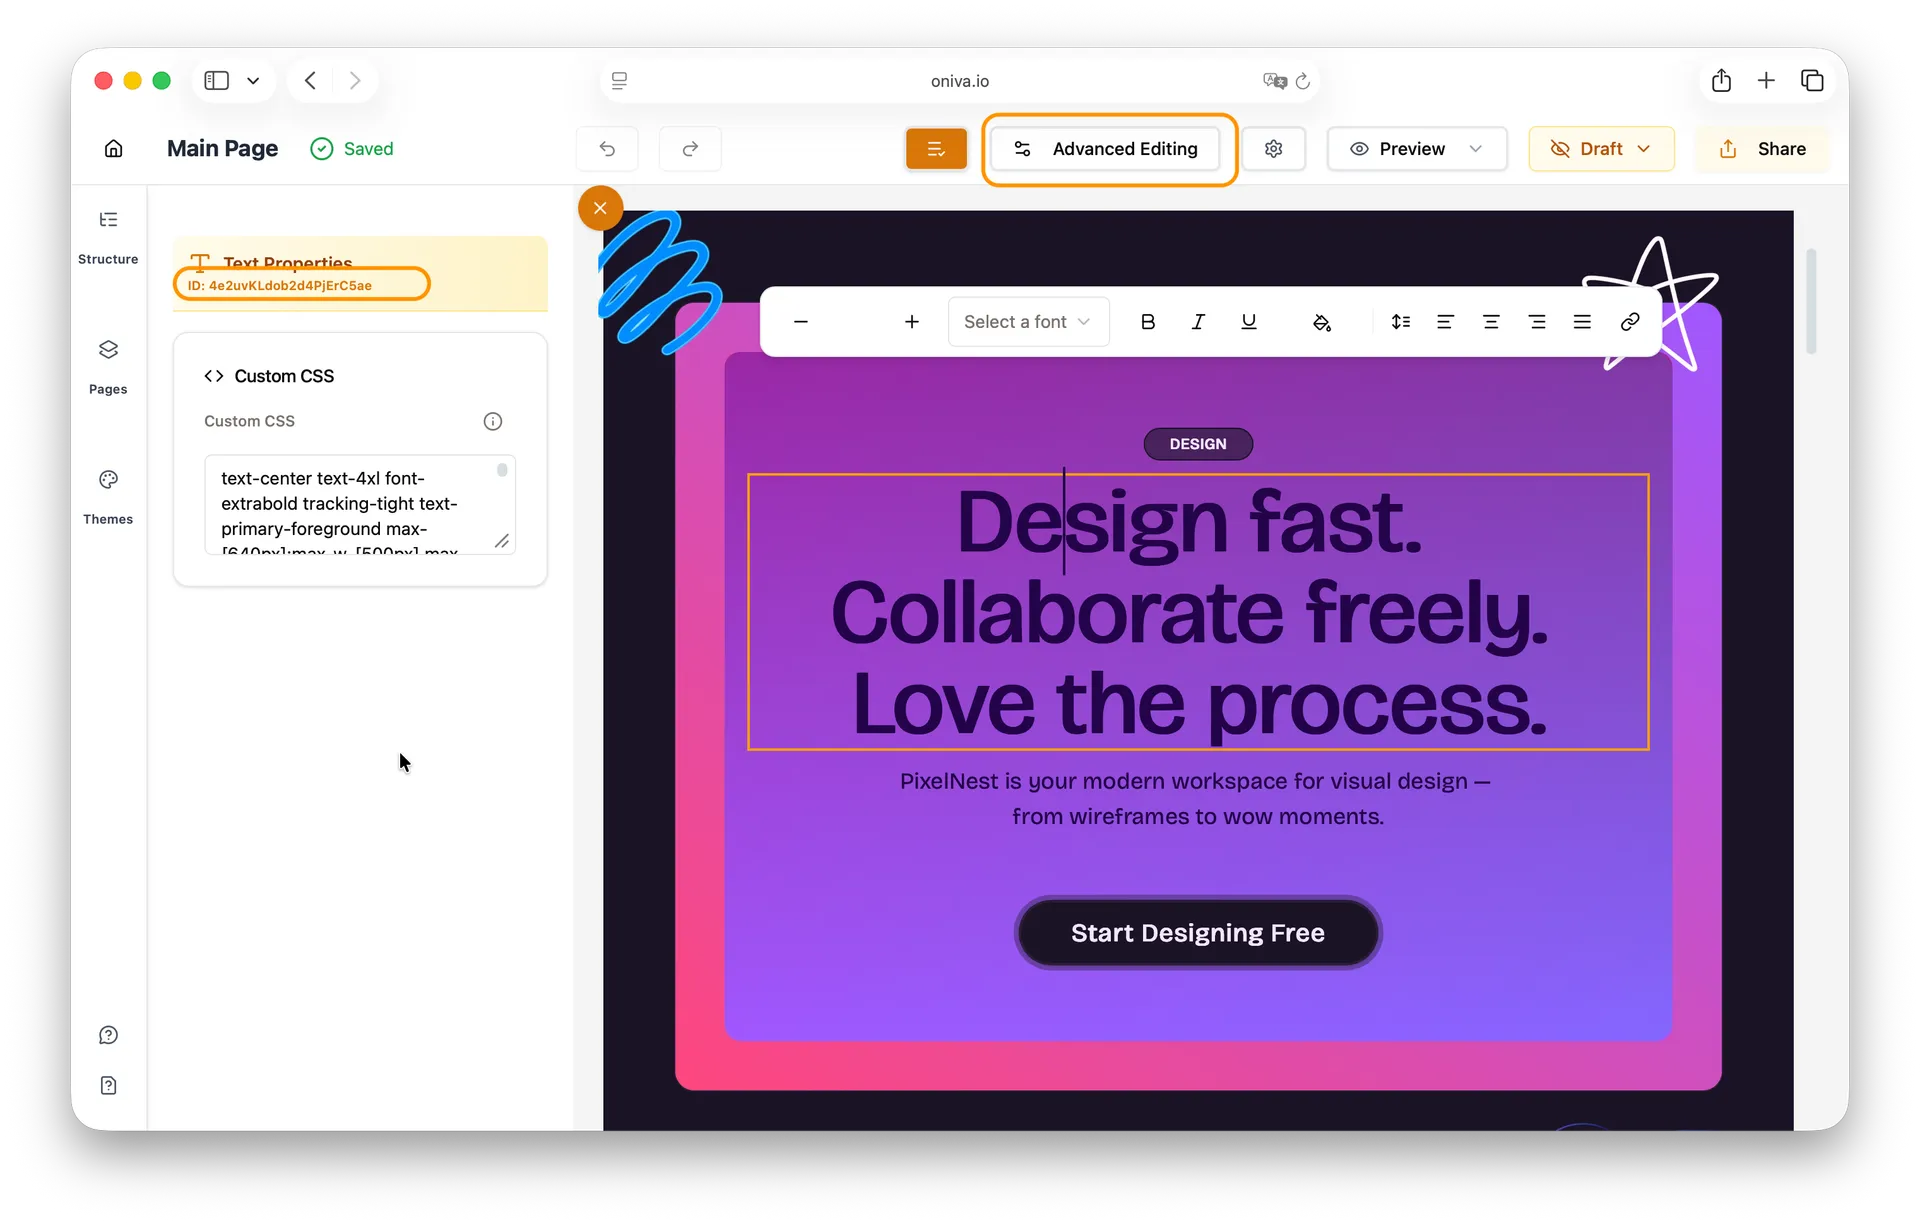
Tip: How to Find an Element ID in Oniva.io
If your custom script needs to target a specific element on your website, you can easily find its element ID inside the editor:
1 - Open the website editor and click on the element you want to target.
2 - The left panel will open showing that element’s edition settings.
3 - Right below the element’s title, you’ll see its Element ID. That’s the ID you’ll use in your script.

👉 If the element is a text block, switch from Easy Editing to Advanced Editing mode to see its Element ID.
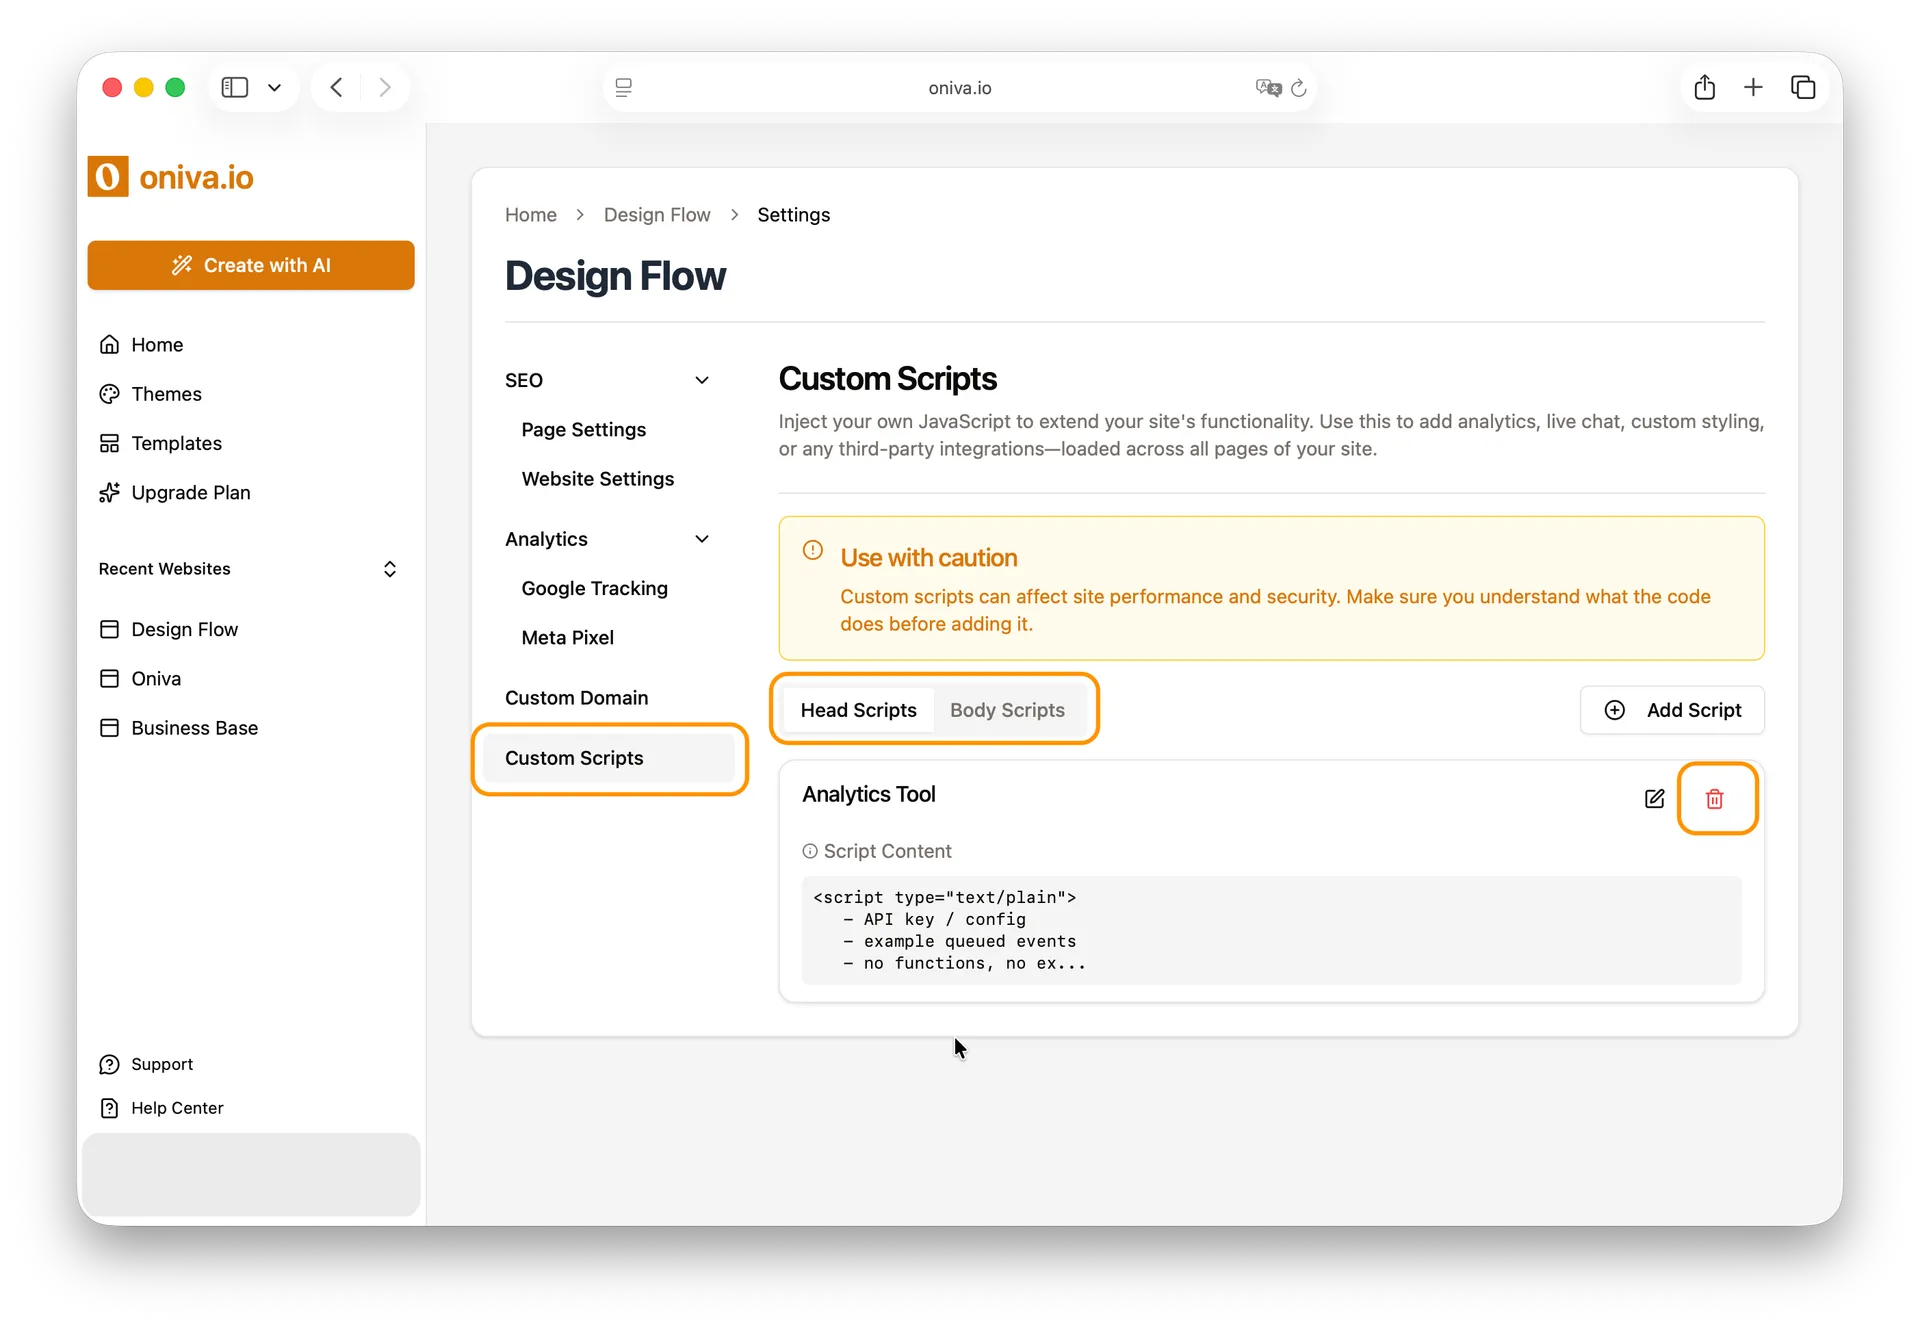
How to edit a Custom Script
1 - Go to Custom Scripts:
Open Website Settings and go to Custom Scripts.
2- Find your script
Your scripts are organized under two tabs: Head and Body. Locate the script you want to update in the correct panel and click the Edit button.
3- Update the code
Make your changes directly in the code field.
4- Save your changes
Click Update Changes to apply the new code across your website.
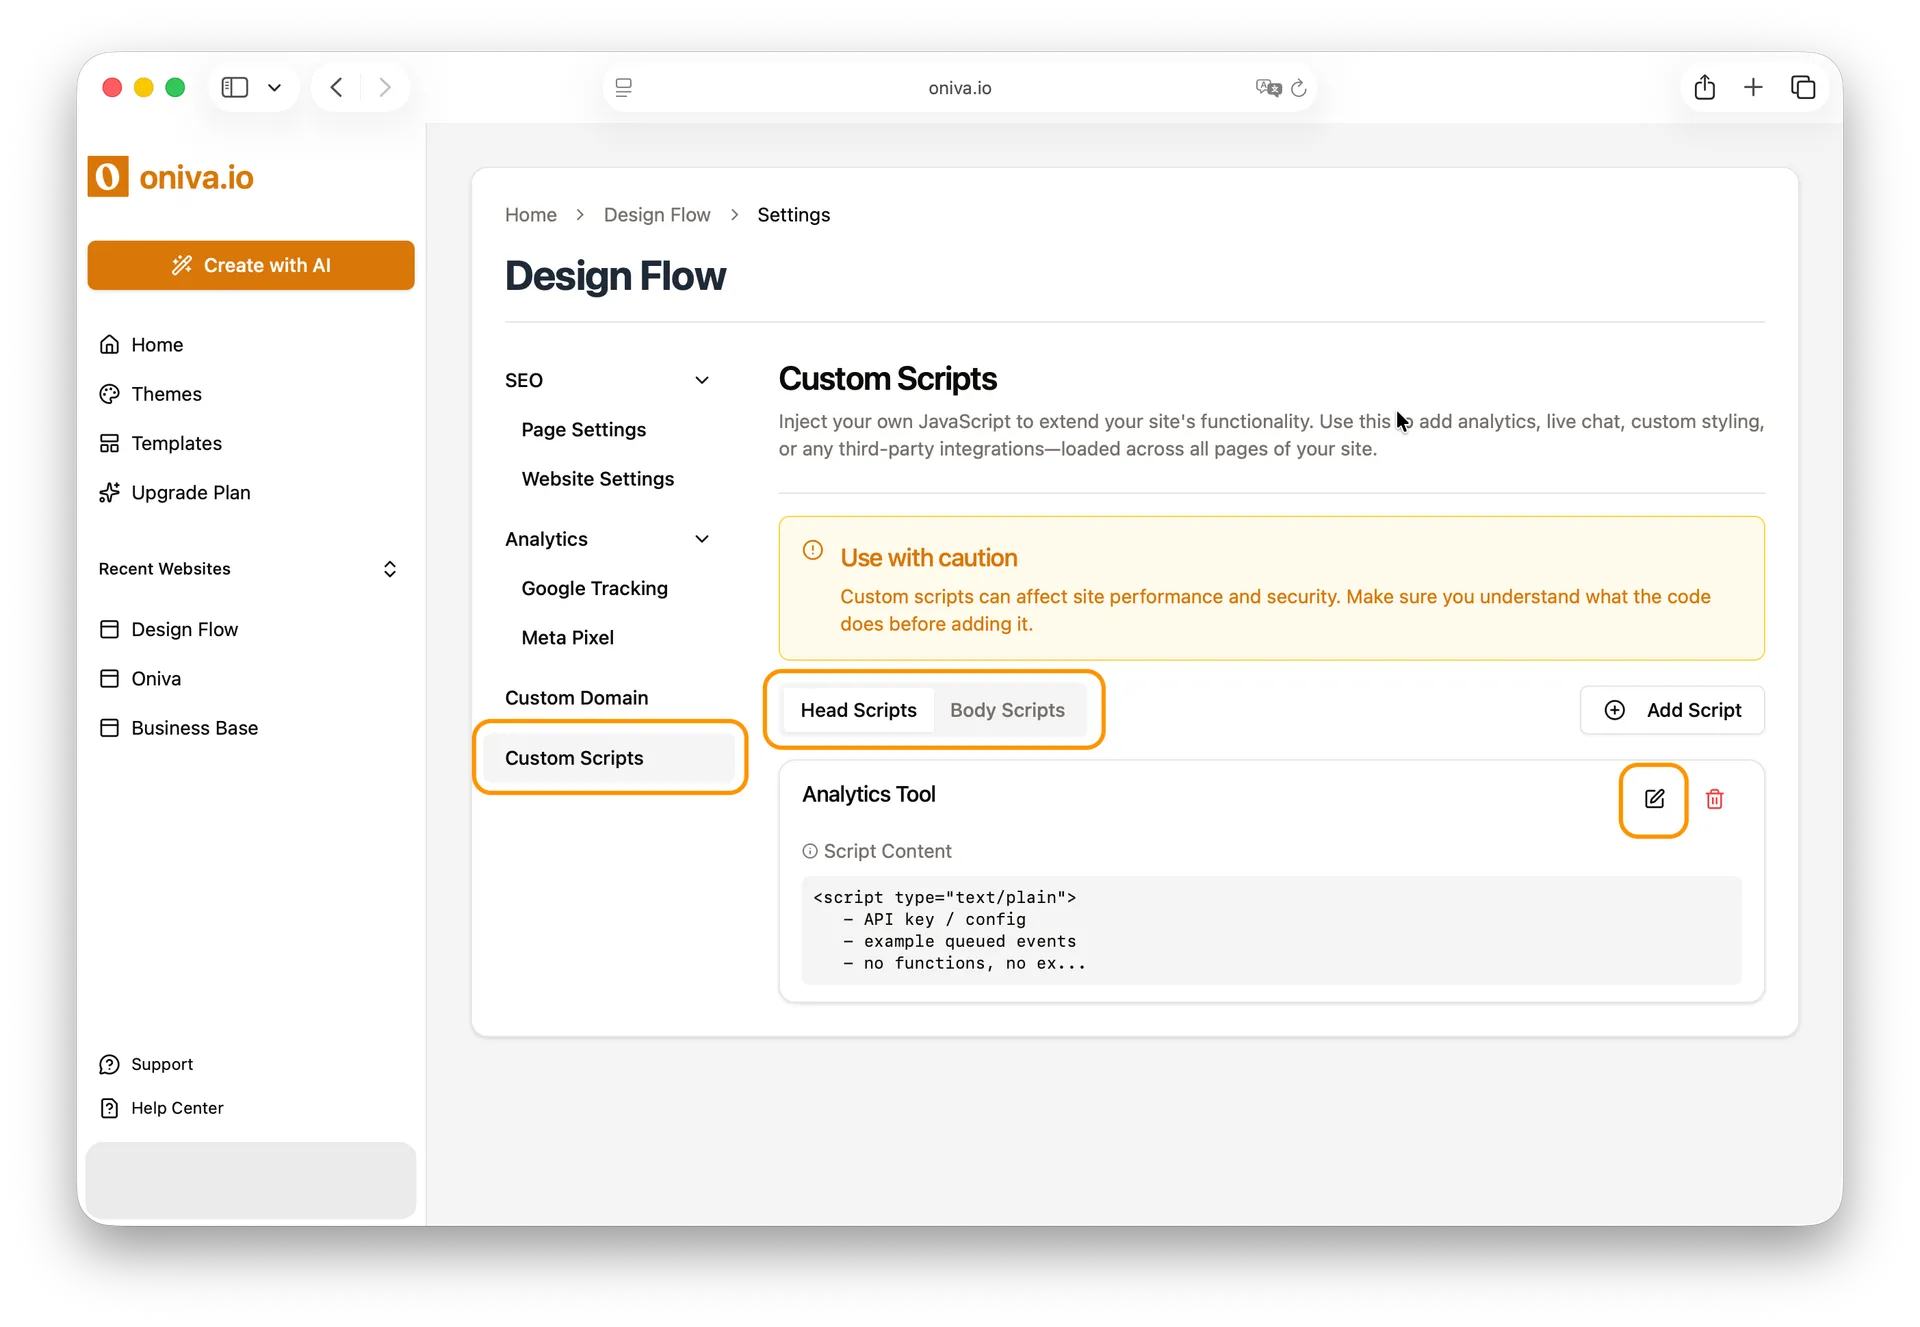
How to delete a Custom Script
1 - Go to Custom Scripts:
Open Website Settings and go to Custom Scripts.
2- Find your script
Your scripts are organized under two tabs: Head and Body. Locate the script you want to update in the correct panel and click the Edit button.
3- Delete the script
Click on the trash icon of the script you want to delete.