Editing Modes
For all users
Updated Sep 2025
Oniva.io gives you two ways to edit your website, depending on how much control you want over content and design. You can choose Easy Editing for quick updates and simple changes, or Advanced Editing for complete control over every element and style on your pages.
Finding and changing the Editing Mode
By default, all pages are generated in Easy Editing mode, which provides simple, guided controls to update content and rearrange sections.
To change the editing mode:
1 - Open the page you want to edit in the Oniva.io editor.
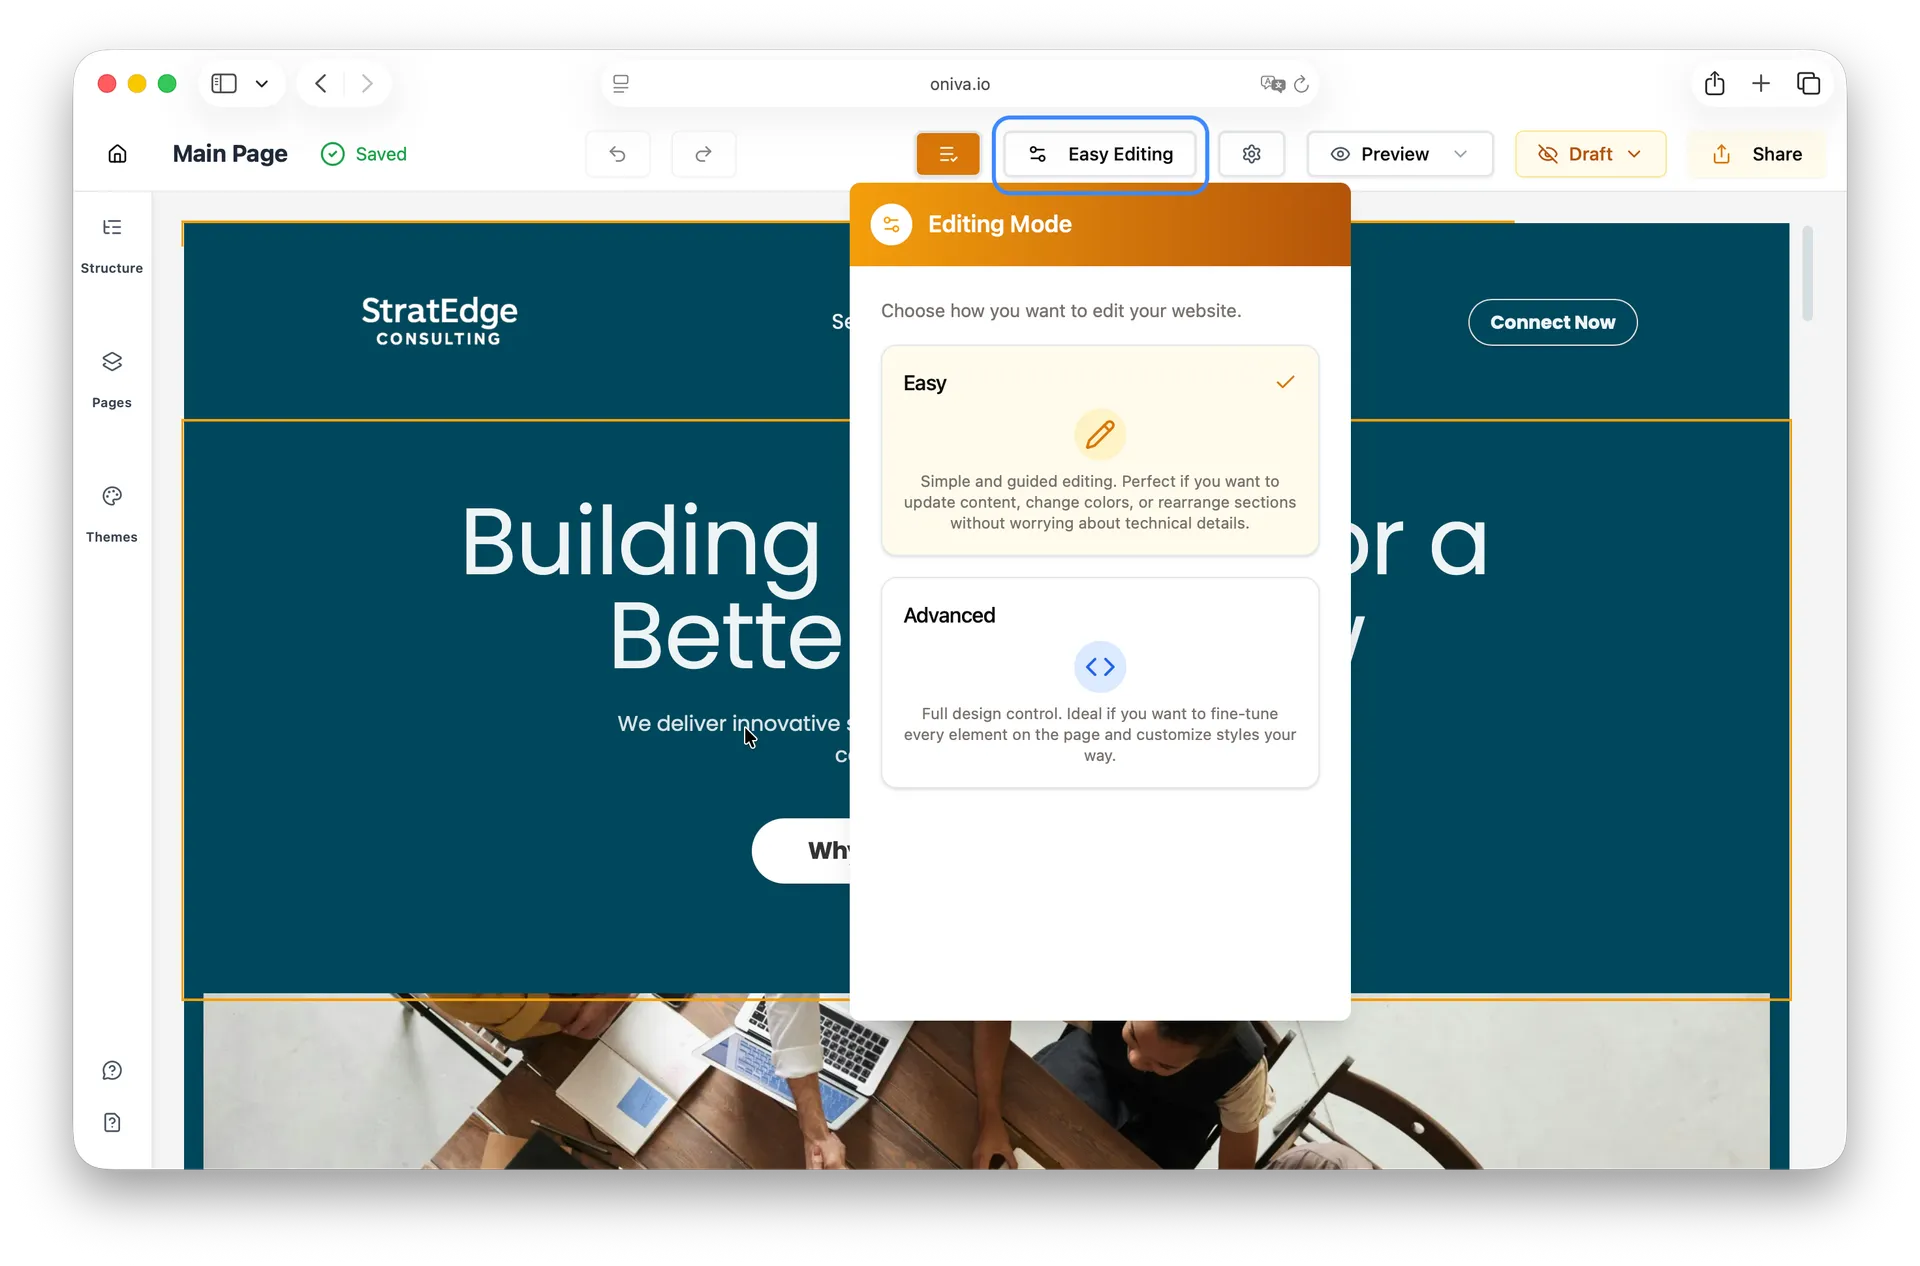
2 - At the top of the editor, locate the Editing Mode button and click on it. The button’s title shows the current editing mode being used on your page.
3 - Select Advanced Editing if you want full control over individual elements, styles, and custom CSS.
4 - Switch back to Easy Editing anytime for a simpler, guided experience..
This allows you to toggle between modes based on the level of control you need for each task.
Easy Editing
Simple and guided editing, perfect for updating content, changing colors manually, or rearranging sections without worrying about technical details. No code or CSS knowledge is needed—controls are intuitive, making it ideal for quick changes.
In Easy Editing, only the pre-selected elements can be edited. Simply hover over an item to highlight it, then click to make your changes.
If the hovered element is a text, you can edit it using the toolbar that appears above it. For other types of elements, the editing is done through the panel that opens on the left side of the screen.
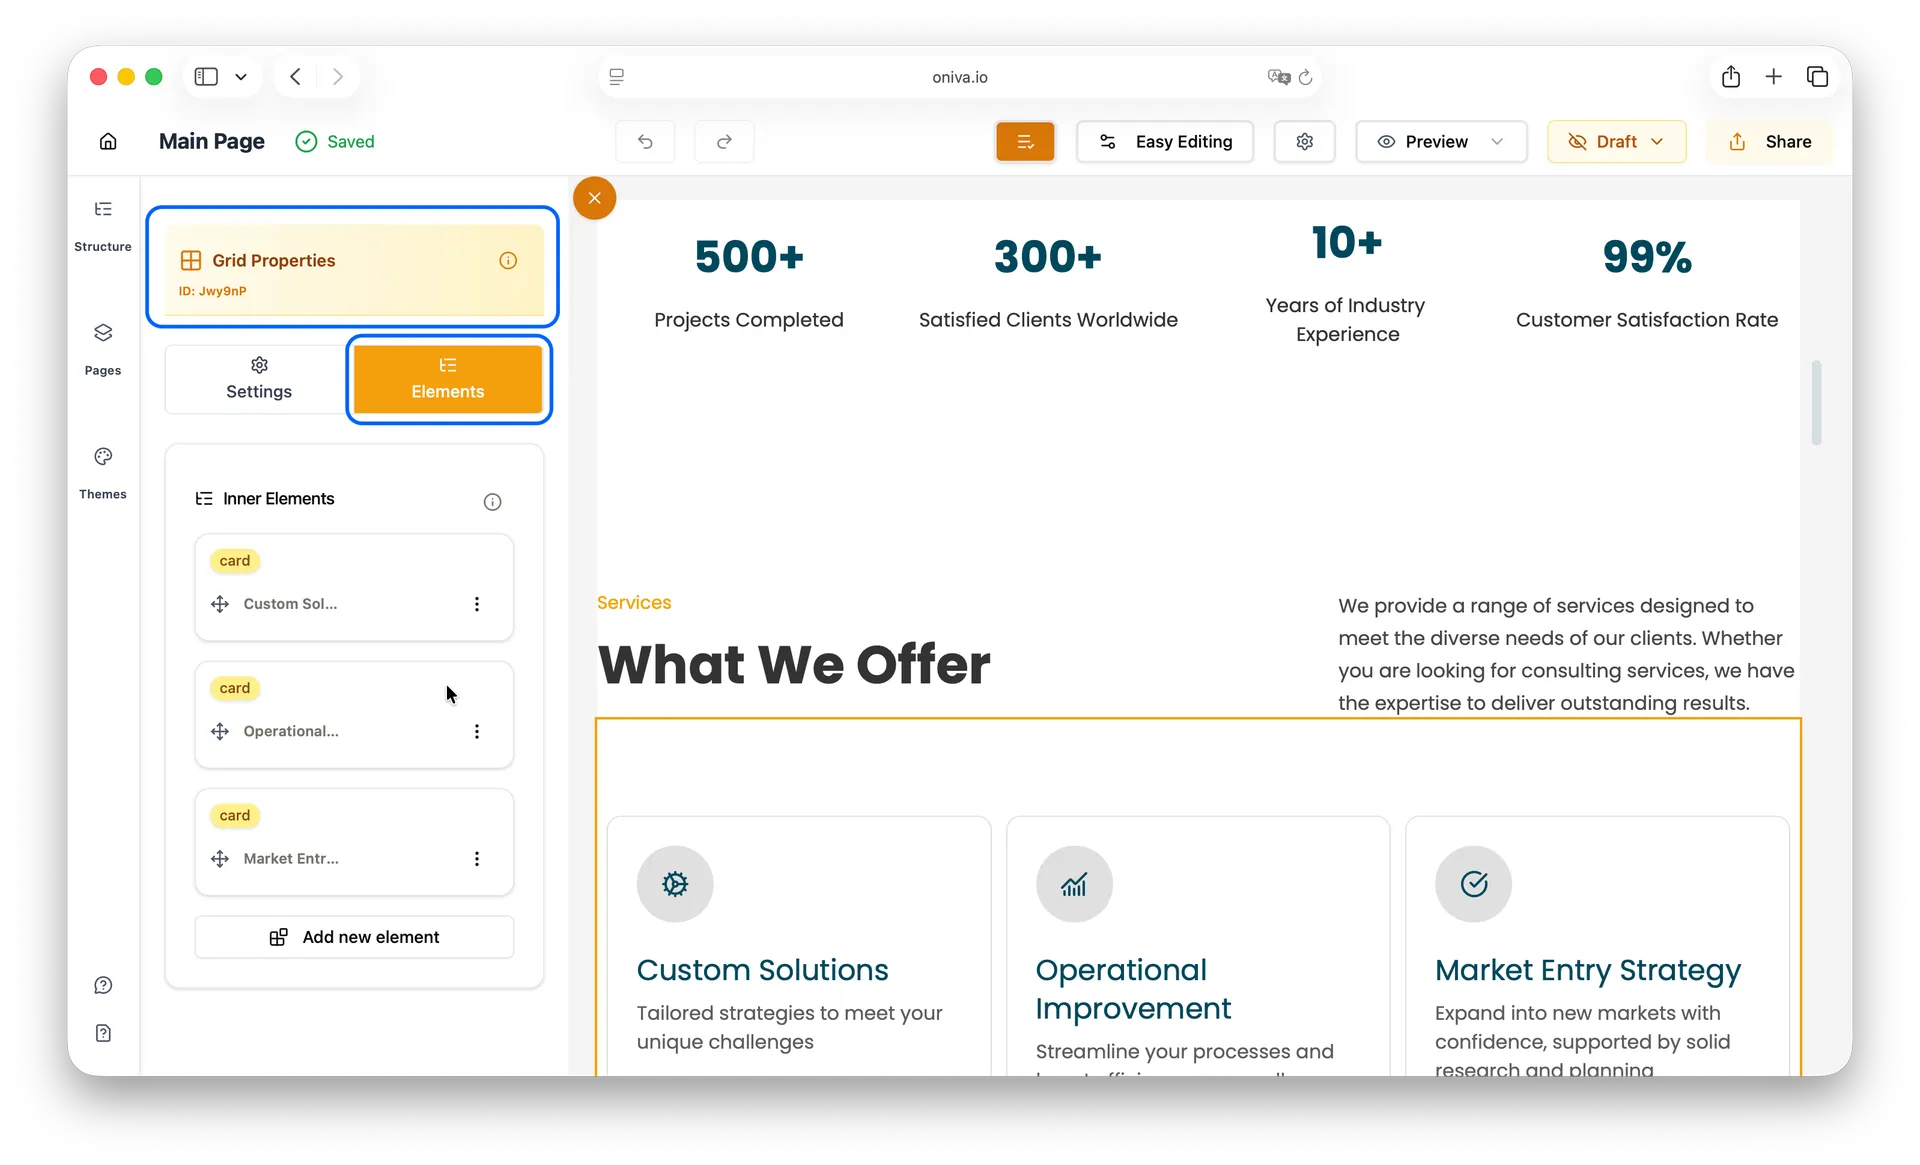
In Easy Editing mode, you can only add new elements inside a grid. A grid is a structured layout that organizes content into rows and columns, keeping your section clean and aligned. To add a new element, open the left panel, go to Elements, and either duplicate an existing element or click Add New Element to select from our gallery of pre-designed block templates.
Advanced Editing
Full design control, ideal for users who want to fine-tune every element on the page. You can edit individual elements, add custom CSS, and enjoy maximum flexibility and creative freedom. Perfect for users who want to fully customize the look and feel of their website.
In Advanced Editing mode, you have access to all elements that make up your page. When you click an element, the left-side editing panel opens with two more tabs: Elements and Advanced.
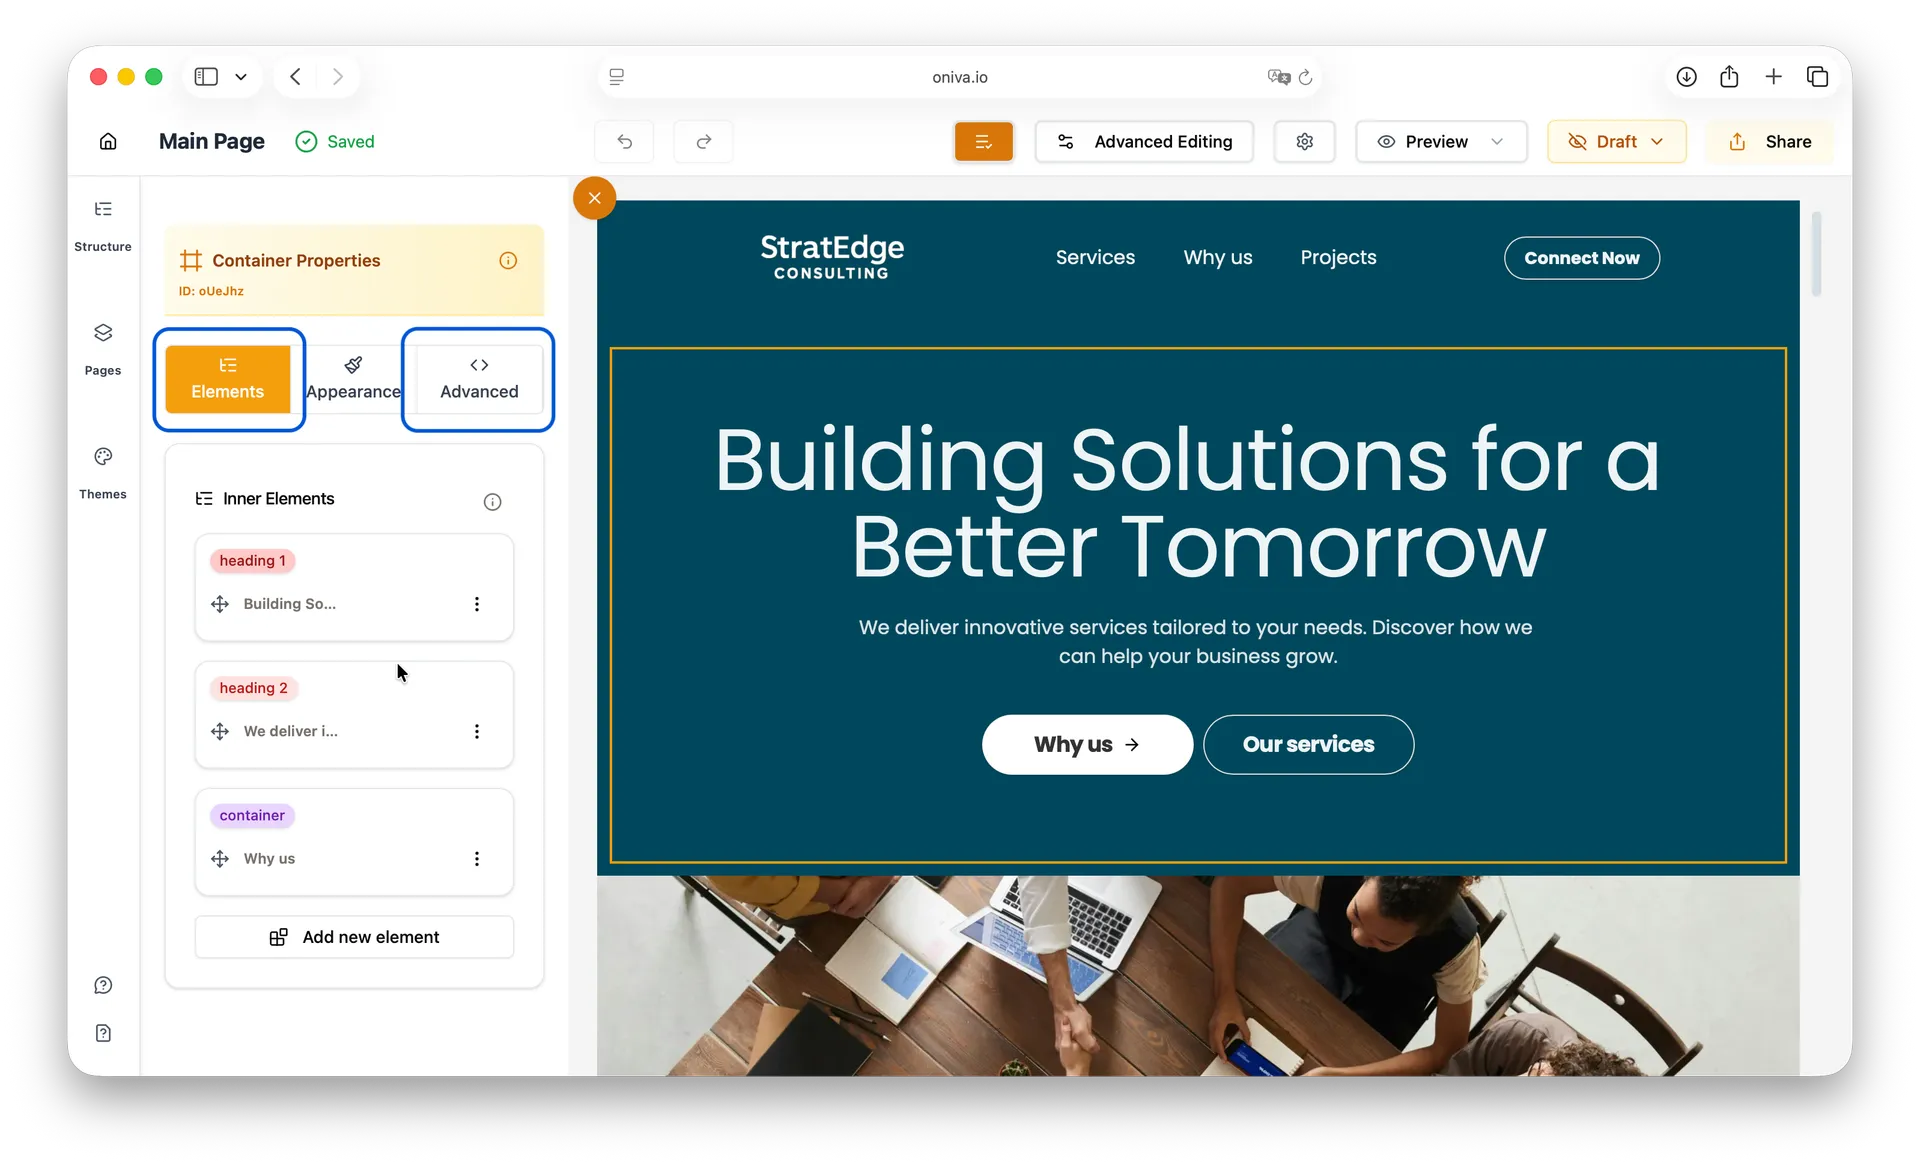
Elements:
Shows all child elements of the element you selected, allowing you to edit them individually.
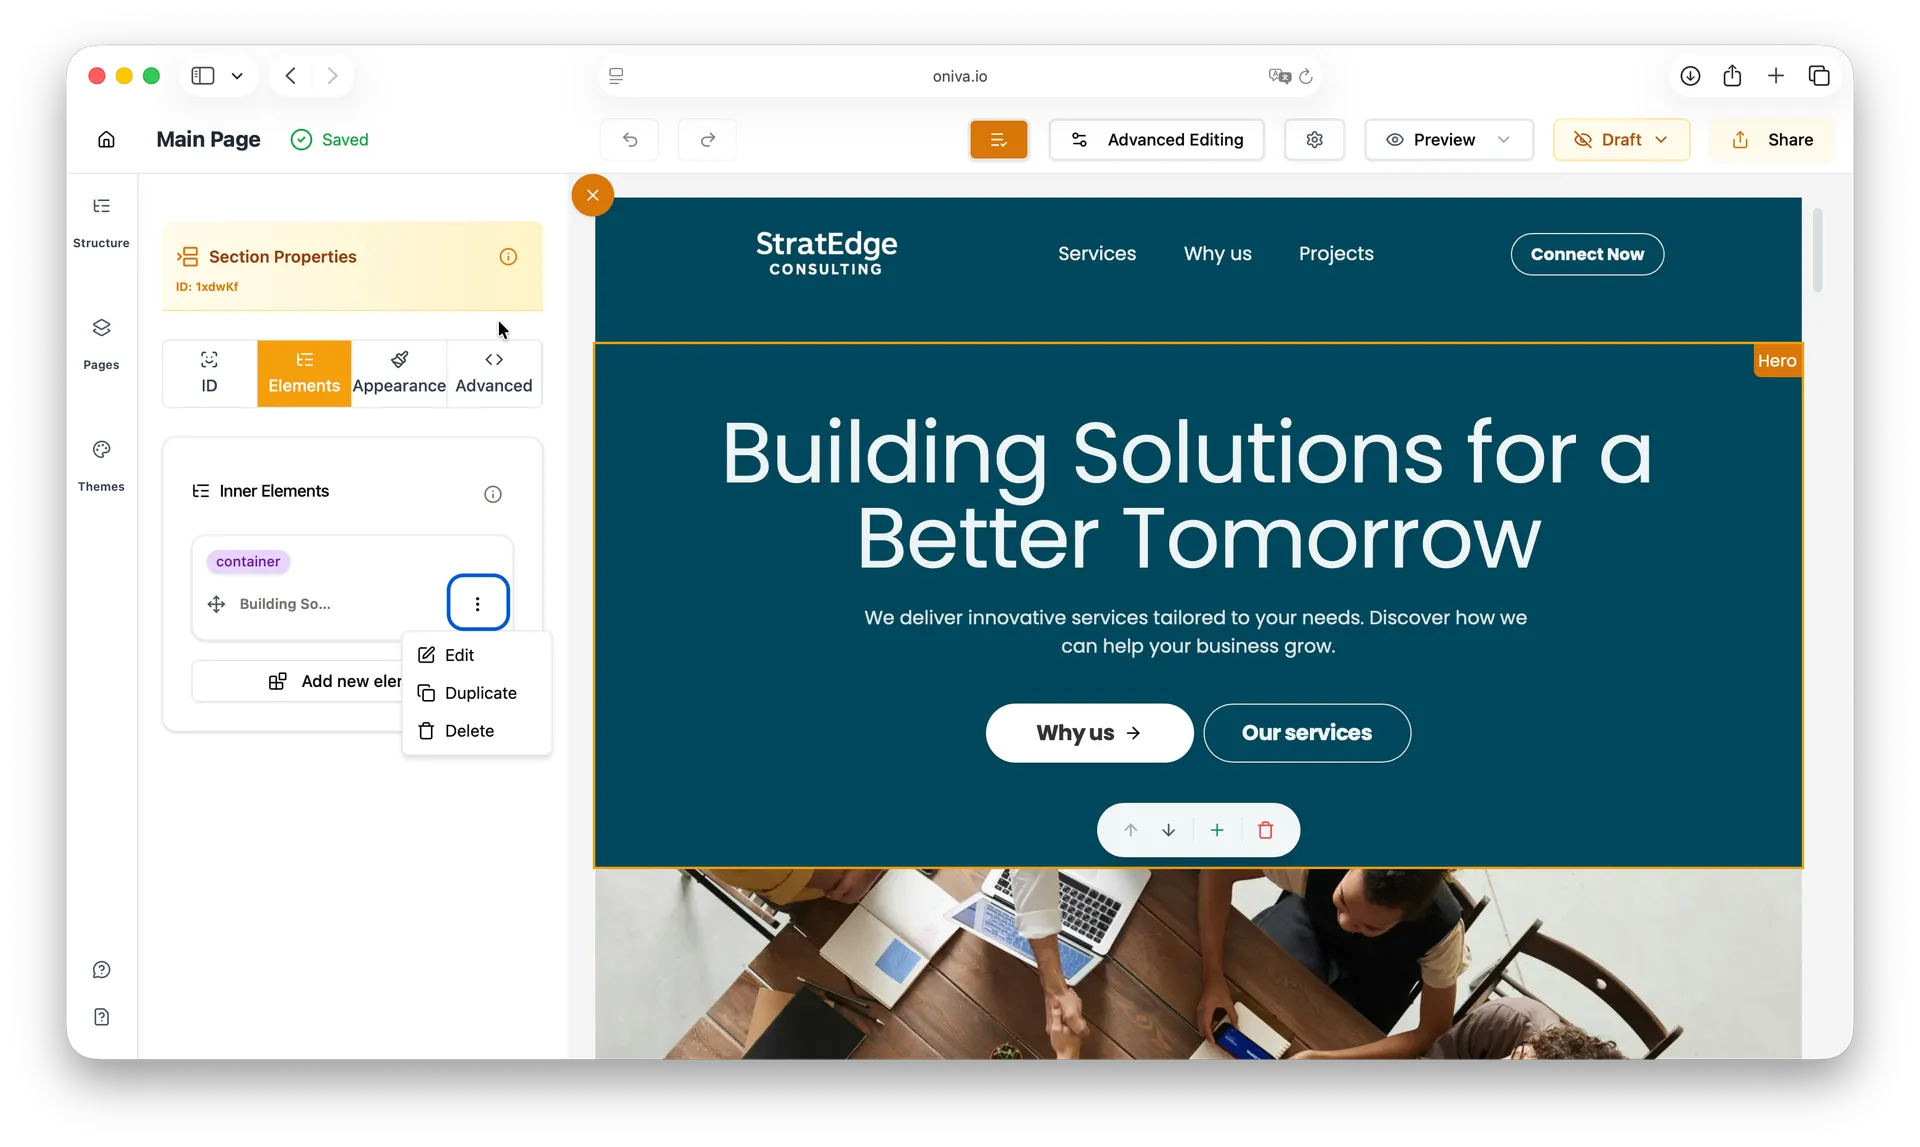
Tip: In Advanced Editing, you can access all elements on the page. Hovering to navigate can be confusing, so it’s better to click the section first and explore its child elements in the Elements tab on the left panel. To edit, click the three dots next to the element you want to edit and click Edit.
Adding New Elements in Advanced Editing Mode
In Easy Editing mode, the Elements panel only appears for grid elements on the page. This means you can add or modify elements inside grids, but other layout elements cannot be directly accessed for editing in this mode.
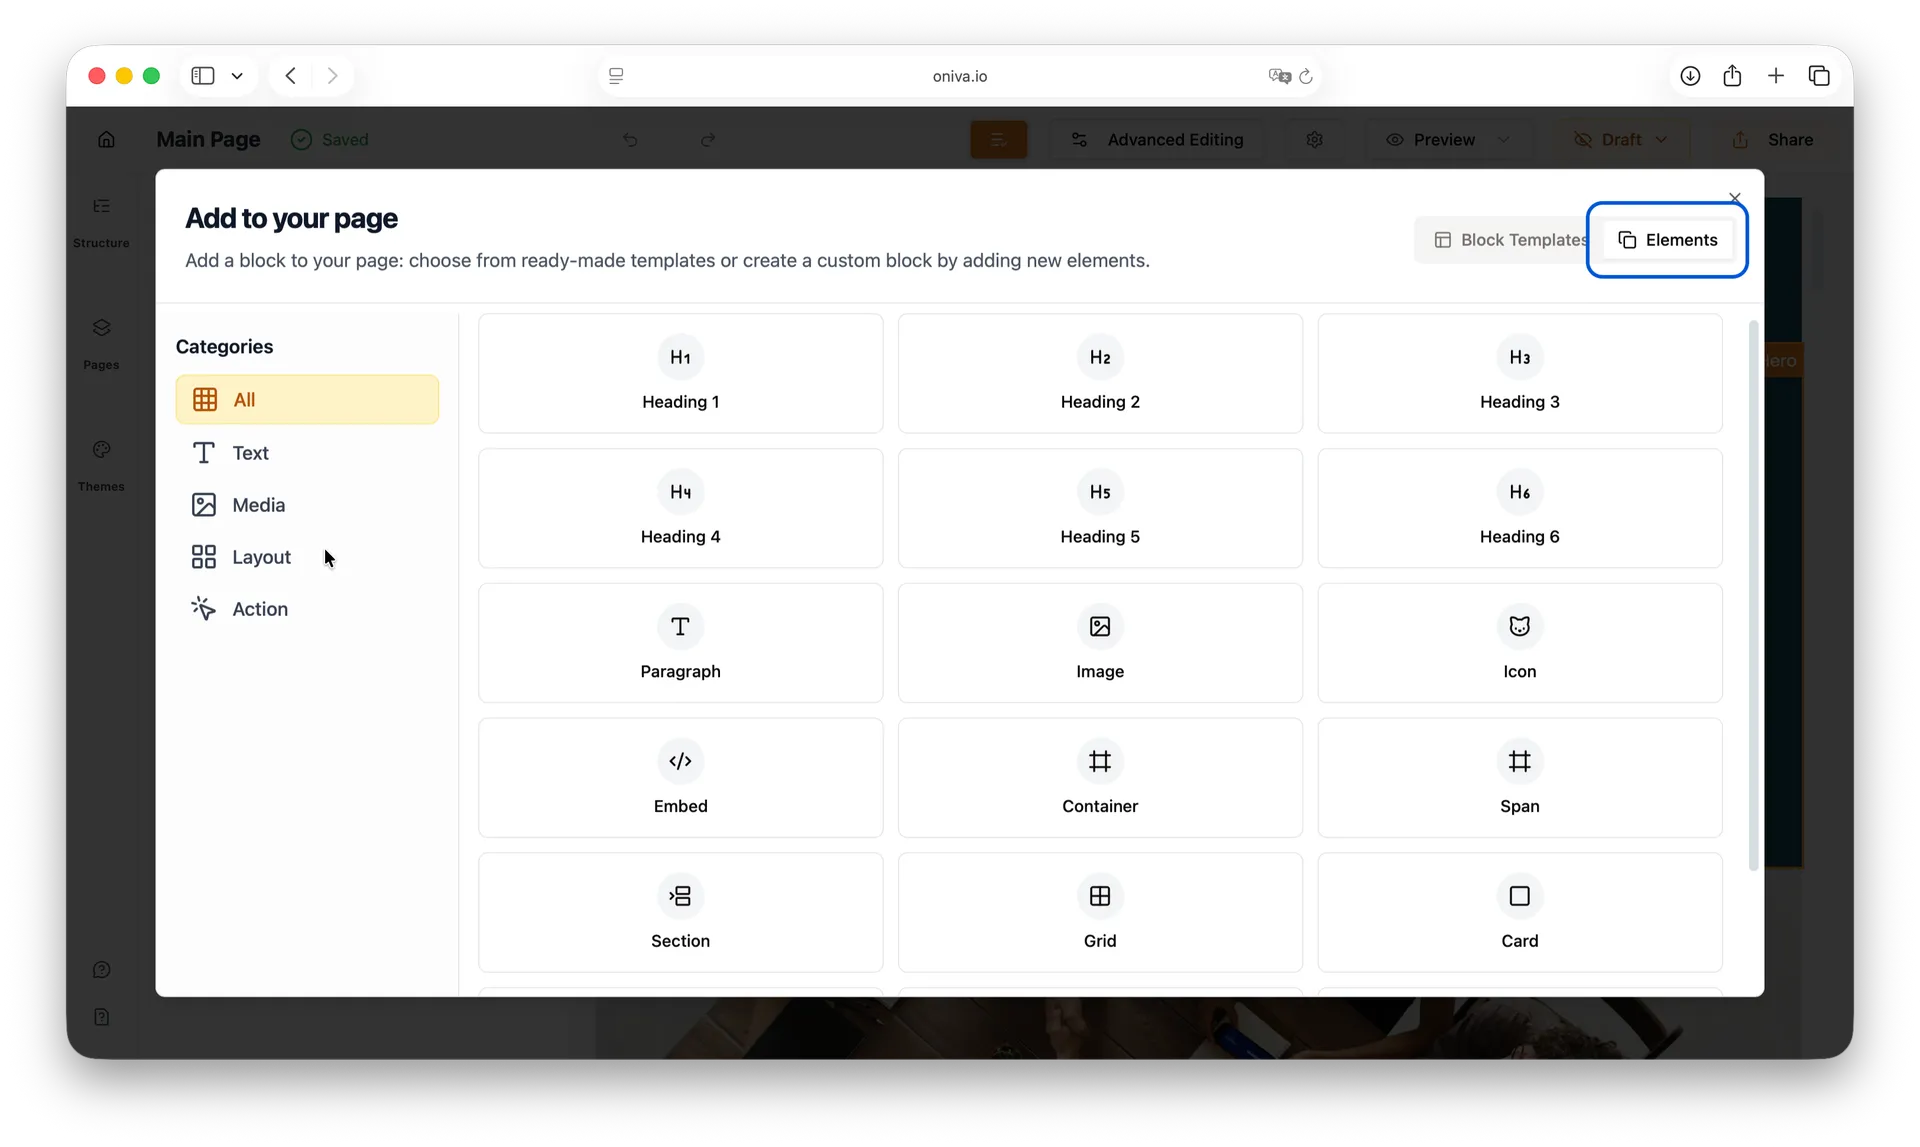
In Advanced Editing Mode, you can add block templates or completely new elements without many predefined styles. To do this:
1 - Click on the element under which you want to add a new element.
2 - The left-side panel will open automatically.
3- Go to the Elements tab in this panel.
4 - Click the Add New Element button.
5 - In the dialog, select the Elements tab on the right side and choose the element you want to insert.
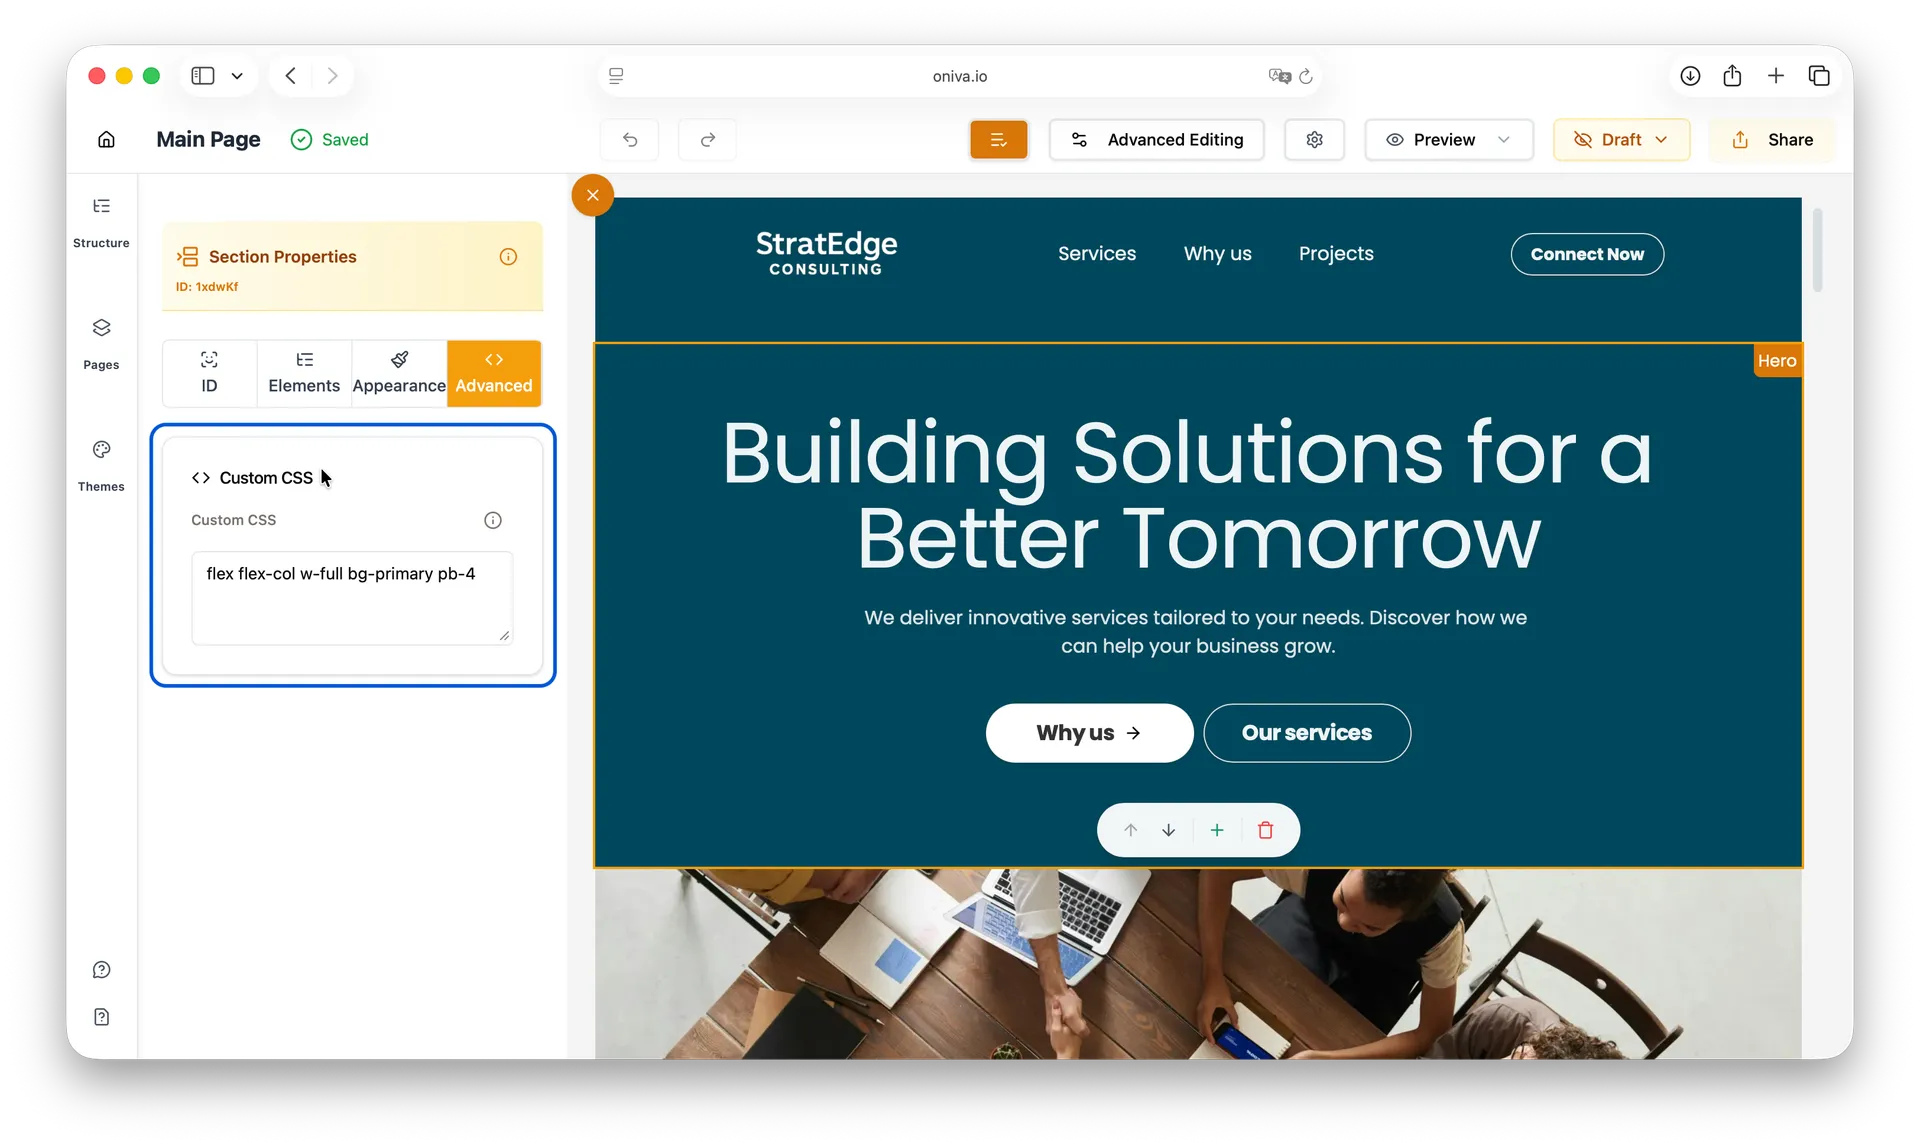
Advanced:
Gives you access to the CSS styles applied to the selected element, so you can modify them directly and have full control over the design.