Create New Page
For all users
Updated Sep 2025
Adding new pages to your website allows you to expand your content and organize information effectively. In Oniva.io, you can easily create, name, and structure new pages so they fit seamlessly with your existing site.
Create a new page
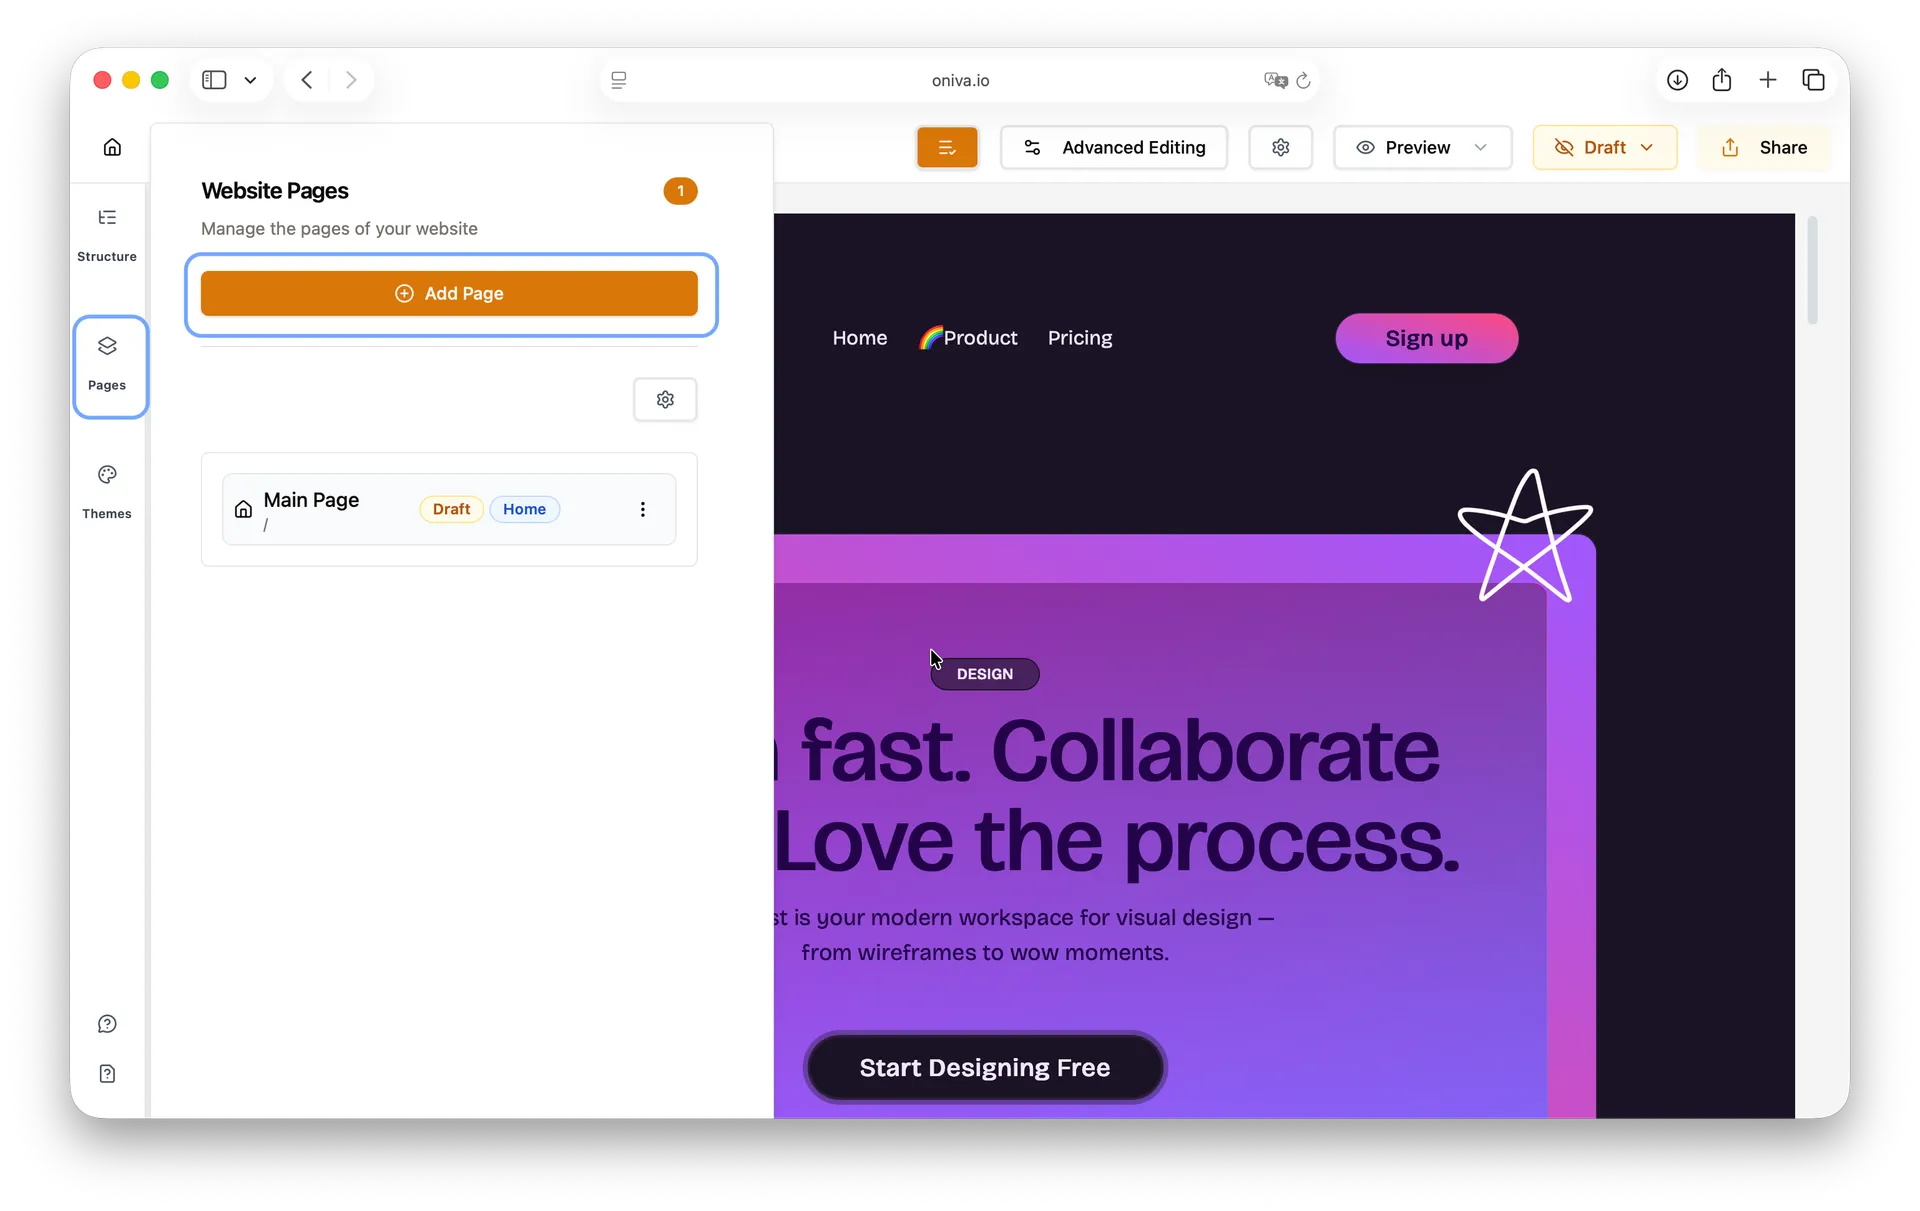
Inside the editor of the website you want to edit, open the Pages panel from the left sidebar. Click Add Page
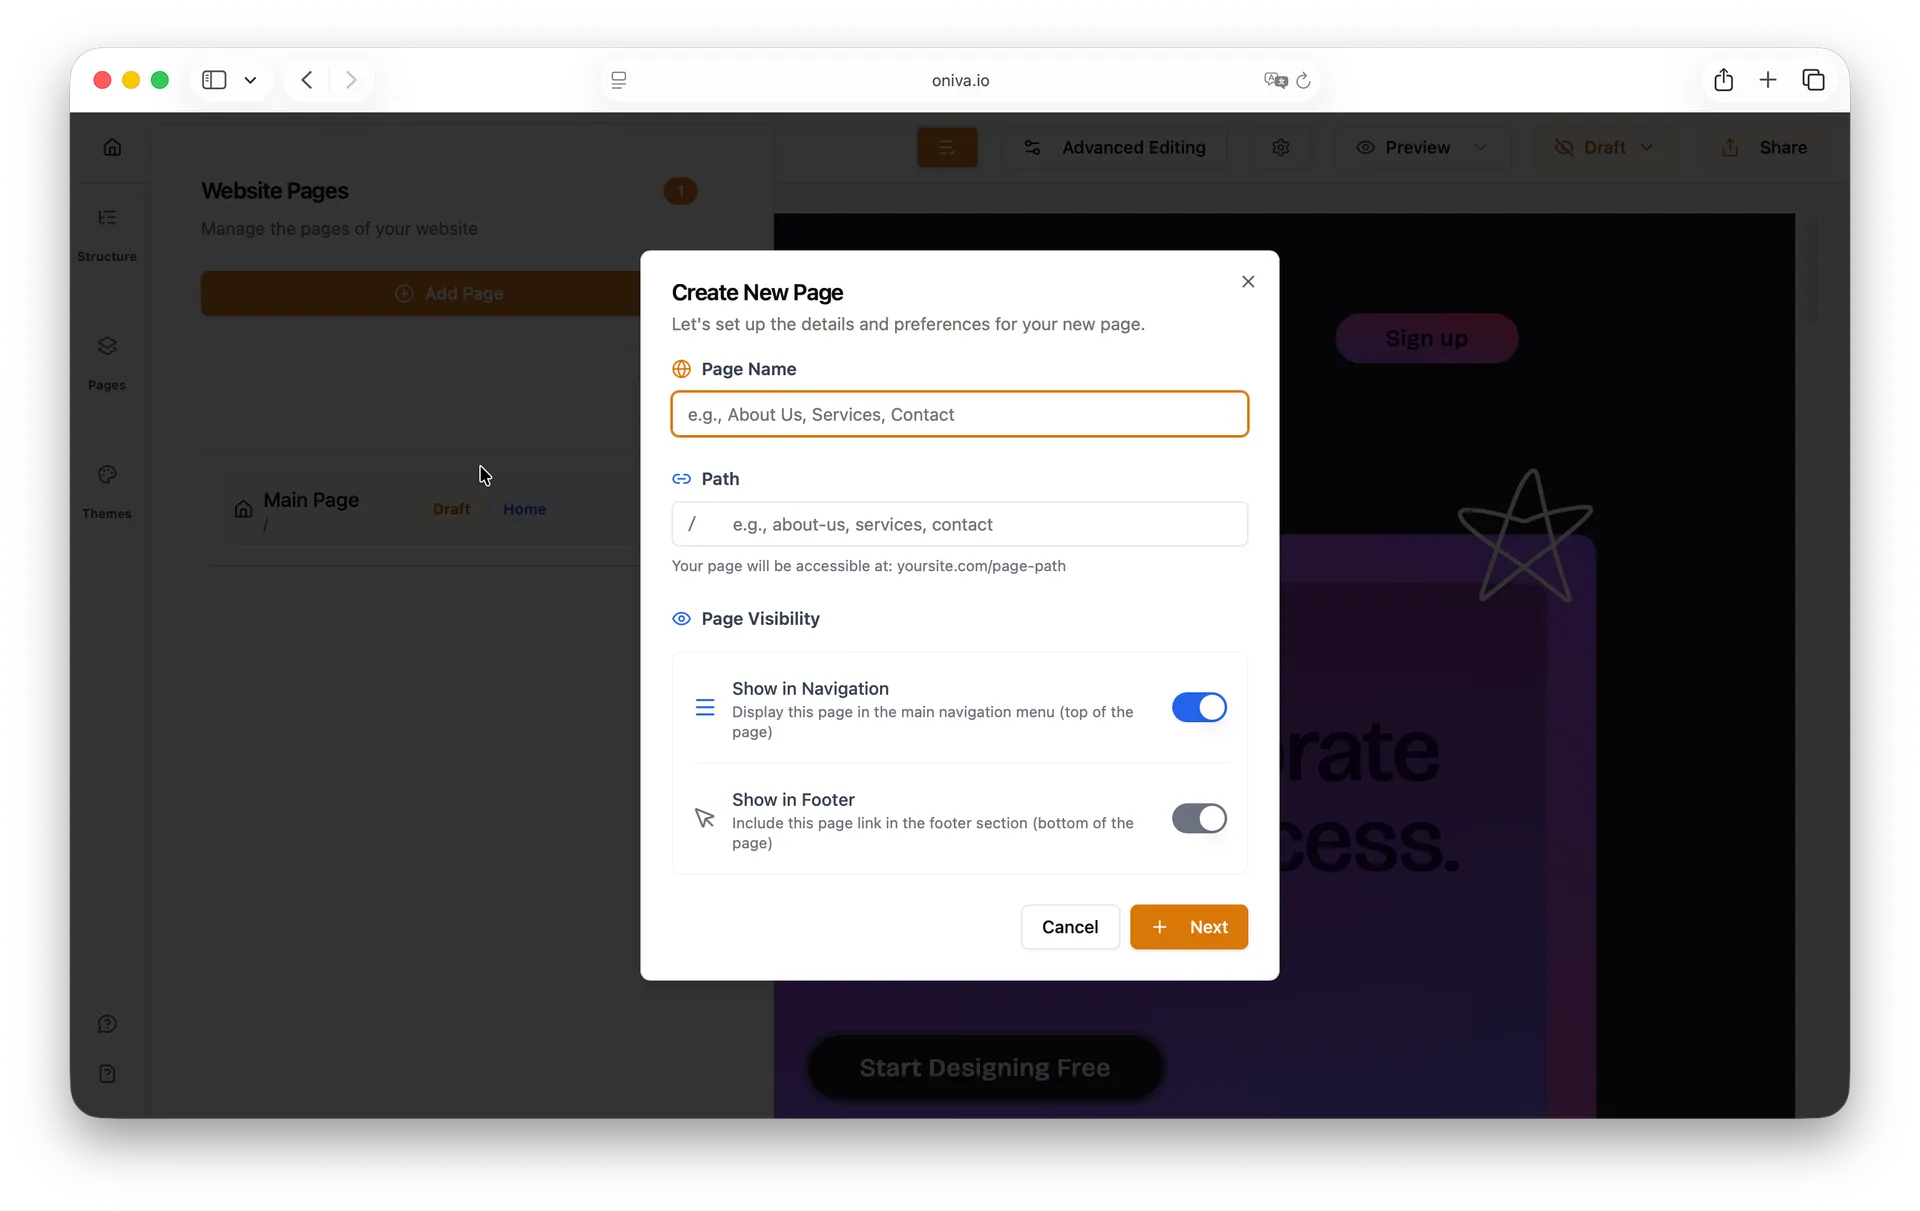
A screen will appear asking you to give the new page a name. This name is just for organization, so you can quickly recognize what the page is about.
Based on the name, a page path will be generated automatically, but you can edit it by simply clicking on it and typing your custom path. By default, the new page will appear in both the header and footer navigation of your website. If you don’t want it to be displayed there, simply switch the option off before continuing.
On the next screen, you’ll see a gallery of additional pages with different templates to choose from. Select the one that best fits your needs, and you’ll be redirected to the editor to start customizing it.
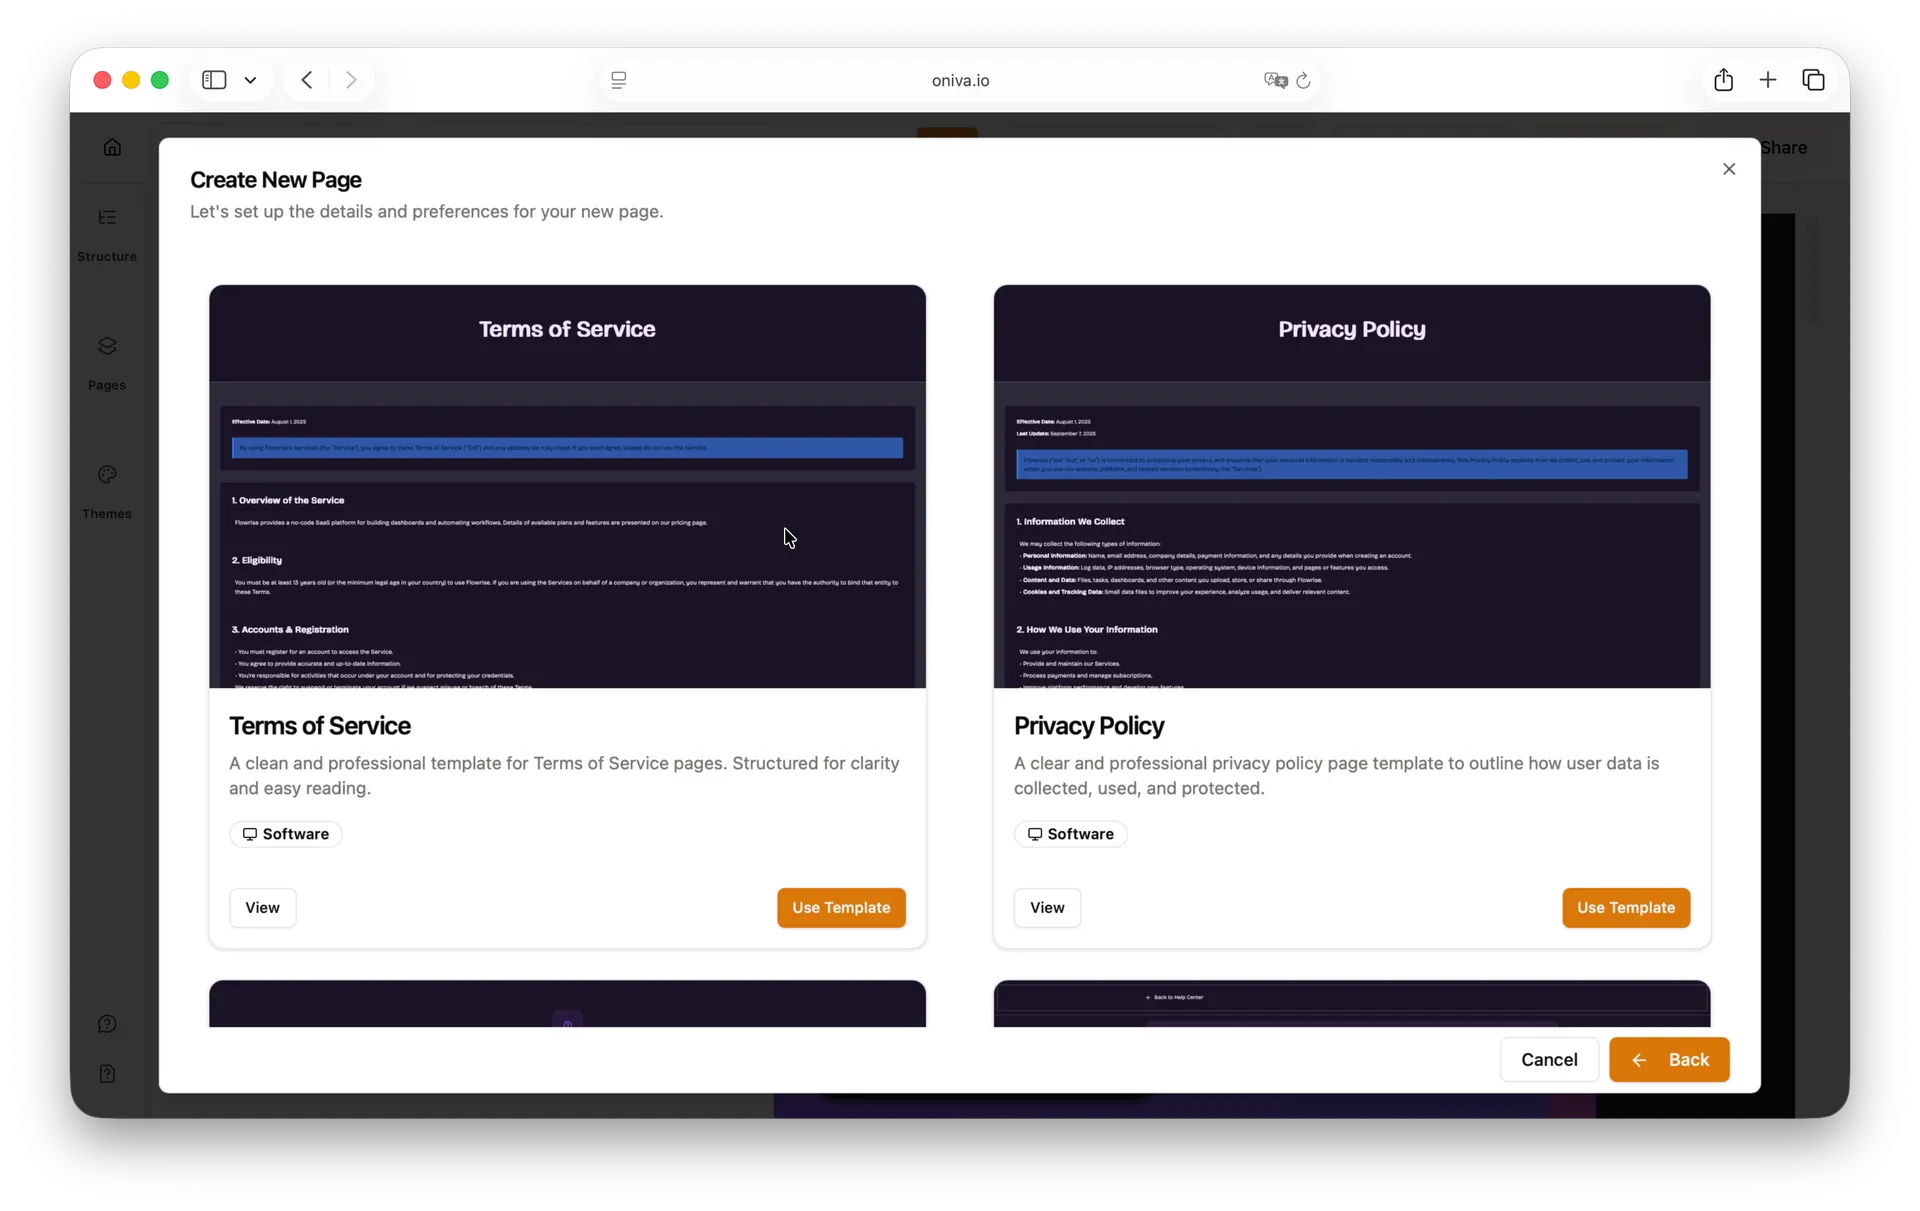
Note: All templates automatically apply your website’s theme, ensuring consistent colors and fonts across every new page you create.
At the moment, Oniva.io doesn’t generate content for additional pages with AI. However, this feature is already on our roadmap and will be available soon.
Manage your website's pages
The Pages menu in the left sidebar gives you all the tools to manage your website’s pages. From here, you can adjust settings, update content, and control how each page appears to your visitors.
To reveal all the available options for managing a specific page, simply click on the three dots on the card of the page you want to work with.
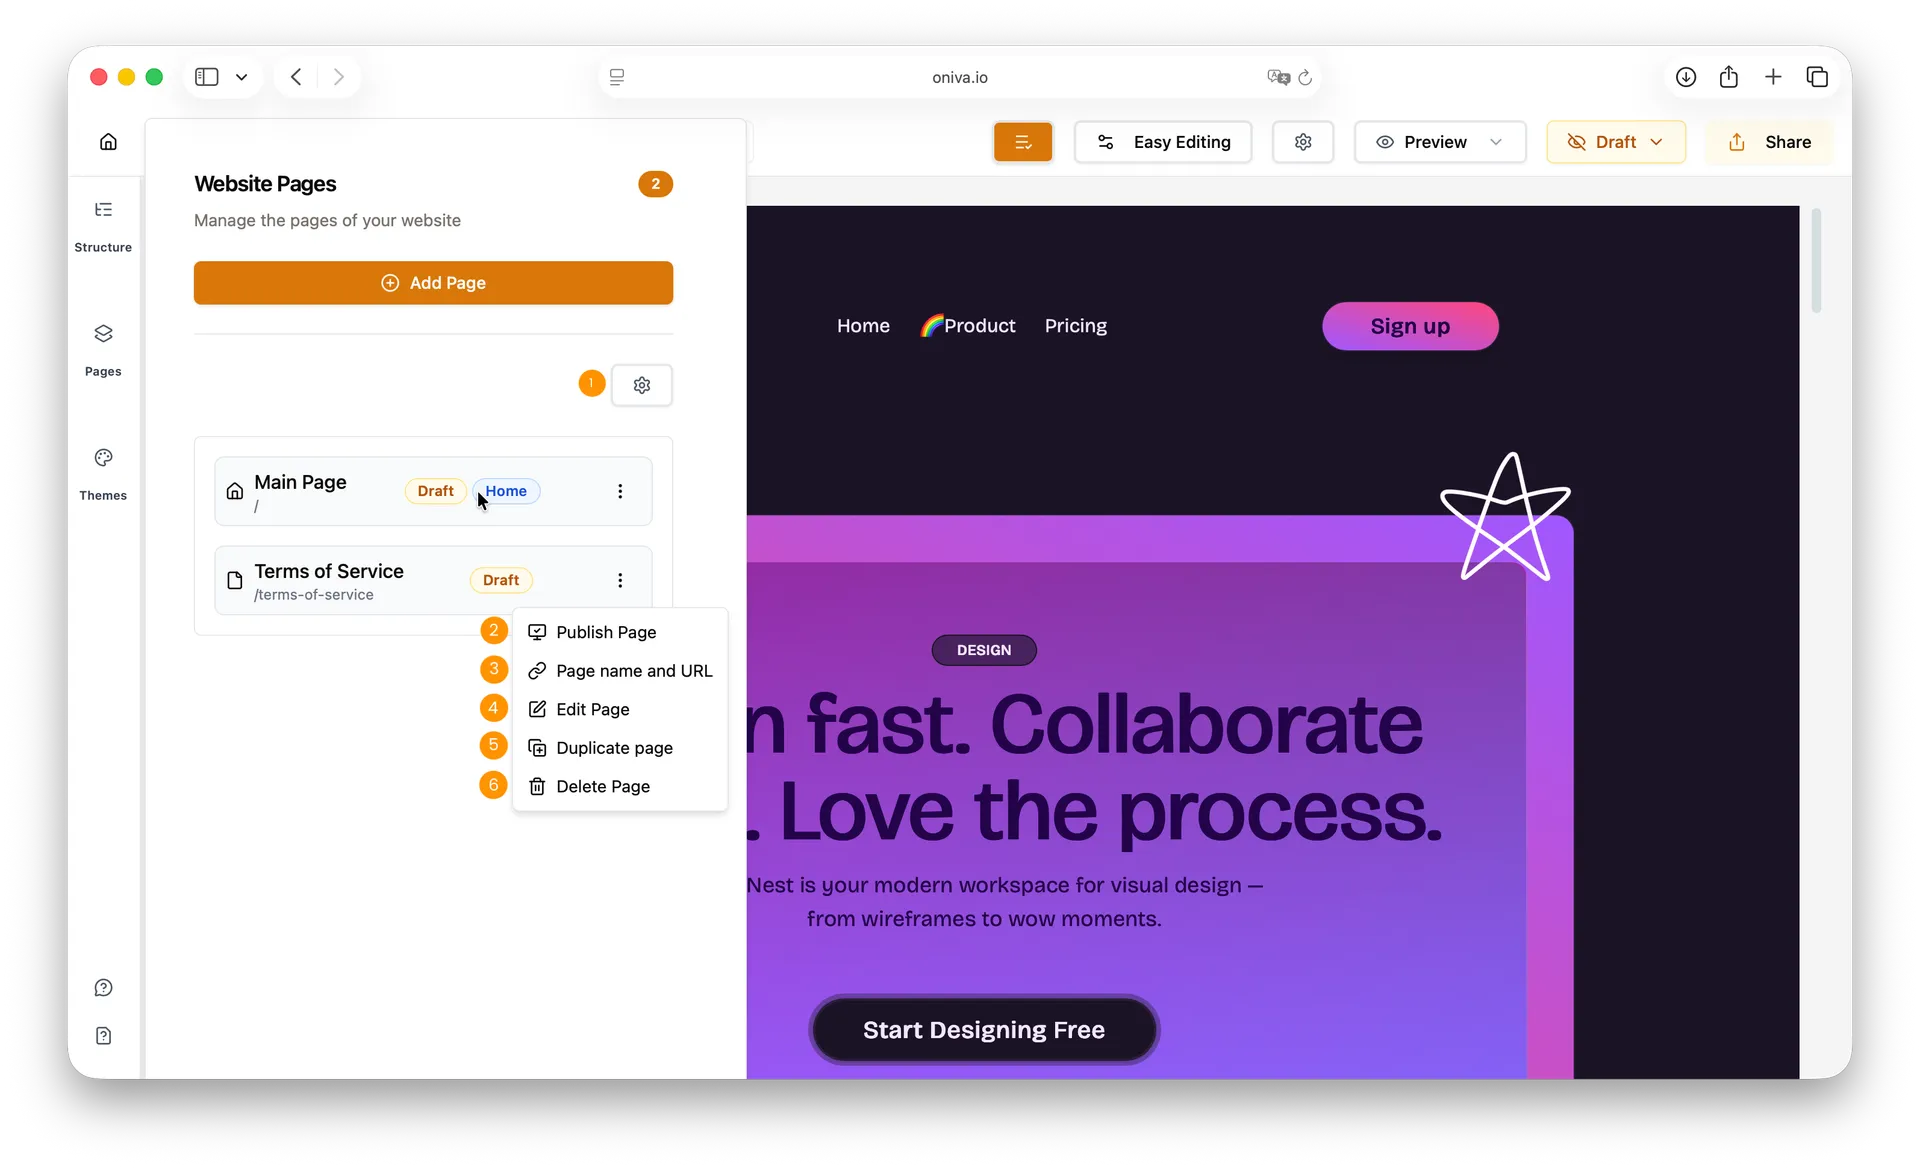
1 - Website Settings: Customize your pages’s SEO, connect a domain, set up analytics, or add custom scripts to optimize and extend your site. Click here to know more →
2- Change Page Status: Easily switch a page between Draft and Published to control whether it’s visible to your visitors.
3 - Update Page Name and URL: Click on this button to edit page name and/or URL, keeping your pages organized and your links clean.
4 - Edit Page: Open the page in the editor to update its content, add new sections, or change existing elements.
5 - Duplicate Page: Create a new page using the layout of an existing one. The duplicated page is created with the same name as the original, but you can easily change both the page name and its URL to fit your needs.
6 - Delete Page: Remove a page you no longer need. Be careful—deleted pages cannot be recovered.
Important: When you update a page’s URL path, any buttons or navigation items that use the “Navigate to Page” action will automatically update to point to the new path. This means you don’t need to manually update every link to that page.
However, if a button or navigation item is set to “Open External Link”, you will need to update the link manually.
Note: For website management reasons, your main page cannot have its name or URL changed, and it cannot be deleted.